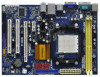
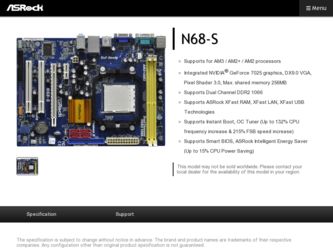
ASRock N68-S driver and firmware
Related ASRock N68-S Manual Pages
Download the free PDF manual for ASRock N68-S and other ASRock manuals at ManualOwl.com
RAID Installation Guide - Page 2
... driver diskette, press to enter BIOS setup to set the option to RAID mode by following the detailed instruction of the "User Manual" in our support CD or "Quick Installation Guide", you can start to use NVIDIA RAID Utility to configure RAID.
This section includes examples of using NVRAID RAID Utility for creating RAID arrays. If your motherboard is equipped with four SATA / SATAII ports, you...
RAID Installation Guide - Page 5

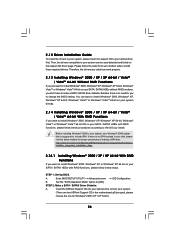
... to install Windows® 2000 / Windows® XP / Windows® XP 64-bit on your SATA
/ SATAII HDDs with RAID functions, please follow below steps.
STEP 1: Set Up BIOS.
A.
Enter BIOS SETUP UTILITY Advanced screen IDE Configuration.
B.
Set the "SATA Operation Mode" option to [IDE].
STEP 2: Make a SATA / SATAII driver diskette.
A.
Insert the ASRock Support CD into your optical drive to...
RAID Installation Guide - Page 6
....
Insert the Windows® VistaTM / Windows® VistaTM 64-bit optical disk into the optical drive
to boot your system, and follow the instruction to install Windows® VistaTM / Windows®
VistaTM 64-bit OS on your system. When you see "Where do you want to install Windows?
" page, please insert the ASRock Support CD into your optical drive, and click the "Load
Driver" button on...
RAID Installation Guide - Page 11
... Vista / Vista 64-bit, there are different installation procedures. Please follow the instructions below according to the OS you install.
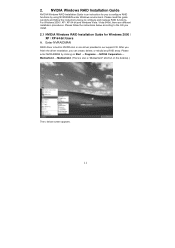
2.1 NVIDIA Windows RAID Installation Guide for Windows 2000 / XP / XP 64-bit Users
A. Enter NVRAIDMAN
RAID driver is built in NVIDIA ALL in one driver provided in our support CD. After you finish the driver installation, you can create, delete, or rebuild any...
RAID Installation Guide - Page 21
... will be completed in a short period of
time.
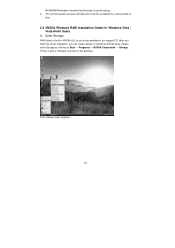
2.2 NVIDIA Windows RAID Installation Guide for Windows Vista / Vista 64-bit Users
A. Enter Storage
RAID driver is built in NVIDIA ALL in one driver provided in our support CD. After you finish the driver installation, you can create, delete, or rebuild any RAID array. Please enter Storage by clicking on Start → Programs → NVIDIA Corporation...
User Manual - Page 3
...-installation Precautions 12 2.1 CPU Installation 13 2.2 Installation of CPU Fan and Heatsink 13 2.3 Installation of Memory Modules (DIMM 14 2.4 Expansion Slots (PCI and PCI Express Slots 15 2.5 Easy Multi Monitor Feature 16 2.6 Jumpers Setup 17 2.7 Onboard Headers and Connectors 18 2.8 SATAII Hard Disk Setup Guide 22 2.9 Serial ATA (SATA) / Serial ATAII (SATAII) Hard Disks
Installation...
User Manual - Page 4
... Floppy Configuration 43 3.4.7 Super IO Configuration 43 3.4.8 USB Configuration 45 3.5 Hardware Health Event Monitoring Screen 46 3.6 Boot Screen 47 3.6.1 Boot Settings Configuration 47 3.7 Security Screen 48 3.8 Exit Screen 49
4 . Software Support 50
4.1 Install Operating System 50 4.2 Support CD Information 50
4.2.1 Running Support CD 50 4.2.2 Drivers Menu 50 4.2.3 Utilities Menu...
User Manual - Page 5
... guide to BIOS setup and information of the Support CD.
Because the motherboard specifications and the BIOS software might be updated, the content of this manual will be subject to change without notice. In case any modifications of this manual occur, the updated version will be available on ASRock website without further notice. You may find the latest VGA cards and CPU support lists on ASRock...
User Manual - Page 7

... pin 12V power connector
- Front panel audio header
- 2 x USB 2.0 headers (support 4 USB 2.0 ports)
(see CAUTION 8)
BIOS Feature
- 4Mb AMI BIOS
- AMI Legal BIOS
- Supports "Plug and Play"
- ACPI 1.1 Compliance Wake Up Events
- Supports jumperfree
- SMBIOS 2.3.1 Support
- Supports Smart BIOS
Support CD
- Drivers, Utilities, AntiVirus Software (Trial Version)
Unique Feature - ASRock OC...
User Manual - Page 9
... a BIOS flash utility embedded in Flash ROM. This convenient BIOS update tool allows you to update system BIOS without entering operating systems first like MS-DOS or Windows®. With this utility, you can press key during the POST or press key to BIOS setup menu to access ASRock Instant Flash. Just launch this tool and save the new BIOS file to your USB flash drive, floppy disk...
User Manual - Page 16

... card installation procedures for details. 2. Connect the D-Sub monitor cable to the VGA/D-Sub port on the I/O panel of this
motherboard. Connect another D-Sub monitor cable to the VGA/D-Sub connector of the add-on PCI Express VGA card. Connect the DVI-D monitor cable to the VGA/DVI-D connector of the add-on PCI Express VGA card. 3. Boot your system. Press to enter BIOS setup. Enter "Share Memory...
User Manual - Page 26

... to install Windows® 2000, Windows® XP or Windows® XP 64-bit on your SATA / SATAII HDDs with RAID functions, please follow below steps.
STEP 1: Set Up BIOS.
A.
Enter BIOS SETUP UTILITY Advanced screen
IDE Configuration.
B.
Set the "SATA Operation Mode" option to [IDE].
STEP 2: Make a SATA / SATAII Driver Diskette.
A.
Insert the ASRock Support CD into your optical drive to...
User Manual - Page 29
...
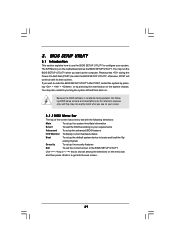
This section explains how to use the BIOS SETUP UTILITY to configure your system. The SPI Memory on the motherboard stores the BIOS SETUP UTILITY. You may run the BIOS SETUP UTILITY when you start up the computer. Please press during the Power-On-Self-Test (POST) to enter the BIOS SETUP UTILITY, otherwise, POST will continue with its test routines. If...
User Manual - Page 50
... for more information.
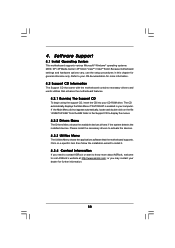
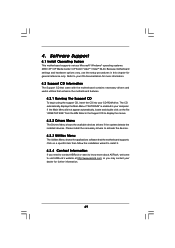
4.2 Support CD Information
The Support CD that came with the motherboard contains necessary drivers and useful utilities that enhance the motherboard features.
4.2.1 Running The Support CD
To begin using the support CD, insert the CD into your CD-ROM drive. The CD automatically displays the Main Menu if "AUTORUN" is enabled in your computer. If the Main Menu...
Quick Installation Guide - Page 8
... a BIOS flash utility embedded in Flash ROM. This convenient BIOS update tool allows you to update system BIOS without entering operating systems first like MS-DOS or Windows®. With this utility, you can press key during the POST or press key to BIOS setup menu to access ASRock Instant Flash. Just launch this tool and save the new BIOS file to your USB flash drive, floppy disk...
User Manual (VIA) - Page 4
... Floppy Configuration 42 3.4.7 Super IO Configuration 42 3.4.8 USB Configuration 44 3.5 Hardware Health Event Monitoring Screen 45 3.6 Boot Screen 46 3.6.1 Boot Settings Configuration 46 3.7 Security Screen 47 3.8 Exit Screen 48
4 . Software Support 49
4.1 Install Operating System 49 4.2 Support CD Information 49
4.2.1 Running Support CD 49 4.2.2 Drivers Menu 49 4.2.3 Utilities Menu...
User Manual (VIA) - Page 16

... card installation procedures for details. 2. Connect the D-Sub monitor cable to the VGA/D-Sub port on the I/O panel of this
motherboard. Connect another D-Sub monitor cable to the VGA/D-Sub connector of the add-on PCI Express VGA card. Connect the DVI-D monitor cable to the VGA/DVI-D connector of the add-on PCI Express VGA card. 3. Boot your system. Press to enter BIOS setup. Enter "Share Memory...
User Manual (VIA) - Page 26
... to install Windows® 2000, Windows® XP or Windows® XP 64-bit on your SATA / SATAII HDDs with RAID functions, please follow below steps.
STEP 1: Set Up BIOS.
A.
Enter BIOS SETUP UTILITY Advanced screen
IDE Configuration.
B.
Set the "SATA Operation Mode" option to [IDE].
STEP 2: Make a SATA / SATAII Driver Diskette.
A.
Insert the ASRock Support CD into your optical drive to...
User Manual (VIA) - Page 29

...
This section explains how to use the BIOS SETUP UTILITY to configure your system. The SPI Memory on the motherboard stores the BIOS SETUP UTILITY. You may run the BIOS SETUP UTILITY when you start up the computer. Please press during the Power-On-Self-Test (POST) to enter the BIOS SETUP UTILITY, otherwise, POST will continue with its test routines. If...
User Manual (VIA) - Page 49
... for more information.
4.2 Support CD Information
The Support CD that came with the motherboard contains necessary drivers and useful utilities that enhance the motherboard features.
4.2.1 Running The Support CD
To begin using the support CD, insert the CD into your CD-ROM drive. The CD automatically displays the Main Menu if "AUTORUN" is enabled in your computer. If the Main Menu...