Acer AL2016W driver and firmware

Related Acer AL2016W Manual Pages
Download the free PDF manual for Acer AL2016W and other Acer manuals at ManualOwl.com
AL2016W User's Guide - Page 1

......1 FCC Statement Warning...2 Canadian DOC Notice...3 Precautions...3 Package Contents...4 Installation Instructions...4
Assembling the Monitor...4 Detaching the Monitor ...4 Adjusting the Viewing Angle ...4 Connecting the Devices ...4 Switching the Power ...5 Adjusting Display Settings ...5 External Controls ...5 OSD Options ...5 OSD Menu ...6
Brightness & Contrast ...6 Tracking ...6 Position...
AL2016W User's Guide - Page 3

... circuit boards, cables, wires, casings and housings. Their purpose is to prevent, or at least to delay the spread of fire. Up to 30% of the plastic in a computer casing can... limits for a Class B digital device, pursuant to Part 15 of the FCC Rules. These limits are designed to provide reasonable protection against harmful interference in a residential installation. This equipment generates, uses...
AL2016W User's Guide - Page 4

... be used.
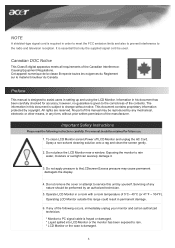
Canadian DOC Notice
This Class B digital apparatus meets all requirements of the Canadian InterferenceCausing Equipment Regulations. Cet appareil numerique de la classe B repecte toutes les exigences du Reglement sur le materiel brouilleur du Canada.
Preface
This manual is designed to assist users in setting up and using the LCD Monitor. Information...
AL2016W User's Guide - Page 8
... the OSD menu language from English, German, French, Traditional Chinese, Simplify Chinese, Japanese, Italian and Spanish.
OSD Position
This changes the position of the OSD window on the screen. TIMEOUT function allow user define the OSD appearing period from 10 seconds to 120 seconds.
AUTO Configuration
Adjust the monitor parameter automatically...
AL2016W User's Guide - Page 11
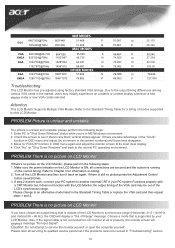
... a mode that is supported by your LCD Monitor. Also, if the signal cable is not connected to LCD monitor at all or properly, the monitor screen will display a message "No Input Signal".
Caution: Do not attempt to service the monitor yourself or open the computer yourself.
Please refer all servicing to qualified service personnel if the problems...
Quick Start Guide - Page 1
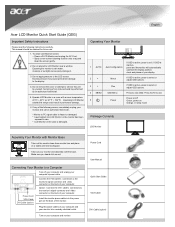
... Connect the DVI cable's connectors to the monitor's signal connector and video connector on the back of your computer.
Insert the monitor power cable into the power port on the back of the monitor.
Plug the power cables of your computer and your monitor into a nearby electrical outlet.
Turn on your computer and monitor.
Power Cord User Manual Quick Start Guide VGA Cable DVI Cable (option)
(CD...
User Manual - Page 1
......1 FCC Statement Warning...2 Canadian DOC Notice...3 Precautions...3 Package Contents...4 Installation Instructions...4
Assembling the Monitor...4 Detaching the Monitor ...4 Adjusting the Viewing Angle ...4 Connecting the Devices ...4 Switching the Power ...5 Adjusting Display Settings ...5 External Controls ...5 OSD Options ...5 OSD Menu ...6
Brightness & Contrast ...6 Tracking ...6 Position...
User Manual - Page 4
... be used.
Canadian DOC Notice
This Class B digital apparatus meets all requirements of the Canadian InterferenceCausing Equipment Regulations. Cet appareil numerique de la classe B repecte toutes les exigences du Reglement sur le materiel brouilleur du Canada.
Preface
This manual is designed to assist users in setting up and using the LCD Monitor. Information...
User Manual - Page 8
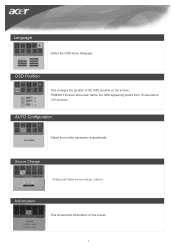
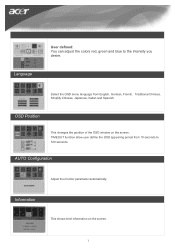
Language
Select the OSD menu language.
OSD Position
This changes the position of the OSD window on the screen. TIMEOUT function allow user define the OSD appearing period from 10 seconds to 120 seconds.
AUTO Configuration
Adjust the monitor parameter automatically.
Source Change
Analog and Digital source change .(option)
Information
This shows brief information on the screen.
User Manual - Page 12
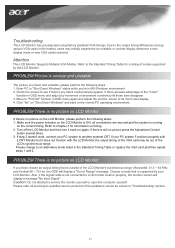
... a mode that is supported by your LCD Monitor. Also, if the signal cable is not connected to LCD monitor at all or properly, the monitor screen will display a message "No Input Signal".
Caution: Do not attempt to service the monitor yourself or open the computer yourself.
Please refer all servicing to qualified service personnel if the problems...