Acer Aspire 6100 driver and firmware
Drivers and firmware downloads for this Acer Computers item

Related Acer Aspire 6100 Manual Pages
Download the free PDF manual for Acer Aspire 6100 and other Acer manuals at ManualOwl.com
User Guide - Page 14
Chapter 4 Installing Optional Components
List of Figures
xiv AcerPower 6100 User's Guide
User Guide - Page 19
About This Manual
Chapter 1 Getting Started Chapter 2 System Board Chapter 3 BIOS Utility Chapter 4 Installing Optional Components
2 AcerPower 6100 User's Guide
User Guide - Page 32
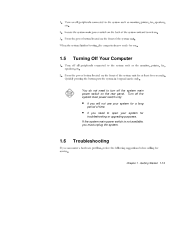
1.5 Turning Off Your Computer
You do not need to turn off the system main power switch on the rear panel. Turn off the system main power switch only:
• if you will not use your system for a long
period of time.
• if you need to open your system for
troubleshooting or upgrading purposes. If...
User Guide - Page 54
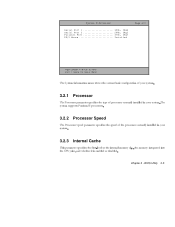
System Information
Serial Port 1 3F8h, IRQ4 Serial Port 2 2F8h, IRQ3 Parallel Port 378h, IRQ7 PS/2 Mouse Installed
Page 2/2
PgDn/PgUp = Move Screen Esc = Back to Main Menu
3.2.1 Processor
3.2.2 Processor Speed
3.2.3 Internal Cache
Chapter 3 - BIOS Utility 3-5
User Guide - Page 68
... are configurable only if the Serial Port parameters are enabled.
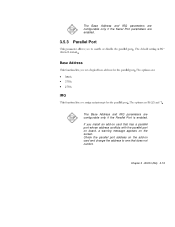
3.5.3 Parallel Port
Bidirectional
Base Address
• 3BCh • 378h • 278h
IRQ
57
The Base Address and IRQ parameters are configurable only if the Parallel Port is enabled.
If you install an add-on card that has a parallel port whose address conflicts with the parallel port on board, a warning message appears on...
User Guide - Page 88
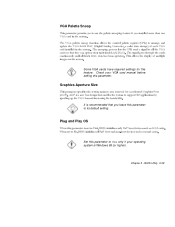
VGA Palette Snoop
Some VGA cards have required settings for this feature. Check your VGA card manual before setting this parameter.
Graphics Aperture Size
It is recommended that you leave this parameter to its default setting.
Plug and Play OS Yes
No Set this parameter to Yes only if your operating system is Windows 95 (or higher).
Chapter 3 - BIOS Utility 3-39
User Guide - Page 92
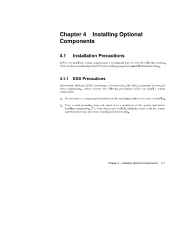
Chapter 4 Installing Optional Components
4.1 Installation Precautions
4.1.1 ESD Precautions
Chapter 4 - Installing Optional Components 4-1
User Guide - Page 93
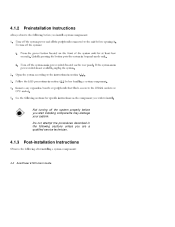
4.1.2 Preinstallation Instructions
Not turning off the system properly before you start installing components may damage your system. Do not attempt the procedures described in the following sections unless you are a qualified service technician.
4.1.3 Post-installation Instructions
4-2 AcerPower 6100 User's Guide
User Guide - Page 96
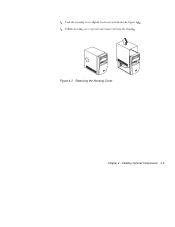
Figure 4-3 Removing the Housing Cover Chapter 4 - Installing Optional Components 4-5
User Guide - Page 98
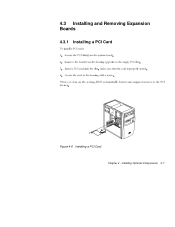
4.3 Installing and Removing Expansion Boards
4.3.1 Installing a PCI Card
Figure 4-6 Installing a PCI Card Chapter 4 - Installing Optional Components 4-7
User Guide - Page 99
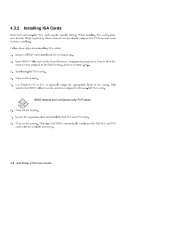
4.3.2 Installing ISA Cards
Yes BIOS detects and configures only PnP cards.
4-8 AcerPower 6100 User's Guide
User Guide - Page 100

Figure 4-7 Installing an ISA Card
4.4 Installing Additional Memory
When installing DIMMs, make sure that you install only one type of DIMM. Do not combine PC-66 and PC-100 DIMMs.
Chapter 4 - Installing Optional Components 4-9
User Guide - Page 102
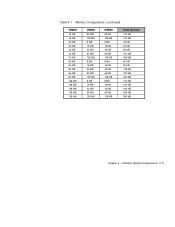
Table 4-1 Memory Configurations (continued)
DIMM1 16 MB 16 MB 32 MB 32 MB 32 MB 32 MB 32 MB 64 MB 64 MB 64 MB 64 MB ... 32 MB 64 MB 128 MB 8 MB 16 MB 32 MB 64 MB 128 MB 8 MB 16 MB 32 MB 64 MB 128 MB
Total Memory 144 MB 272 MB 48 MB 64 MB 96 MB 160 MB 288 MB 80 MB 96 MB 128 MB 192 MB 320 MB 144...
User Guide - Page 103
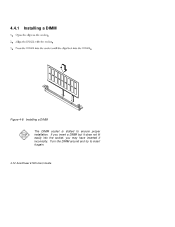
4.4.1 Installing a DIMM
Figure 4-8 Installing a DIMM The DIMM socket is slotted to ensure proper installation. If you insert a DIMM but it does not fit easily into the socket, you may have inserted it incorrectly. Turn the DIMM around and try to insert it again.
4-12 AcerPower 6100 User's Guide
User Guide - Page 104
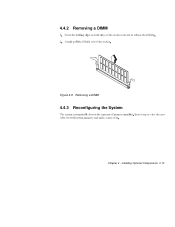
4.4.2 Removing a DIMM
Figure 4-9 Removing a DIMM
4.4.3 Reconfiguring the System
Chapter 4 - Installing Optional Components 4-13
User Guide - Page 105
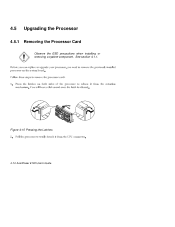
4.5 Upgrading the Processor
4.5.1 Removing the Processor Card
Observe the ESD precautions when installing or removing a system component. See section 4.1.1.
Figure 4-10 Pressing the Latches
4-14 AcerPower 6100 User's Guide
User Guide - Page 106
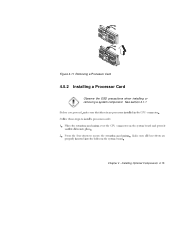
Figure 4-11 Removing a Processor Card
4.5.2 Installing a Processor Card
Observe the ESD precautions when installing or removing a system component. See section 4.1.1
Chapter 4 - Installing Optional Components 4-15
User Guide - Page 107
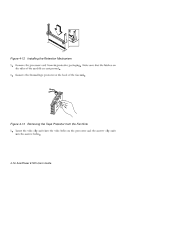
Figure 4-12 Installing the Retention Mechanism
Figure 4-13 Removing the Tape Protector from the Fan Sink 4-16 AcerPower 6100 User's Guide
User Guide - Page 108
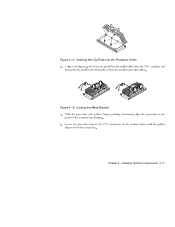
Figure 4-14 Inserting the Clip Ends into the Processor Holes Figure 4-15 Locking the Metal Bracket
Chapter 4 - Installing Optional Components 4-17
User Guide - Page 109
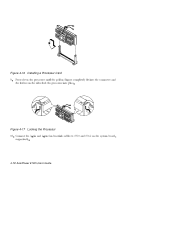
Figure 4-16 Installing a Processor Card
Figure 4-17 Locking the Processor 4-18 AcerPower 6100 User's Guide