Acer TravelMate 5335 driver and firmware
Drivers and firmware downloads for this Acer Computers item

Related Acer TravelMate 5335 Manual Pages
Download the free PDF manual for Acer TravelMate 5335 and other Acer manuals at ManualOwl.com
Pre-Install Intel® AHCI Driver for Windows XP® Operating System - Page 1
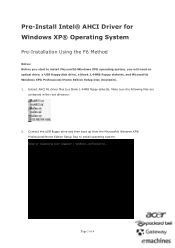
... Using the F6 Method
Notes: Before you start to install Microsoft® Windows XP® operating system, you will need an optical drive, a USB floppy disk drive, a blank 1.44MB floppy diskette, and Microsoft® Windows XP® Professional/Home Edition Setup Disc (bootable). 1. Extract AHCI F6 driver files to a blank 1.44MB floppy diskette. Make sure the following files are
contained...
Pre-Install Intel® AHCI Driver for Windows XP® Operating System - Page 2
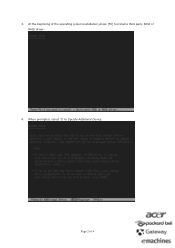
3. At the beginning of the operating system installation, press [F6] to install a third party SCSI or RAID driver.
4. When prompted, select 'S' to Specify Additional Device.
Page 2 of 4
Pre-Install Intel® AHCI Driver for Windows XP® Operating System - Page 4
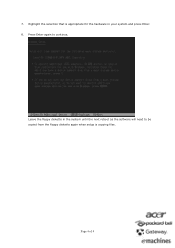
7. Highlight the selection that is appropriate for the hardware in your system and press Enter. 8. Press Enter again to continue.
Leave the floppy diskette in the system until the next reboot as the software will need to be copied from the floppy diskette again when setup is copying files.
Page 4 of 4
Quick Start Guide - Page 5

... your mobile computing needs.
Your guides
To help you use your Acer notebook, we have designed a set of guides:
First off, the setup poster helps you get started with setting up your computer.
The TravelMate Series Generic User Guide contains useful information applying to all models in the TravelMate product series. It covers basic topics such as using the keyboard and audio, etc...
Quick Start Guide - Page 8
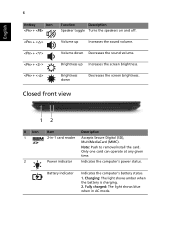
... the screen brightness.
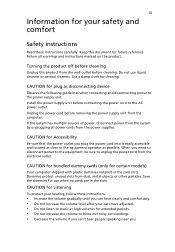
Closed front view
12
# Icon 1
2
Item 2-in-1 card reader
Power indicator
Description
Accepts Secure Digital (SD), MultiMediaCard (MMC). Note: Push to remove/install the card. Only one card can operate at any given time.
Indicates the computer's power status.
Battery indicator
Indicates the computer's battery status.
1. Charging: The light shows amber when the battery...
User Manual - Page 5
... device
Observe the following guidelines when connecting and disconnecting power to the power supply unit: Install the power supply unit before connecting the power cord to the AC power outlet. Unplug the power cord before removing the power supply unit from the computer. If the system has multiple sources of power, disconnect power from the system by unplugging all power cords from the power...
User Manual - Page 6
... rotor devices, HDD, Optical drive, and even exposure risk from lithium battery pack.
• The bottom surface, areas around ventilation openings and AC adapter
may...power strips are used, the load should not exceed 80% of the power strip's input rating.
• This product's AC adapter is equipped with a three-wire grounded plug.
The plug only fits in a grounded power outlet. Make sure the power...
User Manual - Page 11
.... If in-vehicle wireless equipment is improperly installed, and the air bag inflates, serious injury could result. Using your device while flying in aircraft is prohibited. Switch off your device before boarding an aircraft. The use of wireless teledevices in an aircraft may be dangerous to the operation of the aircraft, disrupt the wireless telephone network, and may...
User Manual - Page 13
...Users are also at risk of physical injury after long hours of working in front of a computer. Long work periods, bad posture, poor work habits, stress, inadequate working conditions, personal ...shoulders • avoid tensing your muscles or shrugging your shoulders • install the external display, keyboard and mouse properly and within
comfortable reach
• if you view your monitor ...
User Manual - Page 14
...reflections by: • placing your display in such a way that the side faces the window or
any light source
• ...display's top front edge
• Avoid adjusting your display to an awkward viewing angle. • Avoid looking at bright light sources, such as open windows, for extended
periods of time.
Developing good work habits
Develop the following work habits to make your computer...
User Manual - Page 15

... computer, clicking on AcerSystem User Guide will run the Adobe Reader setup program first. Follow the instructions on the screen to complete the installation. For instructions on how to use Adobe Reader, access the Help and Support menu.
Basic care and tips for using your computer
Turning your computer on and off
To turn on the computer, simply press and release the power...
User Manual - Page 19
... fingerprint reader)
1
Touchpad basics (with two-click buttons)
2
Using the keyboard
3
Lock keys and embedded numeric keypad*
3
Windows keys
4
Audio
5
Acer PureZone (only for certain models)
5
Video
5
16:9 display (only for certain models)
5
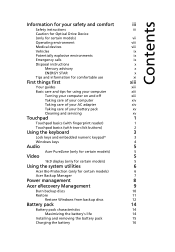
Using the system utilities
6
Acer Bio-Protection (only for certain models)
6
Acer Backup Manager
7
Power management
8
Acer eRecovery...
User Manual - Page 20

...
24
Fax/data modem (only for certain models)
24
Built-in network feature
25
Universal Serial Bus (USB)
25
IEEE 1394 port (only for certain models)
26
High-Definition Multimedia Interface
(only for certain models)
26
ExpressCard (only for certain models)
27
Installing memory
28
BIOS utility
29
Boot sequence
29
Enable disk-to-disk recovery
29
Password
29
Using software
30...
User Manual - Page 28
...
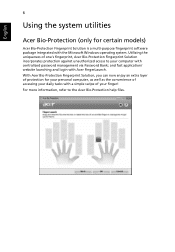
Acer Bio-Protection (only for certain models)
Acer Bio-Protection Fingerprint Solution is a multi-purpose fingerprint software package integrated with the Microsoft Windows operating system. Utilizing the uniqueness of one's fingerprint, Acer Bio-Protection Fingerprint Solution incorporates protection against unauthorized access to your computer with centralized password management via Password...
User Manual - Page 32
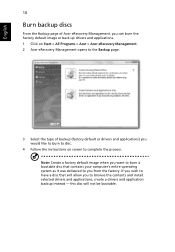
... > Acer > Acer eRecovery Management. 2 Acer eRecovery Management opens to the Backup page.
3 Select the type of backup (factory default or drivers and applications) you would like to burn to disc.
4 Follow the instructions on screen to complete the process. Note: Create a factory default image when you want to burn a bootable disc that contains your computer's entire...
User Manual - Page 34
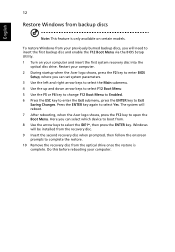
... backup disc and enable the F12 Boot Menu via the BIOS Setup Utility. 1 Turn on your computer and insert the first system recovery disc into the
optical disc drive. Restart your computer. 2 During startup when the Acer logo shows, press the F2 key to enter BIOS
Setup, where you can set system parameters. 3 Use the left and right arrow keys to...
User Manual - Page 35
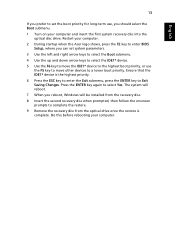
... first system recovery disc into the optical disc drive. Restart your computer.
2 During startup when the Acer logo shows, press the F2 key to enter BIOS Setup, where you can set system parameters.
3 Use the left and right arrow keys to select the Boot submenu. 4 Use the up and down arrow keys to select the IDE1* device. 5 Use the...
User Manual - Page 38
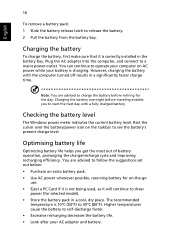
...sure that it is correctly installed in the battery bay. Plug the AC adapter into the computer, and connect to a mains power outlet. You can continue to operate your computer on AC power while your battery is ...to follow the suggestions set out below: • Purchase an extra battery pack. • Use AC power whenever possible, reserving battery for on-the-go
use. • Eject a PC Card if it is ...
User Manual - Page 52
English
30
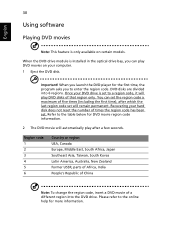
Using software
Playing DVD movies
Note: This feature is only available on certain models.
When the DVD drive module is installed in the optical drive bay, you can play DVD movies on your computer. 1 Eject the DVD disk.
Important! When you launch the DVD player for the first time, the program asks you to enter the region...
User Manual - Page 55
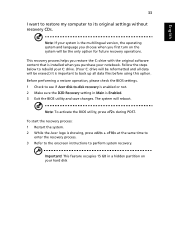
... restore my computer to its original settings without recovery CDs.
Note: If your system is the multilingual version, the operating system and language you choose when you first turn on the system will be the only option for future recovery operations.
This recovery process helps you restore the C: drive with the original software content that is installed when you...