Acer Veriton S461 driver and firmware
Drivers and firmware downloads for this Acer Computers item


Related Acer Veriton S461 Manual Pages
Download the free PDF manual for Acer Veriton S461 and other Acer manuals at ManualOwl.com
Intel Matrix Storage and RAID - Page 3
... THE RAID FUNCTION WITH INTEL MATRIX STORAGE MANAGER CONSOLE
10 5. CONFIGURING RAID0 OR RAID1 ON YOUR RAID READY ACER PC 17 6. CONFIGURING AN EXISTING HDD AS A RAID0 OR RAID1 VOLUME 18 7. MIGRATING FROM RAID0/1/10 TO RAID5 SYSTEM 19 8. PRE-INSTALLATION OF THE INTEL® MATRIX STORAGE MANAGER DRIVER...... 20
8.1 BUILD THE RAID DRIVER ON A FLOPPY DISK 20 8.2 PRE-INSTALLATION USING...
Intel Matrix Storage and RAID - Page 4
... customers to develop their RAID-compatible products.
Selected high-end Acer desktop systems are configured as Intel RAID Ready systems. A "RAID Ready" system can be upgraded to RAID0, RAID1, RAID5 or RAID10 using the RAID migration feature built into Intel Matrix Storage Manager 7.5. This technology enables you to install additional SATA hard drives, and then migrate a RAID Ready configuration to...
Intel Matrix Storage and RAID - Page 8
... Guide for Acer Selected Veriton PC V1.1
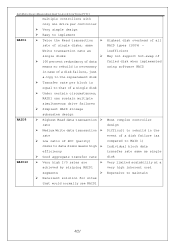
multiple controllers with
RAID1
only one drive per controller ¾ Very simple design ¾ Easy to implement ¾ Twice the Read transaction ¾
rate of single disks, same
Write transaction rate as
single disks
¾
¾ 100 percent redundancy of data
means no rebuild is necessary
in case of a disk failure, just
a copy...
Intel Matrix Storage and RAID - Page 9
Intel Matrix Storage Manager Quick Guide for Acer Selected Veriton PC V1.1
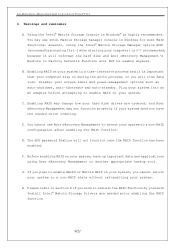
3. Warnings and reminders
A. Using the Intel® Matrix Storage Console in Windows® is highly recommended. You may use Intel Matrix Storage manager console in Windows for most RAID functions. However, using the Intel® Matrix Storage Manager option ROM (accessed by pressing Ctrl-I when starting your computer) is ...
Intel Matrix Storage and RAID - Page 17
... the source hard drive for the migration. 2. Install the second SATA hard drive to an available SATA port. 3. Boot Windows, then install the Intel Matrix Storage Manager software, if not already installed (it is pre-installed in Acer RAID Ready systems), using the setup package obtained from a CD-ROM or from the Internet. This will install the necessary Intel Matrix Storage Console and start menu...
Intel Matrix Storage and RAID - Page 18
... the migration. 2. Physically attach the second SATA hard drive to an available SATA port. 3. Boot to Windows, install the Intel Matrix Storage Manager software, if not already installed (it is pre-installed in Acer RAID Ready systems), using the setup package obtained from a CD-ROM or from the Internet. This will install the necessary Intel Matrix Storage Console and start menu links. 4. Open...
Intel Matrix Storage and RAID - Page 19
... Matrix Storage Manager Quick Guide for Acer Selected Veriton PC V1.1
7. Migrating from RAID0/1/10 to RAID5 system RAID level migration allows an existing RAID configuration which supports
levels 0, 1 or 10 to be migrated to RAID5. The following migrations are possible: ¾ 2-drive RAID1 to 3- or 4-drive RAID5 ¾ 2-drive RAID0 to 3- or 4-drive RAID5 ¾ 3-drive RAID0 to 4-drive RAID5...
Intel Matrix Storage and RAID - Page 20
... steps to pre-install the RAID driver.
The Intel Matrix Storage Manager driver must be installed before installing Windows XP on a RAID volume or when in AHCI mode. The Intel Matrix Storage Manager AHCI driver can be installed over Vista's native AHCI driver.
8.1 Build the RAID driver on a floppy disk You can download the RAID driver from the Acer website or Acer Resource CD.
The driver file is...
Intel Matrix Storage and RAID - Page 21
Intel Matrix Storage Manager Quick Guide for Acer Selected Veriton PC V1.1
on making a driver installation disk.) 4. For Windows Vista: During the operating system installation, after selecting the location to install Vista click the Load Driver button to install a third party SCSI or RAID driver. 5. When prompted, insert the floppy disk or media (Floppy, CD/DVD or USB) created in step 8.1.3 and ...