Asus ASUSPRO ADVANCED B53F driver and firmware
Drivers and firmware downloads for this Asus item

Related Asus ASUSPRO ADVANCED B53F Manual Pages
Download the free PDF manual for Asus ASUSPRO ADVANCED B53F and other Asus manuals at ManualOwl.com
User Manual - Page 3
...60 Automatic Touchpad Disabling 60 Storage Devices 62 Expansion Card 62 Flash Memory Card Reader 64 Optical Drive (on selected models 65 Hard Disk Drive 68 Memory (RAM 71 Connections...73 Network Connection 73 Wireless LAN Connection (on selected models 75 Modem Connection (on selected models 77 Windows Wireless Network Connection 78 Bluetooth Wireless Connection(on selected models 80...
User Manual - Page 17
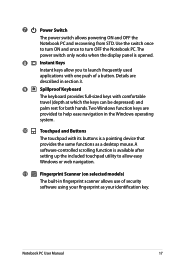
... Notebook PC and recovering from STD. Use the switch once to turn ON and once to turn OFF the Notebook PC. The power switch only works when the display panel is opened...its buttons is a pointing device that provides the same functions as a desktop mouse. A software-controlled scrolling function is available after setting up the included touchpad utility to allow easy Windows or web navigation.
11
...
User Manual - Page 21
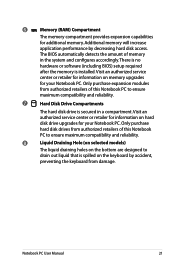
...There is no
hardware or software (including BIOS) setup required
after the memory is installed. Visit an authorized service
center or retailer for information on memory upgrades
for your Notebook PC. Only purchase expansion modules
from authorized retailers of this Notebook PC to ensure
maximum compatibility and reliability.
7
Hard Disk Drive Compartments
The hard disk drive is secured in...
User Manual - Page 23
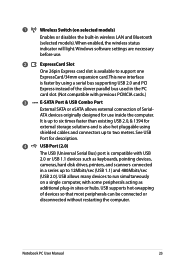
... or disables the built-in wireless LAN and Bluetooth (selected models). When enabled, the wireless status indicator will light. Windows software settings are necessary before use.
2
ExpressCard Slot
One 26pin Express card slot is available to support one
ExpressCard/34mm expansion card.This new interface
is faster by using a serial bus supporting USB 2.0 and PCI
Express instead of the slower...
User Manual - Page 24

... by the optical disk drive. This indicator
will light in proportion to the data size transferred.
7
Optical Drive Electronic Eject
The optical drive eject has an electronic eject button for
opening the tray. You can also eject the optical drive tray
through any software player or by right clicking the optical
drive in Windows "Computer" and selecting Eject.
8
Optical Drive Emergency Eject...
User Manual - Page 36
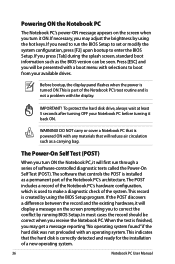
... the BIOS version can be seen. Press [ESC] and you will be presented with a boot menu with selections to boot from your available drives.
Before bootup, the display panel flashes when the power is turned ON.This is part of the Notebook PC's test routine and is not a problem with the display.
IMPORTANT! To protect the hard disk drive...
User Manual - Page 37
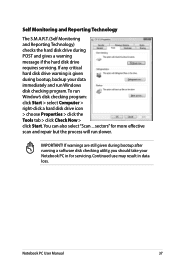
...drive requires servicing. If any critical hard disk drive warning is given during bootup, backup your data immediately and run Windows disk checking program. To run Window's disk checking program: click Start > select Computer > right-click a hard disk drive icon > choose Properties > click the Tools tab > click Check Now > click Start.You can also select "Scan ... sectors" for more effective scan...
User Manual - Page 40

... can be customized in Windows Control Panel "Power Options." For other options, such as "Switch User, Restart, Sleep, or Shut Down," click the arrowhead next to the lock icon.
Restarting or Rebooting After making changes to your operating system, you may be prompted to restart the system. Some installation processes will provide a dialog box...
User Manual - Page 44
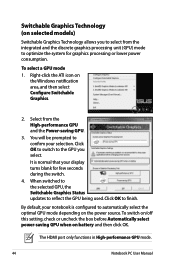
... default, your notebook is configured to automatically select the optimal GPU mode depending on the power source. To switch on/off this setting, check or uncheck the box before Automatically select power-saving GPU when on battery and then click OK.
The HDMI port only functions in High-performance GPU mode.
44
Notebook PC User Manual
User Manual - Page 45
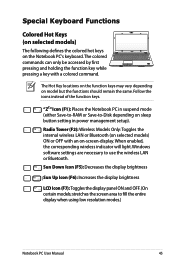
... mode (either Save-to-RAM or Save-to-Disk depending on sleep button setting in power management setup).
Radio Tower (F2): Wireless Models Only:Toggles the internal wireless LAN or Bluetooth (on selected models) ON or OFF with an on-screen-display. When enabled, the corresponding wireless indicator will light. Windows software settings are necessary to use the wireless LAN or Bluetooth.
Sun Down...
User Manual - Page 47
... onscreen display (OSD).
Fn+V (on selected models): Toggles "Life Frame" software application.
For some models, this function is available only when you enable the camera.
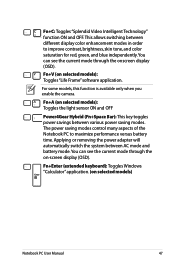
Fn+A (on selected models): Toggles the light sensor ON and OFF
Power4Gear Hybrid (Fn+Space Bar): This key toggles power savings between various power saving modes. The power saving modes control many...
User Manual - Page 72
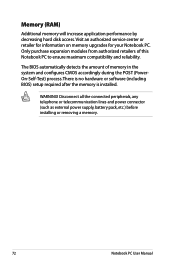
... CMOS accordingly during the POST (PowerOn-Self-Test) process. There is no hardware or software (including BIOS) setup required after the memory is installed.
WARNING! Disconnect all the connected peripherals, any telephone or telecommunication lines and power connector (such as external power supply, battery pack, etc.) before installing or removing a memory.
72
Notebook PC User Manual
User Manual - Page 74
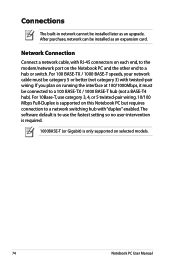
Connections
The built-in network cannot be installed later as an upgrade. After purchase, network can be installed as an expansion card.
Network Connection
Connect a network cable, with RJ-45 connectors on each end, to the modem/network port on the Notebook PC and the other end to a hub or switch. For 100 BASE-TX / 1000 BASE-T speeds, your network cable must be category 5 or...
User Manual - Page 89
... recovery solution that quickly restores the Notebook PC's operating system to its original working state provided that your hard disk drive is in good working order. Contact your retailer if you require such a solution.
Some of the Notebook PC's components and features may not work until the device drivers and utilities are installed.
Notebook PC User Manual...
User Manual - Page 93
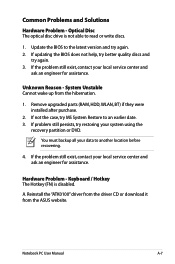
... latest version and try again. 2. If updating the BIOS does not help, try better quality discs and
try again. 3. If the problem still exist, contact your local service center and
ask an engineer for assistance.
Unknown Reason - System Unstable Cannot wake up from the hibernation.
1. Remove upgraded parts (RAM, HDD, WLAN, BT) if they were installed after...
User Manual - Page 96
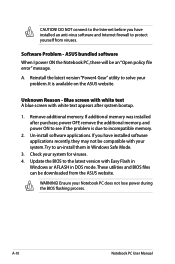
... to incompatible memory.
2. Un-install software applications. If you have installed software applications recently, they may not be compatible with your system.Try to un-install them in Windows Safe Mode.
3. Check your system for viruses. 4. Update the BIOS to the latest version with Easy Flash in
Windows or AFLASH in DOS mode. These utilities and BIOS files can be downloaded from the ASUS website...
User Manual - Page 97
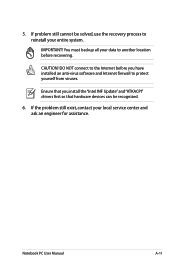
... to another location before recovering.
CAUTION! DO NOT connect to the Internet before you have installed an anti-virus software and Internet firewall to protect yourself from viruses.
Ensure that you install the "Intel INF Update" and "ATKACPI" drivers first so that hardware devices can be recognized.
6. If the problem still exist, contact your local service center and ask an...
User Manual - Page 98
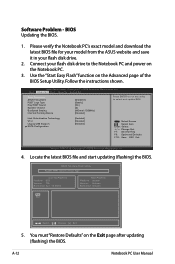
Software Problem - BIOS Updating the BIOS.
1. Please verify the Notebook PC's exact model and download the latest BIOS file for your model from the ASUS website and save it in your flash disk drive.
2. Connect your flash disk drive to the Notebook PC and power on the Notebook PC.
3. Use the "Start Easy Flash" function on the Advanced page of the BIOS Setup Utility. Follow the instructions shown....
User Manual - Page 99
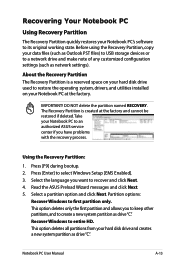
.... Before using the Recovery Partition, copy your data files (such as Outlook PST files) to USB storage devices or to a network drive and make note of any customized configuration settings (such as network settings).
About the Recovery Partition The Recovery Partition is a reserved space on your hard disk drive used to restore the operating system, drivers, and utilities installed on your Notebook...
User Manual - Page 100

Recover Windows to entire HD with two partitions. This option deletes all partitions from your hard drive and creates two new partitions"C"(25%) and"D"(75%). 6. Follow the onscreen instructions to complete the recovery process.
Visit the ASUS website at www.asus.com for updated drivers and utilities.
Using Recovery DVD (on selected models)
Creating the Recovery DVD: 1. Double-click the AI Recovery...