Asus ET2011EG driver and firmware

Related Asus ET2011EG Manual Pages
Download the free PDF manual for Asus ET2011EG and other Asus manuals at ManualOwl.com
User Manual - Page 2
... part of this manual, including the products and software described in it, may be reproduced, transmitted, transcribed, stored in a retrieval system, or translated into any language in any form or by any means, except documentation kept by the purchaser for backup purposes, without the express written permission of ASUSTeK COMPUTER, INC. ("ASUS"). Products and...
User Manual - Page 5
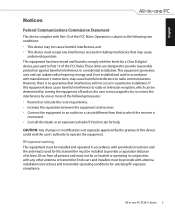
... the dealer or an experienced radio/TV technician for help.
CAUTION: Any changes or modifications not expressly approved by the grantee of this device could void the user's authority to operate the equipment.
RF exposure warning This equipment must be installed and operated in accordance with provided instructions and the antenna(s) used for this...
User Manual - Page 11
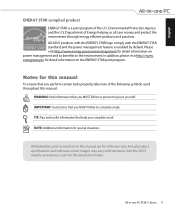
.... IMPORTANT: Instructions that you MUST follow to complete a task. TIP: Tips and useful information that help you complete a task. NOTE: Additional information for special situations.
All illustrations and screenshots in this manual are for reference only. Actual product specifications and software screen images may vary with territories. Visit the ASUS website at www.asus.com...
User Manual - Page 13
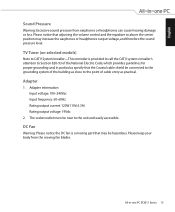
... cause hearing damage or loss. Please notice that adjusting the volume control and the equalizer to above the center position may increase the earphones or headphones output voltage, and therefore the sound pressure level.
TV Tuner (on selected models)
Note to CATV System Installer-This reminder is provided to call the CATV systems...
User Manual - Page 16
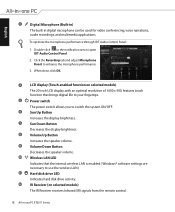
... the menu. MODE Button Press to switch the display signal source. When switched to HDMI input, the All-in-one PC can be used as a standard desktop LCD monitor. Wireless LAN LED Indicates that the internal wireless LAN is enabled. (Windows® software settings are necessary to use the wireless LAN.) Hard disk drive LED Indicates hard disk drive activity.
16 All-in-one PC ET2011...
User Manual - Page 18
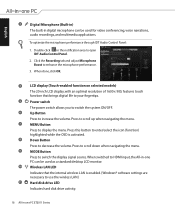
... digital life to your fingertips.
Power switch The power switch allows you to switch the system ON/OFF. Sun Up Button Increases the display brightness. Sun Down Button Decreases the display brightness. Volume Up Button Increases the speaker volume. Volume Down Button Decreases the speaker volume. Wireless LAN LED Indicates that the internal wireless LAN is enabled. (Windows® software settings...
User Manual - Page 24
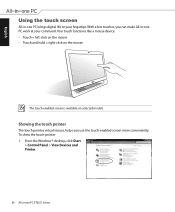
... the touch screen
All-in-one PC brings digital life to your fingertips. With a few touches, you can make All-in-one PC work at your command. Your touch functions like a mouse device: • Touch = left-click on the...-enabled screen more conveniently. To show the touch pointer 1. From the Windows® desktop, click Start
> Control Panel > View Devices and Printer.
24 All-in-one PC ET2011 Series
User Manual - Page 27
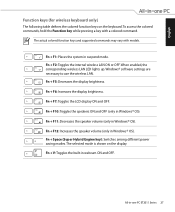
... command.
The actual colored function keys and supported commands may vary with models.
Fn + F1: Places the system in suspend mode. Fn + F2: Toggles the internal wireless LAN ON or OFF. When enabled, the corresponding wireless LAN LED lights up. Windows® software settings are necessary to use the wireless LAN. Fn + F5: Decreases the display brightness. Fn + F6: Increases the...
User Manual - Page 28
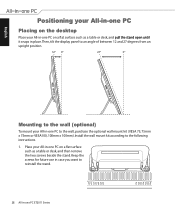
...;e��n��u�n�t�i�l it snaps in place. Then, tilt the display panel to an angle of between 12 and 27 degrees from an upright position.
12O
0O...optional wall mount kit (VESA 75, 75mm x 75mm or VESA100, 100mm x 100mm). Install the wall mount kit according to the following instructions. 1. Place your All-in-one PC on a flat surface
such as a table...
User Manual - Page 31
English
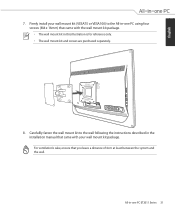
7. Firmly install your wall mount kit (VESA75 or VESA100) to the All-in-one PC using four screws (M4...8226; The wall mount kit and screws are purchased separately.
100 mm 75 mm
HDMI
ANT/CABLE
8. Carefullly fasten the wall mount kit to the wall following the instructions described in the installation manual that came with your wall mount kit package.
For ventilation's sake, ensure that ...
User Manual - Page 32
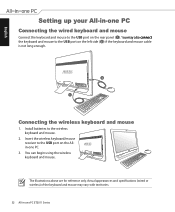
... mouse to the USB port on the left side ( 2 ) if the keyboard and mouse cable is not long enough.�
1
HDMI
ANT/CABLE
2
Connecting the wireless keyboard and mouse
1. Install batteries to the wireless keyboard and mouse.
2. Insert the wireless keyboard/mouse receiver to the USB port on the Allin-one PC.
3. You can begin using the wireless
HDMI
ANT/CABLE
keyboard and mouse...
User Manual - Page 33
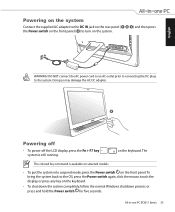
... the front panel ( 4 ) to turn on the system.
3 1
2
HDMI
ANT/CABLE
WARNING! DO NOT connect the AC power cord to an AC outlet prior to connecting the DC plug to the system. Doing so may damage the AC-DC adapter.
4
Powering off
• To power off the LCD display, press the Fn + F7 key system is still...
User Manual - Page 34

...software tool that allows you to adjust touch screen precision.
The touch-enabled screen is available on selected models.
1. From the Windows® desktop, click Start > Control Panel > Hardware and Sound > Tablet PC Settings... and click Calibrate the screen for pen or touch input.
2. From the Display tab...
User Manual - Page 35
English
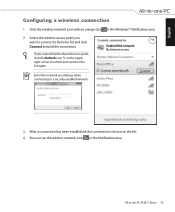
Configuring a wireless connection
1. Click the wireless network icon with an orange star in the Windows® Notification area. 2. Select the wireless access point you
want to connect to from the list and click Connect to build the connection.
If you cannot find the desired access point, ...
User Manual - Page 36
English
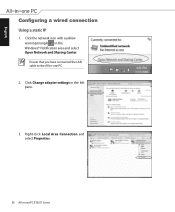
Configuring a wired connection
Using a static IP
1. Click the network icon with a yellow warning triangle in the Windows® Notification area and select Open Network and Sharing Center. Ensure that you have connected the LAN cable to the All-in-one PC.
2. Click Change adapter settings in the left pane.
3. Right-click Local Area Connection and select Properties...
User Manual - Page 42

English
Configuring audio output settings
After connecting a speaker system to your All-in-one PC, follow the steps below to configure the speaker settings:
1. Right-click the speaker icon in the Windows® notification area and click Sounds.
2. Select a playback device and click Properties to configure the settings.
3. Do the advanced configurations, such as adjusting the speaker...
User Manual - Page 43
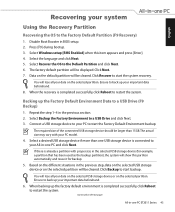
... the Factory Default Partition (F9 Recovery)
1. Disable Boot Booster in BIOS setup. 2. Press [F9] during bootup. 3. Select Windows setup [EMS Enabled] when this item appears and press [Enter]. 4. Select the language and click Next. 5. Select Recover the OS to the Default Partition and click Next. 6. The factory default partition will be displayed. Click Next. 7. Data on the...