Asus L1N64-SLI WS B driver and firmware

Related Asus L1N64-SLI WS B Manual Pages
Download the free PDF manual for Asus L1N64-SLI WS B and other Asus manuals at ManualOwl.com
User Manual - Page 4

...3.1 Starting up for the first time 3-1 3.2 Powering off the computer 3-2
3.2.1 Using the OS shut down function 3-2
Chapter 4: BIOS setup 4.1 Managing and updating your BIOS 4-1
4.1.1 ASUS Update utility 4-1 4.1.2 Creating a bootable floppy disk 4-4 4.1.3 AFUDOS utility 4-5 4.1.4 ASUS CrashFree BIOS 3 utility 4-8 4.2 BIOS setup program 4-9 4.2.1 BIOS menu screen 4-10 4.2.2 Menu bar 4-10...
User Manual - Page 5
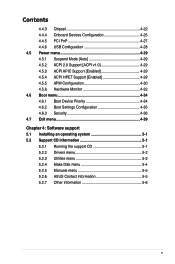
...4-34 4.6.1 Boot Device Priority 4-34 4.6.2 Boot Settings Configuration 4-35 4.6.3 Security 4-36 4.7 Exit menu 4-39 Chapter 4: Software support 5.1 Installing an operating system 5-1 5.2 Support CD information 5-1 5.2.1 Running the support CD 5-1 5.2.2 Drivers menu 5-2 5.2.3 Utilities menu 5-3 5.2.4 Make Disk menu 5-4 5.2.5 Manuals menu 5-5 5.2.6 ASUS Contact information 5-5 5.2.7 Other...
User Manual - Page 8
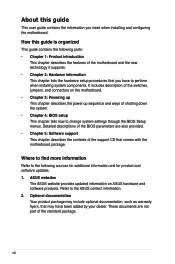
... to change system settings through the BIOS Setup menus. Detailed descriptions of the BIOS parameters are also provided. • Chapter 5: Software support This chapter describes the contents of the support CD that comes with the motherboard package.
Where to find more information
Refer to the following sources for additional information and for product and software updates. 1. ASUS websites
The...
User Manual - Page 12
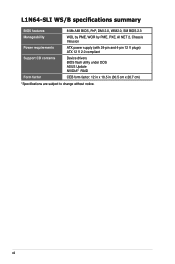
L1N64-SLI WS/B specifications summary
BIOS features
8 Mb AMI BIOS, PnP, DMI 2.0, WfM2.0, SM BIOS 2.3
Manageability
WOL by PME, WOR by PME, PXE, AI NET 2, Chassis Intrusion
Power requirements
ATX power supply (with 24-pin and 4-pin 12 V plugs) ATX 12 V 2.0 compliant
Support CD contents
Device drivers
BIOS flash utility under DOS
ASUS Update NVIDIA® RAID
Form factor
CEB form factor: ...
User Manual - Page 27
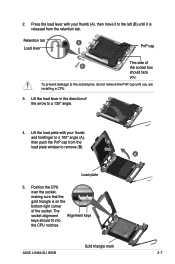
... forefinger to a 100º angle (A),
then push the PnP cap from the
B
load plate window to remove (B).
A
Load plate
5. Position the CPU over the socket, making sure that the gold triangle is on the bottom-right corner of the socket. The socket alignment Alignment keys keys should fit into the CPU notches.
Gold triangle mark
ASUS L1N64-SLI WS/B
2-
User Manual - Page 34
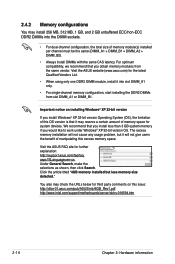
... system devices. We recommend that you install less than 3 GB system memory if you would like to work under Windows® XP 32-bit version OS. The excess memory installation will not cause any usage problem, but it will not give users the benefit of manipulating this excess memory space.
Visit the ASUS FAQ site for further explanation: http://support.asus...
User Manual - Page 36
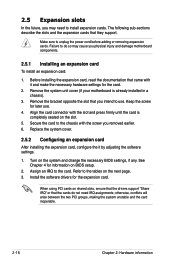
... the it by adjusting the software settings.
1. Turn on the system and change the necessary BIOS settings, if any. See Chapter 4 for information on BIOS setup.
2. Assign an IRQ to the card. Refer to the tables on the next page. 3. Install the software drivers for the expansion card.
When using PCI cards on shared slots, ensure that the drivers support "Share IRQ" or that the...
User Manual - Page 59
... Service Provider (ISP).
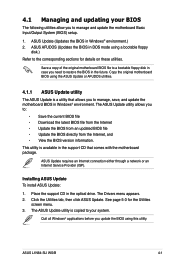
Installing ASUS Update To install ASUS Update:
1. Place the support CD in the optical drive. The Drivers menu appears. 2. Click the Utilities tab, then click ASUS Update. See page 5-3 for the Utilities
screen menu. 3. The ASUS Update utility is copied to your system.
Quit all Windows® applications before you update the BIOS using this utility.
ASUS L1N64-SLI WS...
User Manual - Page 60
...:
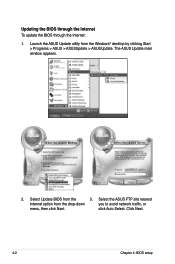
1. Launch the ASUS Update utility from the Windows® desktop by clicking Start > Programs > ASUS > ASUSUpdate > ASUSUpdate. The ASUS Update main window appears.
2. Select Update BIOS from the
3. Select the ASUS FTP site nearest
Internet option from the drop‑down
you to avoid network traffic, or
menu, then click Next.
click Auto Select. Click Next.
4-
Chapter 4: BIOS setup
User Manual - Page 61
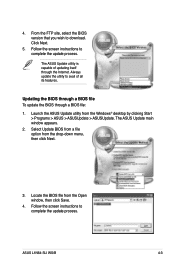
... the ASUS Update utility from the Windows® desktop by clicking Start > Programs > ASUS > ASUSUpdate > ASUSUpdate. The ASUS Update main window appears.
2. Select Update BIOS from a file option from the drop‑down menu, then click Next.
3. Locate the BIOS file from the Open window, then click Save.
4. Follow the screen instructions to complete the update process.
ASUS L1N64-SLI WS/B
4-
User Manual - Page 63
... name
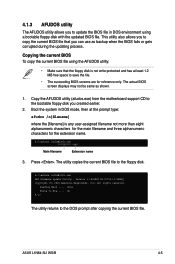
3. Press . The utility copies the current BIOS file to the floppy disk.
A:\>afudos /oOLDBIOS1.rom AMI Firmware Update Utility - Version 1.19(ASUS V2.07(03.11.24BB)) Copyright (C) 2002 American Megatrends, Inc. All rights reserved.
Reading flash ..... done Write to file...... ok A:\>
The utility returns to the DOS prompt after copying the current BIOS file.
ASUS L1N64-SLI WS/B
4-
User Manual - Page 64

...] is the latest or the original BIOS file on the bootable floppy disk.
A:\>afudos /iL1N64WS.rom
4. The utility verifies the file and starts updating the BIOS.
A:\>afudos /iL1N64WS.rom AMI Firmware Update Utility - Version 1.19(ASUS V2.07(03.11.24BB)) Copyright (C) 2002 American Megatrends, Inc. All rights reserved.
WARNING!! Do not turn off power during flash BIOS Reading file ....... done Reading...
User Manual - Page 65
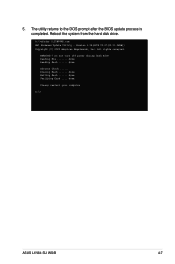
.../iL1N64WS.rom AMI Firmware Update Utility - Version 1.19(ASUS V2.07(03.11.24BB)) Copyright (C) 2002 American Megatrends, Inc. All rights reserved.
WARNING!! Do not turn off power during flash BIOS Reading file ....... done Reading flash ...... done
Advance Check ...... Erasing flash ...... done Writing flash ...... done Verifying flash .... done
Please restart your computer
A:\>
ASUS L1N64-SLI WS...
User Manual - Page 66
... floppy disk containing the updated motherboard BIOS before using this utility.
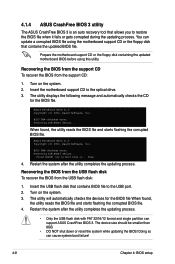
Recovering the BIOS from the support CD To recover the BIOS from the support CD:
1. Turn on the system. 2. Insert the motherboard support CD to the optical drive. 3. The utility displays the following message and automatically checks the CD
for the BIOS file.
Award BootBlock BIOS v1.0 Copyright (c) 2000, Award Software...
User Manual - Page 67
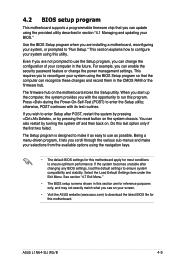
... can enable the security password feature or change the power management settings. This requires you to reconfigure your system using the BIOS Setup program so that the computer can recognize these changes and record them in the CMOS RAM or the firmware hub.
The firmware hub on the motherboard stores the Setup utility. When you start up the computer, the system provides you...
User Manual - Page 77
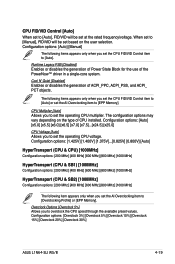
...MHz] [600 MHz] [800 MHz] [1000 MHz]
The following item appears only when you set the AI Overclocking item to [Overclocking Profile] or [EPP Memory].
Overclock Options [Overclock 5%] Allows you to overclock the CPU speed through the available preset values. Configuration options: [Overclock 3%] [Overclock 5%] [Overclock 10%] [Overclock 15%] [Overclock 20%] [Overclock 30%]
ASUS L1N64-SLI WS/B
4-19
User Manual - Page 101
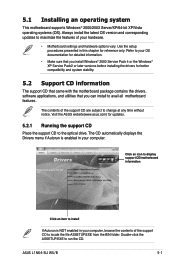
... the drivers, software applications, and utilities that you can install to avail all motherboard features.
The contents of the support CD are subject to change at any time without notice. Visit the ASUS website(www.asus.com) for updates.
5.2.1 Running the support CD
Place the support CD to the optical drive. The CD automatically displays the Drivers menu if Autorun is enabled in your computer...
User Manual - Page 102
....
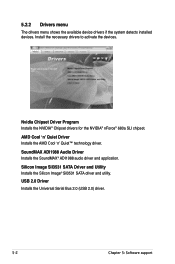
AMD Cool 'n' Quiet Driver Installs the AMD Cool 'n' Quiet™ technology driver.
SoundMAX ADI1988 Audio Driver Installs the SoundMAX® ADI1988 audio driver and application.
Silicon Image Sil3531 SATA Driver and Utility Installs the Silicon Image® Sil3531 SATA driver and utility. USB 2.0 Driver Installs the Universal Serial Bus 2.0 (USB 2.0) driver.
5-
Chapter 5: Software support
User Manual - Page 103
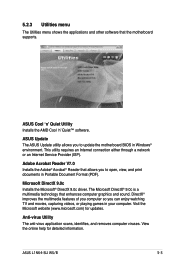
... and other software that the motherboard supports.
ASUS Cool 'n' Quiet Utility Installs the AMD Cool 'n' Quiet™ software.
ASUS Update The ASUS Update utility allows you to update the motherboard BIOS in Windows® environment. This utility requires an Internet connection either through a network or an Internet Service Provider (ISP).
Adobe Acrobat Reader V7.0 Installs the Adobe...
User Manual - Page 104
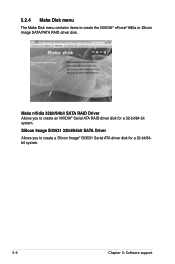
... the NVIDIA® nForce® 680a or Silicon Image SATA/PATA RAID driver disk.
Make nVidia 32bit/64bit SATA RAID Driver Allows you to create an NVIDIA® Serial ATA RAID driver disk for a 32-bit/64-bit system. Silicon Image Sil3531 32bit/64bit SATA Driver Allows you to create a Silicon Image® Sil3531 Serial ATA driver disk for a 32-bit/64bit system.
5-
Chapter 5: Software support