Asus M5A78L-M USB3 driver and firmware

Related Asus M5A78L-M USB3 Manual Pages
Download the free PDF manual for Asus M5A78L-M USB3 and other Asus manuals at ManualOwl.com
User Manual - Page 2
.../or LGPL Software, which will be no earlier than December 1, 2011, either (1) for free by downloading it from http://support.asus.com/download; or (2) for the cost of reproduction and shipment, which is dependent on the preferred carrier and the location where you want to have it shipped to, by sending a request to: ASUSTeK Computer Inc...
User Manual - Page 3
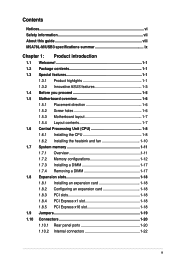
Contents
Notices...vi Safety information vii About this guide viii M5A78L-M/USB3 specifications summar ix
Chapter 1: Product introduction
1.1 Welcome 1-1 1.2 Package contents 1-1 1.3 Special features 1-1
1.3.1 Product highlights 1-1 1.3.2 Innovative ASUS features 1-3 1.4 Before you proceed 1-5 1.5 Motherboard overview 1-6 1.5.1 Placement direction 1-6 1.5.2 Screw holes 1-6 1.5.3 ...
User Manual - Page 4
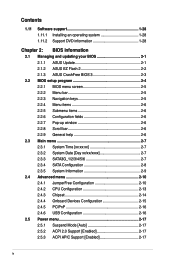
Contents
1.11 Software support 1-28 1.11.1 Installing an operating system 1-28 1.11.2 Support DVD information 1-28
Chapter 2: BIOS information
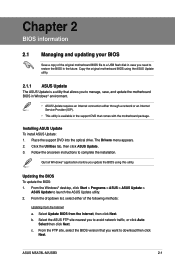
2.1 Managing and updating your BIOS 2-1 2.1.1 ASUS Update 2-1 2.1.2 ASUS EZ Flash 2 2-2 2.1.3 ASUS CrashFree BIOS 3 2-3
2.2 BIOS setup program 2-4 2.2.1 BIOS menu screen 2-5 2.2.2 Menu bar 2-5 2.2.3 Navigation keys 2-5 2.2.4 Menu items 2-6 2.2.5...
User Manual - Page 6
...the dealer or an experienced radio/TV technician for help.
The use of shielded cables for connection of the monitor to the graphics card is required to assure compliance ... from digital apparatus set out in the Radio Interference Regulations of the Canadian Department of Communications. This class B digital apparatus complies with Canadian ICES-003.
ASUS Recycling/Takeback Services
ASUS recycling ...
User Manual - Page 7

... to fix it by yourself. Contact a qualified service technician or your retailer.
Operation safety
• Before installing the motherboard and adding devices on it, carefully read all the manuals that came with the package.
• Before using the product, ensure that all cables are correctly connected and the power cables are not damaged. If you detect any damage...
User Manual - Page 8
... you need when installing and configuring the motherboard.
How this guide is organized
This guide contains the following parts: • Chapter 1: Product introduction
This chapter describes the features of the motherboard and the new technology it supports.
• Chapter 2: BIOS information
This chapter tells how to change system settings through the BIOS Setup menus. Detailed descriptions...
User Manual - Page 9
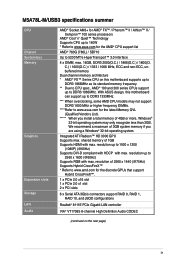
M5A78L-M/USB3 specifications summar
CPU Chipset System bus Memory
Graphics
Expansion slots Storage LAN Audio
AMD® Socket AM3+ for AMD® FX™ / Phenom™ II / Athlon™ II / Sempron™ 100 series processors
AMD® Cool 'n' Quiet™ Technology Supports CPU up to 140W * Refer to www.asus.com for the AMD® CPU support list
AMD® 760G (780L) / SB710
Up to 5200...
User Manual - Page 10
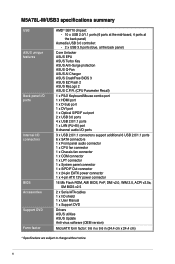
... ASUS Q-Fan ASUS AI Charger ASUS CrashFree BIOS 3 ASUS EZ Flash 2 ASUS MyLogo 2 ASUS C.P.R. (CPU Parameter Recall)
1 x PS/2 Keyboard/Mouse combo port 1 x HDMI port 1 x D-Sub port 1 x DVI port 1 x Optical S/PDIF out port 2 x USB 3.0 ports 4 x USB 2.0/1.1 ports 1 x LAN (RJ-45) port 8-channel audio I/O ports
3 x USB 2.0/1.1 connectors support additional 6 USB 2.0/1.1 ports 6 x SATA connectors...
User Manual - Page 22
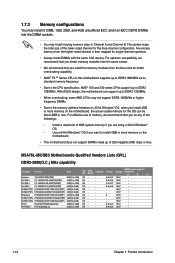
... to the CPU specification, AMD® 100 and 200 series CPUs support up to DDR3 1066MHz. With ASUS design, this motherboard can support up to DDR3 1333MHz.
• When overclocking, some AMD CPUs may not support DDR3 1600MHz or higher frequency DIMMs.
• Due to the memory address limitation on 32-bit Windows® OS, when you install 4GB or...
User Manual - Page 28
... drivers support "Share IRQ" or that the cards do not need IRQ assignments. Otherwise, conflicts will arise between the two PCI groups, making the system unstable and the card inoperable.
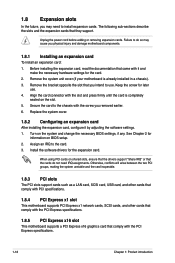
1.8.3 PCI slots
The PCI slots support cards such as a LAN card, SCSI card, USB card, and other cards that comply with PCI specifications.
1.8.4 PCI Express x1 slot
This motherboard supports PCI Express x1 network...
User Manual - Page 31

... device. DVI-D can't be converted to output RGB Signal to CRT and isn't compatible with DVI-I.
14. HDMI port. This port is for a High-Definition Multimedia Interface (HDMI) connector, and is HDCP compliant allowing playback of HD DVD, Blu-Ray and other protected content.
15. USB 2.0 ports 5 and 6. These two 4-pin Universal Serial Bus (USB) ports connect to USB 2.0/1.1 devices.
ASUS M5A78L-M/USB3...
User Manual - Page 34
...M5A78L-M/USB3
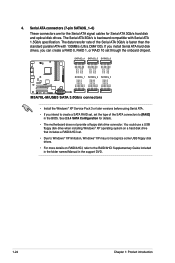
M5A78L-M/USB3 SATA 3.0Gb/s connectors
• Install the Windows® XP Service Pack 3 or later versions before using Serial ATA. • If you intend to create a SATA RAID set, set the type of the SATA connectors to [RAID]
in the BIOS. See 2.3.4 SATA Configuration for details. • The motherboard does not provide a floppy disk drive connector. You could use a USB
floppy disk...
User Manual - Page 38
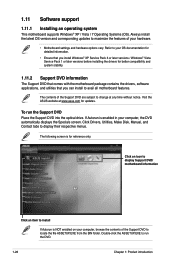
... can install to avail all motherboard features.
The contents of the Support DVD are subject to change at any time without notice. Visit the ASUS website at www.asus.com for updates.
To run the Support DVD Place the Support DVD into the optical drive. If Autorun is enabled in your computer, the DVD automatically displays the Specials screen. Click Drivers, Utilities, Make Disk, Manual...
User Manual - Page 39
..., save, and update the motherboard BIOS in Windows® environment.
• ASUS Update requires an Internet connection either through a network or an Internet Service Provider (ISP).
• This utility is available in the support DVD that comes with the motherboard package.
Installing ASUS Update To install ASUS Update: 1. Place the support DVD into the optical drive. The Drivers menu appears...
User Manual - Page 40
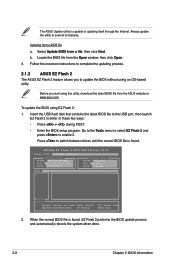
... USB port, then launch EZ Flash 2 in either of these two ways:
• Press + during POST.
• Enter the BIOS setup program. Go to the Tools menu to select EZ Flash 2 and press to enable it.
Press to switch between drives until the correct BIOS file is found.
ASUSTek EZ Flash 2 BIOS ROM Utility V3.44
FLASH TYPE: WINBOND W25X/Q16
Current ROM
BOARD: M5A78L-M/USB3...
User Manual - Page 41
... utility, rename the BIOS file in the USB flash drive into MA78LMU.ROM.
• Download the latest BIOS file from the ASUS website at www.asus.com.
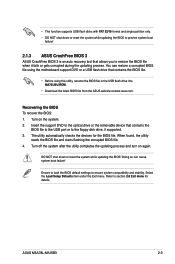
Recovering the BIOS To recover the BIOS: 1. Turn on the system. 2. Insert the support DVD to the optical drive or the removable device that contains the
BIOS file to the USB port or to the floppy disk drive, if supported. 3. The utility automatically...
User Manual - Page 42
... any BIOS settings, load the default settings to ensure system compatibility and stability. Select the Load Setup Defaults item under the Exit menu. See section 2.8 Exit Menu.
• The BIOS setup screens in this chapter are for reference only. They may not exactly match what you see on your screen.
• Visit the ASUS website at www.asus.com to download...
User Manual - Page 46
... want to use the Serial ATA hard disk drives as Parallel ATA physical storage devices.
[RAID]
Set to [RAID] when you want to create a RAID configuration from the SATA hard disk drives.
[AHCI]
Set to [AHCI] when you want the SATA hard disk drives to use the AHCI (Advanced Host Controller Interface). The AHCI allows the onboard storage driver to enable advanced Serial ATA features that increases...
User Manual - Page 51
... or [Per Core].
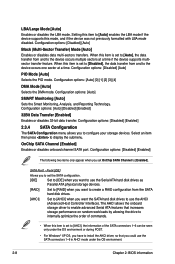
Unleashing Mode [Disabled] Enable the Unleashing Mode to get full computing power of the processor. However, this might make your system unstable depending on your processor's overclocking capability. Configuration options: [Enabled] [Disabled] Active CPU Cores [Auto] Allows you to manually turn ON/OFF a process core. Configuration options: [Auto] [Manual]
ASUS M5A78L-M/USB3
2-13
User Manual - Page 57
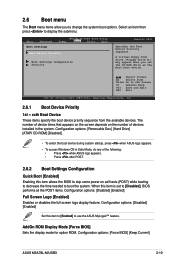
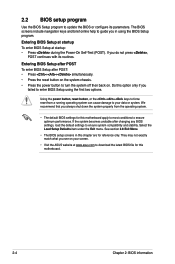
.... Select an item then press to display the submenu.
Main Advanced Boot Settings
M5A78L-M/USB3 BIOS Setup
Power
Boot Tools Exit
Boot Device Priority
Boot Settings Configuration Security
Version 0201
Specifies the Boot Device Priority sequence.
A virtual floppy disk drive (Floppy Drive B:) may appear when you set the CD-ROM drive as the first boot device.
Select Screen Select Item Enter Go...