Asus MAXIMUS IV GENE-Z driver and firmware

Related Asus MAXIMUS IV GENE-Z Manual Pages
Download the free PDF manual for Asus MAXIMUS IV GENE-Z and other Asus manuals at ManualOwl.com
User Manual - Page 5
... 3-46 3.10.4 ASUS BIOS Updater 3-47
Chapter 4: Software support 4.1 Installing an operating system 4-1 4.2 Support DVD information 4-1
4.2.1 Running the support DVD 4-1 4.2.2 Obtaining the software manuals 4-2 4.3 Software information 4-3 4.3.1 AI Suite II 4-3 4.3.2 DIGI+ VRM 4-4 4.3.3 TurboV EVO 4-7 4.3.4 EPU 4-10 4.3.5 FAN Xpert 4-11 4.3.6 Probe II 4-12 4.3.7 Sensor Recorder 4-13...
User Manual - Page 6
... BIOS 4-25 4.4.4 Intel® Rapid Storage Technology Option ROM utility..... 4-26 4.5 Creating a RAID driver disk 4-32 4.5.1 Creating a RAID driver disk without entering the OS.... 4-32 4.5.2 Creating a RAID driver disk in Windows 4-32 4.5.3 Installing the RAID driver during
Windows® OS installation 4-33 4.5.4 Using a USB floppy disk drive 4-34 Chapter 5: Multiple GPU technology support...
User Manual - Page 13

... the BIOS Setup menus. Detailed descriptions of the BIOS parameters are also provided. • Chapter 4: Software support This chapter describes the contents of the support DVD that comes with the motherboard package and the software. • Chapter 5: Multiple GPU technology support This chapter describes how to install and configure multiple ATI® CrossFireX™ and NVIDIA® SLI...
User Manual - Page 38
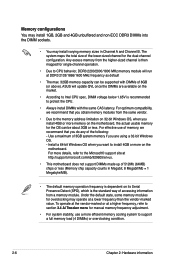
... is recommended to protect the CPU.
• Always install DIMMs with the same CAS latency. For optimum compatibility, we recommend that you obtain memory modules from the same vendor.
• Due to the memory address limitation on 32-bit Windows OS, when you install 4GB or more memory on the motherboard, the actual usable memory for the OS can be...
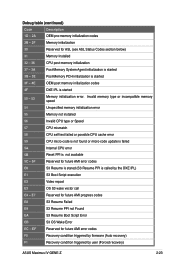
User Manual - Page 55
... vector call
E4 - E7
Reserved for future AMI progress codes
E8
S3 Resume Failed
E9
S3 Resume PPI not Found
EA
S3 Resume Boot Script Error
EB
S3 OS Wake Error
EC - EF
Reserved for future AMI error codes
F0
Recovery condition triggered by firmware (Auto recovery)
F1
Recovery condition triggered by user (Forced recovery)
ASUS Maximus IV GENE-Z
2-23
User Manual - Page 56
...
F3
Recovery firmware image is found
F4
Recovery firmware image is loaded
F5-F7
Reserved for future AMI progress codes
F8
Recovery PPI is not available
F9
Recovery capsule is not found
FA
Invalid recovery capsule
FB-FF
Reserved for future AMI error codes
60
DXE Core is started
61
NVRAM initialization
62
Installation of the PCH Runtime Services
63 - 67
CPU...
User Manual - Page 130
... a network or an Internet Service Provider (ISP).
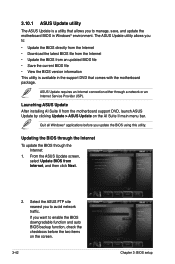
Launching ASUS Update After installing AI Suite II from the motherboard support DVD, launch ASUS Update by clicking Update > ASUS Update on the AI Suite II main menu bar.
Quit all Windows® applications before you update the BIOS using this utility.
Updating the BIOS through the Internet
To update the BIOS through the Internet:
1. From the ASUS...
User Manual - Page 141
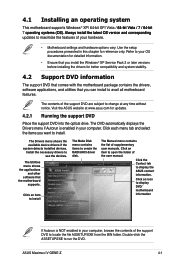
...drivers, software applications, and utilities that you can install to avail all motherboard features.
The contents of the support DVD are subject to change at any time without notice. Visit the ASUS website at www.asus.com for updates.
4.2.1 Running the support DVD
Place the support DVD into the optical drive. The DVD automatically displays the Drivers menu if Autorun is enabled in your computer...
User Manual - Page 143
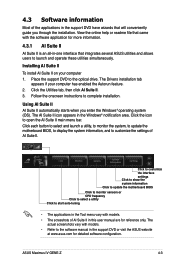
... start auto-tuning
• The applications in the Tool menu vary with models.
• The screeshots of AI Suite II in this user manual are for reference only. The actual screenshots vary with models.
• Refer to the software manual in the support DVD or visit the ASUS website at www.asus.com for detailed software configuration.
ASUS Maximus IV GENE-Z
4-3
User Manual - Page 162
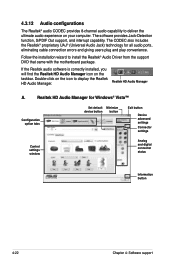
... for all audio ports,
eliminating cable connection errors and giving users plug and play convenience.
Follow the installation wizard to install the Realtek® Audio Driver from the support DVD that came with the motherboard package.
If the Realtek audio software is correctly installed, you will find the Realtek HD Audio Manager icon on the taskbar. Double-click on the icon to display the...
User Manual - Page 164
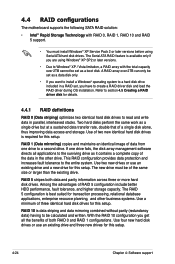
...The motherboard supports the following SATA RAID solution:
• Intel® Rapid Storage Technology with RAID 0, RAID 1, RAID 10 and RAID 5 support.
• You must install Windows® XP Service Pack 2 or later versions before using Serial ATA hard disk drives. The Serial ATA RAID feature is available only if you are using Windows® XP SP2 or later versions.
• Due to Windows®...
User Manual - Page 170
..., set the SATA Mode BIOS item to [RAID mode] in BIOS setup. Refer to section 3.5.4 SATA Configuration for details.
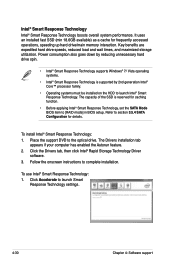
To install Intel® Smart Response Technology: 1. Place the support DVD to the optical drive. The Drivers installation tab
appears if your computer has enabled the Autorun feature. 2. Click the Drivers tab, then click Intel® Rapid Storage Technology Driver
software. 3. Follow...
User Manual - Page 172
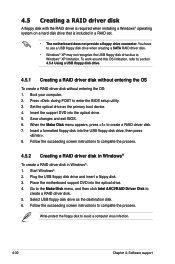
...your computer. 2. Press during POST to enter the BIOS setup utility. 3. Set the optical drive as the primary boot device. 4. Insert the support DVD into the optical drive. 5. Save changes and exit BIOS. 6. When the Make Disk menu appears, press to create a RAID driver disk. 7. Insert a formatted floppy disk into the USB floppy disk drive, then press
. 8. Follow the succeeding screen instructions...
User Manual - Page 173
... the name of the device you've inserted, go to Drivers > RAID, and then
select the RAID driver for the corresponding OS version. Click OK. 4. Follow the succeeding screen instructions to complete the installation.
Before loading the RAID driver from a USB flash drive, you have to use another computer to copy the RAID driver from the support DVD to the USB flash drive.
ASUS Maximus IV GENE-Z
4-33
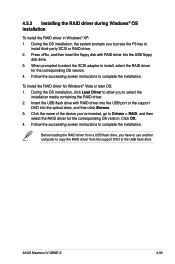
User Manual - Page 174
... floppy disk containing the RAID driver. Refer to the steps below:
1. Using another computer, plug the USB floppy disk drive, and insert the floppy disk containing the RAID driver.
2. Right-click My Computer on the Windows® desktop or start menu, and then select Manage from the pop-up window.
or
3. Select Device Manager. From the Universal Serial Bus controllers, right-click xxxxxx USB Floppy...
User Manual - Page 179
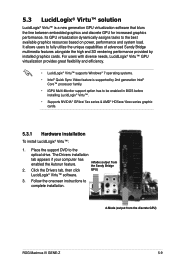
... cards to your system.
To uninstall existing graphics card drivers
1. Close all current applications. 2. For Windows XP, go to Control Panel > Add/Remove Programs.
For Windows Vista, go to Control Panel > Programs and Features. 3. Select your current graphics card driver/s. 4. For Windows XP, select Add/Remove.
For Windows Vista, select Uninstall. 5. Turn off your computer.
ROG Maximus IV GENE...
User Manual - Page 181
...click on the Windows® desktop and
select Catalyst(TM) Control Center. You can also right-click the ATI icon in the Windows notification area and select Cayalist Control Center.
2. The Catalyst Control Center Setup Assistant appears when the system detects the existance of multigraphics cards. Click Go to continue to the Catalyst Control Center Advanced View window.
ROG Maximus IV GENE-Z
5-3
User Manual - Page 184
... the power supply to the two graphics cards separately.
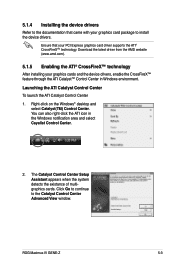
6. Connect a VGA or a DVI cable to the graphics card.
SLI bridge
Goldfingers
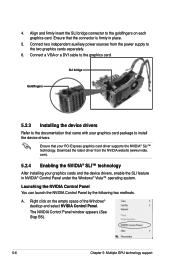
5.2.3 Installing the device drivers
Refer to the documentation that came with your graphics card package to install the device drivers.
Ensure that your PCI Express graphics card driver supports the NVIDIA® SLI™ technology. Download the latest driver from...
User Manual - Page 187
...™:
1. Place the support DVD to the
optical drive. The Drivers installation
tab appears if your computer has enabled the Autorun feature.
i-Mode (output from the Sandy Bridge
2. Click the Drivers tab, then click
GPU)
LucidLogix® Virtu™ software.
3. Follow the onscreen instructions to complete installation.
d-Mode (output from the discrete GPU)
ROG Maximus IV GENE-Z
5-9
User Manual - Page 189
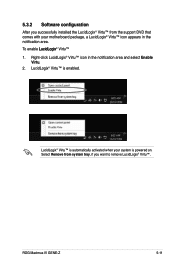
5.3.2 Software configuration
After you successfully installed the LucidLogix® Virtu™ from the support DVD that comes with your motherboard package, a LucidLogix® Virtu™ icon appears in ...® Virtu™ is automatically activated when your system is powered on. Select Remove from system tray, if you want to remove LucidLogix® Virtu™.
ROG Maximus IV GENE-Z
5-11