Asus P4V800D-X driver and firmware
Related Asus P4V800D-X Manual Pages
Download the free PDF manual for Asus P4V800D-X and other Asus manuals at ManualOwl.com
Motherboard DIY Troubleshooting Guide - Page 2
... this manual, including the products and software described in it, may be reproduced, transmitted, transcribed, stored in a retrieval system, or translated into any language in any form or by any means, except documentation kept by the purchaser for backup purposes, without the express written permission of ASUSTeK COMPUTER INC. (" ASUS"). Product warranty or service will...
Motherboard DIY Troubleshooting Guide - Page 3
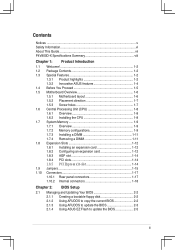
... card 1-12 1.8.3 AGP slot 1-14 1.8.4 PCI slots 1-14
1-14 1.9 Jumpers 1-15 1.10 Connectors 1-17
1.10.1 Rear panel connectors 1-17 1.10.2 Internal connectors 1-18
Chapter 2: BIOS Setup 2.1 Managing and Updating Your BIOS 2-2
2.1.1 Creating a bootable floppy disk 2-2 2.1.2 Using AFUDOS to copy the current BIOS 2-2 2.1.3 Using AFUDOS to update the BIOS 2-3 2.1.4 Using ASUS EZ Flash...
Motherboard DIY Troubleshooting Guide - Page 4
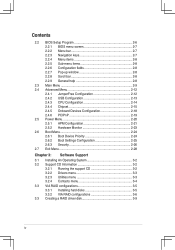
...2-13 2.4.3 CPU Configuration 2-14 2.4.4 Chipset 2-15 2.4.5 Onboard Devices Configuration 2-18 2.4.6 PCIPnP 2-19 2.5 Power Menu 2-20 2.5.1 APM Configuration 2-21 2.5.2 Hardware Monitor 2-23 2.6 Boot Menu 2-24 2.6.1 Boot Device Priority 2-24 2.6.2 Boot Settings Configuration 2-25 2.6.3 Security 2-26 2.7 Exit Menu 2-28
Chapter 3: Software Support 3.1 Installing An...
Motherboard DIY Troubleshooting Guide - Page 5
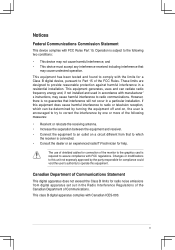
...limits for a Class B digital device, pursuant to Part 15 of the FCC Rules. These limits are designed to provide reasonable protection against harmful interference in a residential installation. This equipment generates, ... the dealer or an experienced radio/TV technician for help.
The use of shielded cables for connection of the monitor to the graphics card is required to assure compliance with ...
Motherboard DIY Troubleshooting Guide - Page 7
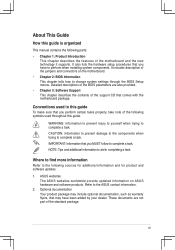
... this guide is organized
This manual contains the following parts: • Chapter 1: Product Introduction
This chapter describes the features of the motherboard and the new technology it supports. It also lists the hardware setup procedures that you have to perform when installing system components. It includes description of the jumpers and connectors on the motherboard. • Chapter 2: BIOS...
Motherboard DIY Troubleshooting Guide - Page 9
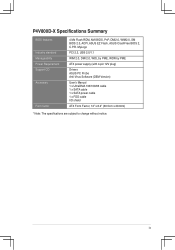
... factor
4 Mb Flash ROM, AMI BIOS, PnP, DMI2.0, WfM2.0, SM BIOS 2.3, ACPI, ASUS EZ Flash, ASUS CrashFree BIOS 2, C.P.R. MyLogo
PCI 2.2, USB 2.0/1.1
WfM 2.0, DMI 2.0, WOL by PME, WOR by PME
ATX power supply (with 4-pin 12V plug)
Drivers ASUS PC Probe Anti-Virus Software (OEM Version)
Userʼs Manual 1 x UltraDMA 133/100/66 cable 1 x SATA cable 1 x SATA power cable 1 x FDD cable I/O shield
ATX...
Motherboard DIY Troubleshooting Guide - Page 12
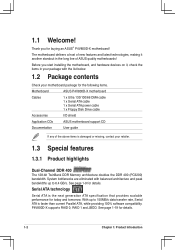
... line of ASUS quality motherboards!
Before you start installing the motherboard, and hardware devices on it, check the items in your package with the list below.
1.2 Package contents
Check your motherboard package for the following items.
Motherboard
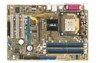
ASUS P4V800D-X motherboard
Cables
1 x Ultra 133/100/66 DMA cable 1 x Serial ATA cable 1 x Serial ATA power cable 1 x Floppy Disk Drive cable...
Motherboard DIY Troubleshooting Guide - Page 22
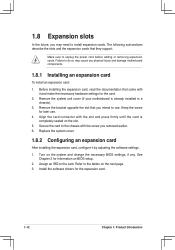
...64257;guring an expansion card
After installing the expansion card, configure it by adjusting the software settings.
1. Turn on the system and change the necessary BIOS settings, if any. See Chapter 2 for information on BIOS setup.
2. Assign an IRQ to the card. Refer to the tables on the next page. 3. Install the software drivers for the expansion card.
1-12
Chapter 1: Product Introduction
Motherboard DIY Troubleshooting Guide - Page 29

...RSATA_TXN1
GND RSATA_RXP1 RSATA_RXN1
GND
P4V800D-X SATA connectors
Important notes on Serial ATA • You must install Windows® 2000 SP4, Windows® XP SP1, Windows® 2003,
or newer OS versions before using Serial ATA hard disk drives. • The Serial ATA interface is not supported when using Windows® 98SE/Me
operating system.
4. CPU, power and chassis fan connectors (3-pin...
Motherboard DIY Troubleshooting Guide - Page 35
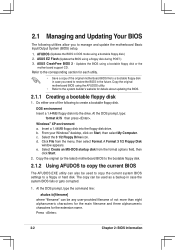
... System (BIOS) setup.
1. AFUDOS (Updates the BIOS in DOS mode using a bootable floppy disk.) 2. ASUS EZ Flash (Updates the BIOS using a floppy disk during POST.) 3. ASUS CrashFree BIOS 2 - Updates the BIOS using a bootable floppy disk or the
mother board support CD. Refer to the corresponding section for each utility.
• Save a copy of the original motherboard BIOS fi...
Motherboard DIY Troubleshooting Guide - Page 36
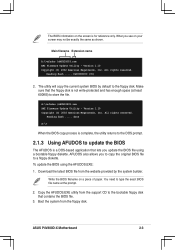
... shown.
Main filename Extension name
A:\>afudos /oMYBIOS03.rom AMI Firmware Update Utility - Version 1.10 Copyright (C) 2002 American Megatrends, Inc. All rights reserved.
Reading flash ..... 0x0008CC00 (9%)
2. The utility will copy the current system BIOS by default to the floppy disk. Make sure that the floppy disk is not write-protected and has enough space (at...
Motherboard DIY Troubleshooting Guide - Page 37

... latest (or original) BIOS file that you copied to the bootable floppy disk. 5. Press . The screen displays the status of the update process.
The BIOS information on the screen is for reference only. What you see on your screen may not be exactly the same as shown.
A:\>afudos /iP4V800D-X.rom AMI Firmware Update Utility - Version 1.10 Copyright (C) 2002...
Motherboard DIY Troubleshooting Guide - Page 38
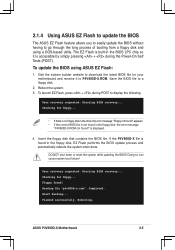
...during the Power-On Self Tests (POST).
To update the BIOS using ASUS EZ Flash:
1. Visit the system builder website to download the latest BIOS file for your motherboard and rename it to P4V800D-X.ROM. Save the BIOS file to a floppy disk.
2. Reboot the system. 3. To launch EZ Flash, press + during POST to display the following.
User recovery requested. Starting BIOS recovery... Checking for...
Motherboard DIY Troubleshooting Guide - Page 39
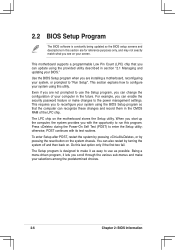
... can enable the security password feature or make changes to the power management settings. This requires you to reconfigure your system using the BIOS Setup program so that the computer can recognize these changes and record them in the CMOS RAM of the LPC chip.
The LPC chip on the motherboard stores the Setup utility. When you start...
Motherboard DIY Troubleshooting Guide - Page 63
... time without notice. Visit the ASUS website(www.asus.com) for updates.
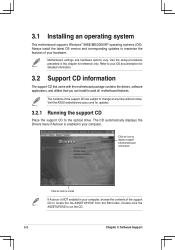
3.2.1 Running the support CD
Place the support CD to the optical drive. The CD automatically displays the Drivers menu if Autorun is enabled in your computer.
Click an icon to display support CD/motherboard information
Click an item to install
If Autorun is NOT enabled in your computer, browse the contents of the...
Motherboard DIY Troubleshooting Guide - Page 64
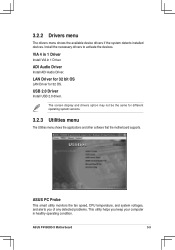
... Audio Driver
Install ADI Audio Driver.
LAN Driver for 32 bit OS
LAN Driver for 32 OS.
USB 2.0 Driver
Install USB 2.0 driver.
The screen display and drivers option may not be the same for different operating system versions.
3.2.3 Utilities menu
The Utilities menu shows the applications and other software that the motherboard supports.
ASUS PC Probe
This smart utility monitors the fan speed, CPU...
Motherboard DIY Troubleshooting Guide - Page 65
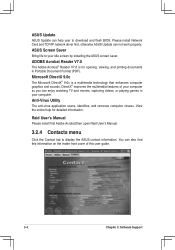
..., identifies, and removes computer viruses. View the online help for detailed information.
Raid Userʼs Manual
Please install first Adobe Acrobat,then open Raid Userʼs Manual.
3.2.4 Contacts menu
Click the Contact tab to display the ASUS contact information. You can also find this information on the inside front cover of this user guide.
3-4
Chapter 3: Software Support
Motherboard DIY Troubleshooting Guide - Page 66
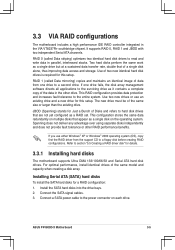
... hard disk drives. For optimal performance, install identical drives of the same model and capacity when creating a disk array.
Installing Serial ATA (SATA) hard disks
To install the SATA hard disks for a RAID configuration:
1. Install the SATA hard disks into the drive bays. 2. Connect the SATA signal cables. 3. Connect a SATA power cable to the power connector on each drive.
ASUS P4V800D...
Motherboard DIY Troubleshooting Guide - Page 67
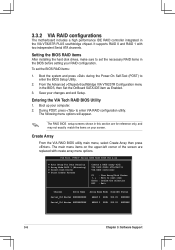
... IDE RAID controller integrated in the VIA VT8237R PLUS southbridge chipset. It supports RAID 0 and RAID 1 with two independent Serial ATA channels.
Setting the BIOS RAID items
After installing the hard disk drives, make sure to set the necessary RAID items in the BIOS before setting your RAID configuration. To set the BIOS RAID items:
1. Boot the system and press during the Power-On...
Motherboard DIY Troubleshooting Guide - Page 70
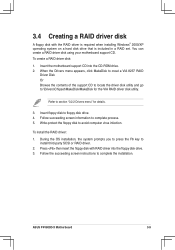
...64258;oppy disk to avoid computer virus infection.
To install the RAID driver:
1. During the OS installation, the system prompts you to press the F6 key to install third-party SCSI or RAID driver.
2. Press then insert the floppy disk with RAID driver into the floppy disk drive. 3. Follow the succeeding screen instructions to complete the installation.
ASUS P4V800D-X Motherboard
3-9