Asus P4V8X-MX driver and firmware
Related Asus P4V8X-MX Manual Pages
Download the free PDF manual for Asus P4V8X-MX and other Asus manuals at ManualOwl.com
Motherboard DIY Troubleshooting Guide - Page 3
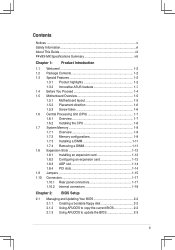
...1-12 1.8.1 Installing an expansion card 1-12 1.8.2 Configuring an expansion card 1-12 1.8.3 AGP slot 1-14 1.8.4 PCI slots 1-14 1.9 Jumpers 1-15 1.10 Connectors 1-17 1.10.1 Rear panel connectors 1-17 1.10.2 Internal connectors 1-18
Chapter 2: BIOS Setup
2.1 Managing and Updating Your BIOS 2-2 2.1.1 Creating a bootable floppy disk 2-2 2.1.2 Using AFUDOS to copy the current BIOS...
Motherboard DIY Troubleshooting Guide - Page 4
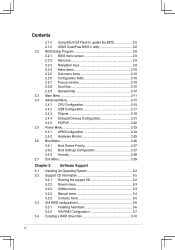
... Menu 2-26 2.6.1 Boot Device Priority 2-27 2.6.2 Boot Settings Configuration 2-27 2.6.3 Security 2-28 2.7 Exit Menu 2-29
Chapter 3: Software Support
3.1 Installing An Operating System 3-2 3.2 Support CD Information 3-2
3.2.1 Running the support CD 3-2 3.2.2 Drivers menu 3-3 3.2.3 Utilities menu 3-3 3.2.4 Manual menu 3-4 3.2.5 Contacts menu 3-5 3.3 VIA RAID configurations...
Motherboard DIY Troubleshooting Guide - Page 7
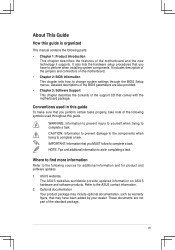
... this guide is organized
This manual contains the following parts: • Chapter 1: Product Introduction
This chapter describes the features of the motherboard and the new technology it supports. It also lists the hardware setup procedures that you have to perform when installing system components. It includes description of the jumpers and connectors on the motherboard. • Chapter 2: BIOS...
Motherboard DIY Troubleshooting Guide - Page 8
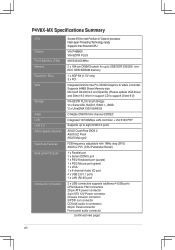
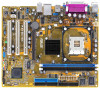
P4V8X-MX Specifications Summary
CPU Chipset Front Side Bus (FSB) Memory Expansion Slots VGA
Storage Audio LAN USB 2.0 ASUS Special features Overclock Features Back panel I/O ports
Internal I/O connectors
Socket 478 for Intel Pentium 4/ Celeron processor Intel Hyper-Threading Technology ready Supports Intel Prescott CPU
VIA P4M800 VIA 8237R PLUS
800/533/400 MHz
2 x 184-pin DIMM Sockets for ...
Motherboard DIY Troubleshooting Guide - Page 9
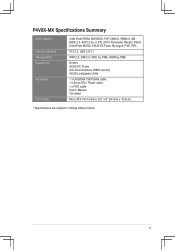
... Mb Flash ROM, AMI BIOS, PnP, DMI2.0, WfM2.0, SM BIOS 2.3, ACPI 2.0a, C.P.R. (CPU Parameter Recall), ASUS CrashFree BIOS2, ASUS EZ Flash, MyLogo2, PXE, RPL
PCI 2.2, USB 2.0/1.1
WfM 2.0, DMI 2.0, WOL by PME, WOR by PME
Drivers ASUS PC Probe Anti-Virus Software (OEM version) ASUS LiveUpdate Utility
1 x UltraDMA 133/100/66 cable 1 x Serial ATA / Power cable 1 x FDD cable Userʼs Manual I/O shield...
Motherboard DIY Troubleshooting Guide - Page 12
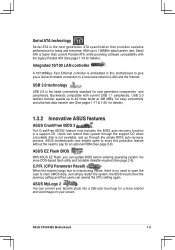
... data transfer rate, Serial ATA is faster than current Parallel ATA, while providing software compatibility with the legacy Parallel ATA (See page 1-19 for details).
Integrated 10/100 LAN controller
A 10/100Mbps Fast Ethernet controller is embedded in this motherboard to give you a fast and reliable connection to a local area network (LAN) and the Internet.
USB 2.0 technology
USB 2.0 is the latest...
Motherboard DIY Troubleshooting Guide - Page 16
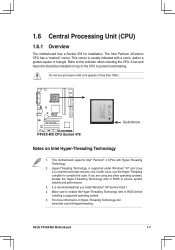
...the Hyper-Threading Technology item in BIOS to ensure system stability and performance.
3. It is recommended that you install Windows® XP Service Pack 1.
4. Make sure to enable the Hyper-Threading Technology item in BIOS before installing a supported operating system.
5. For more infformaion on Hyper-Threading Technology,visit www.intel.com/info/hyperthreading.
ASUS P4V8X-MX Motherboard
1-7
Motherboard DIY Troubleshooting Guide - Page 21
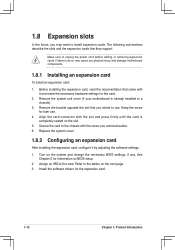
...64257;guring an expansion card
After installing the expansion card, configure it by adjusting the software settings.
1. Turn on the system and change the necessary BIOS settings, if any. See Chapter 2 for information on BIOS setup.
2. Assign an IRQ to the card. Refer to the tables on the next page. 3. Install the software drivers for the expansion card.
1-12
Chapter 1: Product Introduction
Motherboard DIY Troubleshooting Guide - Page 28

... RSATA_RXP2 GND RSATA_TXN2 RSATA_TXP2 GND
P4V8X-MX SATA Connectors
Important notes on Serial ATA • You must install Windows® 2000 SP4, Windows® XP SP1, Windows® 2003,
or newer OS versions before using Serial ATA hard disk drives. • The Serial ATA interface is not supported when using Windows® 98SE/Me
operating system.
4. CPU and chassis fan connectors (3-pin...
Motherboard DIY Troubleshooting Guide - Page 34
... System (BIOS) setup.
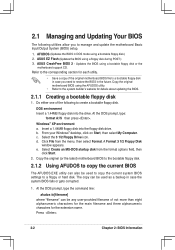
1. AFUDOS (Updates the BIOS in DOS mode using a bootable floppy disk.) 2. ASUS EZ Flash (Updates the BIOS using a floppy disk during POST.) 3. ASUS CrashFree BIOS 2 - Updates the BIOS using a bootable floppy disk or the
motherboard support CD. Refer to the corresponding section for each utility.
• Save a copy of the original motherboard BIOS fi...
Motherboard DIY Troubleshooting Guide - Page 35
... website provided by the system builder.
Write the BIOS filename on a piece of paper. You need to type the exact BIOS file name at the prompt.
2. Copy the AFUDOS.EXE utility from the support CD to the bootable floppy disk that contains the BIOS file.
3. Boot the system from the floppy disk.
ASUS P4V8X-MX Motherboard
2-3
Motherboard DIY Troubleshooting Guide - Page 36
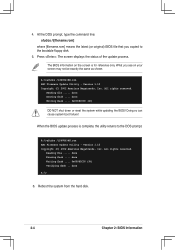
... latest (or original) BIOS file that you copied to the bootable floppy disk. 5. Press . The screen displays the status of the update process.
The BIOS information on the screen is for reference only. What you see on your screen may not be exactly the same as shown.
A:\>afudos /iP4V8X-MX.rom AMI Firmware Update Utility - Version 1.10 Copyright (C) 2002...
Motherboard DIY Troubleshooting Guide - Page 37
... the Power-On Self Tests (POST).
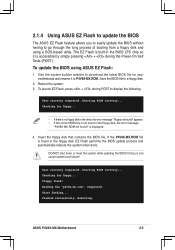
To update the BIOS using ASUS EZ Flash:
1. Visit the system builder website to download the latest BIOS file for your motherboard and rename it to P4V8X-MX.ROM. Save the BIOS file to a floppy disk.
2. Reboot the system. 3. To launch EZ Flash, press + during POST to display the following.
User recovery requested. Starting BIOS recovery... Checking...
Motherboard DIY Troubleshooting Guide - Page 39
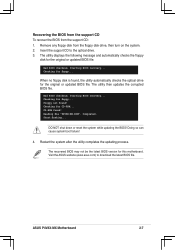
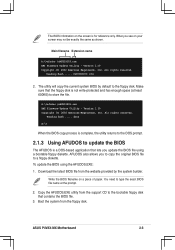
...-MX.ROM". Completed. Start flashing...
DO NOT shut down or reset the system while updating the BIOS! Doing so can cause system boot failure!
4. Restart the system after the utility completes the updating process.
The recovered BIOS may not be the latest BIOS version for this motherboard. Visit the ASUS website (www.asus.com) to download the latest BIOS file.
ASUS P4V8X-MX Motherboard...
Motherboard DIY Troubleshooting Guide - Page 40
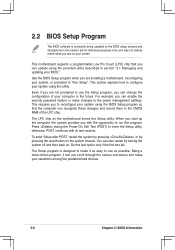
... can enable the security password feature or make changes to the power management settings. This requires you to reconfigure your system using the BIOS Setup program so that the computer can recognize these changes and record them in the CMOS RAM of the LPC chip.
The LPC chip on the motherboard stores the Setup utility. When you start...
Motherboard DIY Troubleshooting Guide - Page 63
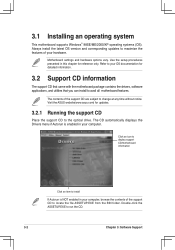
... the drivers, software applications, and utilities that you can install to avail all motherboard features.
The contents of the support CD are subject to change at any time without notice. Visit the ASUS website(www.asus.com) for updates.
3.2.1 Running the support CD
Place the support CD to the optical drive. The CD automatically displays the Drivers menu if Autorun is enabled in your computer...
Motherboard DIY Troubleshooting Guide - Page 64
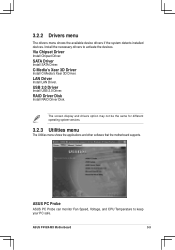
...USB 2.0 Driver.
RAID Driver Disk
Install RAID Driver Disk.
The screen display and drivers option may not be the same for different operating system versions.
3.2.3 Utilities menu
The Utilities menu shows the applications and other software that the motherboard supports.
ASUS PC Probe
ASUS PC Probe can monitor Fan Speed, Voltage, and CPU Temperature to keep your PC safe.
ASUS P4V8X-MX Motherboard...
Motherboard DIY Troubleshooting Guide - Page 65
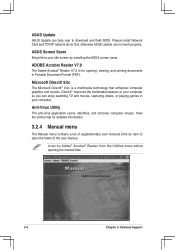
ASUS Update
ASUS Update can help user to download and flash BIOS. Please install Network Card and TCP/IP network driver first, otherwise ASUS Update can not work properly.
ASUS Screen Saver
Bring life to your idle screen by installing the ASUS screen saver.
ADOBE Acrobat Reader V7.0
The Adobe Acrobat® Reader V7.0 is for opening, viewing, and printing documents in Portable Document...
Motherboard DIY Troubleshooting Guide - Page 67
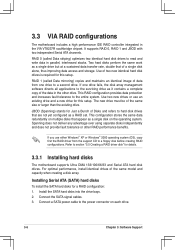
...For optimal performance, install identical drives of the same model and capacity when creating a disk array.
Installing Serial ATA (SATA) hard disks
To install the SATA hard disks for a RAID configuration:
1. Install the SATA hard disks into the drive bays. 2. Connect the SATA signal cables. 3. Connect a SATA power cable to the power connector on each drive.
3-6
Chapter 3: Software Support
Motherboard DIY Troubleshooting Guide - Page 71
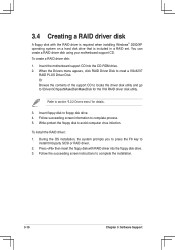
...;oppy disk to avoid computer virus infection.
To install the RAID driver:
1. During the OS installation, the system prompts you to press the F6 key to install third-party SCSI or RAID driver.
2. Press then insert the floppy disk with RAID driver into the floppy disk drive. 3. Follow the succeeding screen instructions to complete the installation.
3-10
Chapter 3: Software Support