Asus P5G41-M SI DVI driver and firmware

Related Asus P5G41-M SI DVI Manual Pages
Download the free PDF manual for Asus P5G41-M SI DVI and other Asus manuals at ManualOwl.com
User Manual - Page 2
... the express written permission of ASUSTeK Computer Inc. ("ASUS"). Product warranty or service will not be extended if: (1) the product is repaired, modified or altered, unless such repair, modification of alteration is authorized in writing by ASUS; or (2) the serial number of the product is defaced or missing. ASUS PROVIDES THIS MANUAL "AS IS" WITHOUT WARRANTY OF...
User Manual - Page 3
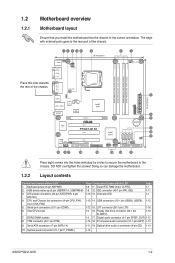
... 1-9 1.7.1 Rear panel ports 1-9 1.7.2 Internal connectors 1-10 1.8 Software support 1-17 1.8.1 Installing an operating system 1-17 1.8.2 Support DVD information 1-17
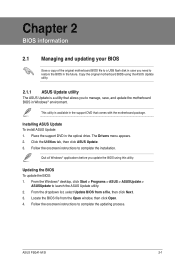
Chapter 2: BIOS information 2.1 Managing and updating your BIOS 2-1
2.1.1 ASUS Update utility 2-1 2.1.2 ASUS EZ Flash 2 utility 2-2 2.1.3 ASUS CrashFree BIOS 2-3 2.2 BIOS setup program 2-4 2.2.1 BIOS menu screen 2-5
iii
User Manual - Page 4
... IDE Master/Slave and SATA 1-4 2-7 2.3.5 Storage Configuration 2-8 2.3.6 System Information 2-8 2.4 Advanced menu 2-9 2.4.1 CPU Configuration 2-9 2.4.2 Chipset 2-10 2.4.3 Onboard Devices Configuration 2-11 2.4.4 USB Configuration 2-11 2.4.5 PCI PnP 2-12 2.5 Power menu 2-13 2.5.1 Suspend Mode 2-13 2.5.2 ACPI 2.0 Support 2-13 2.5.3 ACPI APIC Support 2-13 2.5.4 APM Configuration 2-13...
User Manual - Page 5
... with the limits for a Class B digital device, pursuant to Part 15 of the FCC Rules. These limits are designed to provide reasonable protection against harmful interference in a residential installation. This equipment generates, uses and can radiate radio frequency energy and, if not installed and used in accordance with manufacturer's instructions, may cause harmful interference to...
User Manual - Page 6
...; DISPOSE OF USED BATTERIES ACCORDING TO THE ABOVE BATTERY-RELATED INSTRUCTIONS.
Operation safety
• Before installing the motherboard and adding devices on it, carefully read all the manuals that came with the package.
• Before using the product, ensure that all cables are correctly connected and the power cables are not damaged. If you detect any damage, contact...
User Manual - Page 7

... the existing system before you add a device.
• Before connecting or removing signal cables from the motherboard, ensure that all power cables are unplugged.
• Seek professional assistance before using an adpater or extension cord. These devices could interrupt the grounding circuit.
• Make sure that your power supply is set to the correct voltage in your area...
User Manual - Page 8
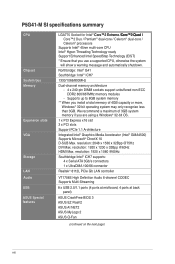
... DVI Max. resolution: 1920 x 1200 x 32Bpp @60Hz HDMI Max. resolution: 1920 x 1080 @60Hz
Southbridge Intel® ICH7 supports: 4 x Serial ATA 3Gb/s connectors
1 x UltraDMA 100/66 connector
Realtek® 8112L PCIe Gb LAN controller
VT1708S High Definition Audio 6-channel CODEC Supports Multi-Streaming
8 x USB 2.0/1.1 ports (4 ports at mid-board, 4 ports at back panel)
ASUS CrashFree BIOS 3
ASUS...
User Manual - Page 9
...
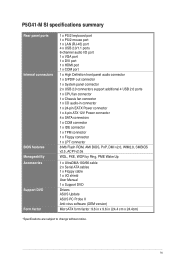
1 x TPM connector
1 x Floppy connector
1 x LPT connector
8 Mb Flash ROM, AMI BIOS, PnP, DMI v2.0, WfM2.0, SMBIOS v2.5, ACPI v2.0a
WOL, PXE, WOR by Ring, PME Wake Up
1 x UltraDMA 100/66 cable 2 x Serial ATA cables 1 x Floppy cable 1 x I/O shield User Manual
1 x Support DVD
Drivers ASUS Update
ASUS PC Probe II
Anti-virus software (OEM version)
MicroATX form factor: 9.6 in x 9.6 in (24.4 cm x 24...
User Manual - Page 10

...; P5G41-M SI motherboard! Before you start installing the motherboard, and hardware devices on it, check the items in your motherboard package. Refer to page ix for the list of accessories.
If any of the items is damaged or missing, contact your retailer.
1.1 Before you proceed
Take note of the following precautions before you install motherboard components or change any motherboard settings...
User Manual - Page 11
...
1-12 15. LPT connector (26-1 pin LTP)
1-16
1-3 16. Floppy disk drive connector (34-1 pin
1-16
FLOPPY)
1-3 17. Digital audio connector (4-1 pin SPDIF_OUT) 1-15
1-14 18. Front panel audio connector (10-1 pin AAFP) 1-15
9. Serial ATA connectors (7-pin SATA1-4)
1-11 19. Optical drive audio in connector (4-pin CD) 1-13
10. System panel connector (10-1 pin F_PANEL)
1-14
ASUS P5G41-M SI
1-2
User Manual - Page 12

... all power cables are unplugged before installing the CPU.
• Upon purchase of the motherboard, ensure that the PnP cap is on the socket and the socket contacts are not bent. Contact your retailer immediately if the PnP cap is missing, or if you see any damage to the PnP cap/socket contacts/motherboard components. ASUS will...
User Manual - Page 13
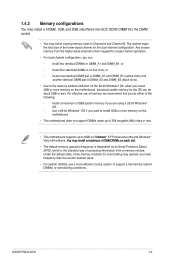
...dependent on its Serial Presence Detect (SPD), which is the standard way of accessing information from a memory module. Under the default state, some memory modules for overclocking may operate at a lower frequency than the vendor-marked value.
• For system stability, use a more efficient cooling system to support a full memory load (4 DIMMs) or overclocking conditions.
ASUS P5G41-M SI
1-4
User Manual - Page 16
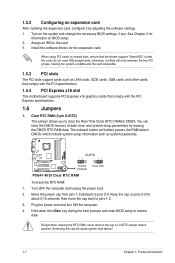
... PCI slots support cards such as LAN cards, SCSI cards, USB cards, and other cards that comply with the PCI specifications.
1.5.4 PCI Express x16 slot
This motherboard supports PCI Express x16 graphics cards that comply with the PCI Express specifications.
1.6 Jumpers
1. Clear RTC RAM (3-pin CLRTC) This jumper allows you to clear the Real Time Clock (RTC) RAM in CMOS. You can clear the CMOS memory...
User Manual - Page 20
...
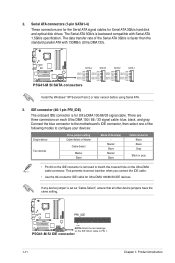
GND
P5G41-M SI SATA connectors
Install the Windows® XP Service Pack 2 or later version before using Serial ATA.
3. IDE connector (40-1 pin PRI_IDE)
The onboard IDE connector is for Ultra DMA 100/66/33 signal cable. There are three connectors on each Ultra DMA 100 / 66 / 33 signal cable: blue, black, and gray. Connect the blue connector to the motherboard's IDE...
User Manual - Page 26
... updates to maximize the features of your hardware.
• Motherboard settings and hardware options vary. Refer to your OS documentation for detailed information.
• Ensure that you install Windows® XP Service Pack 3 or later versions / Windows® Vista Service Pack 1 or later versions before installing the drivers for better compatibility and system stability.
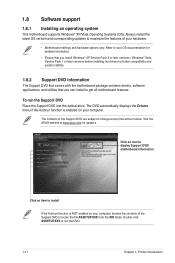
1.8.2 Support...
User Manual - Page 27
... to a USB flash disk in case you need to restore the BIOS in the future. Copy the original motherboard BIOS using the ASUS Update utility.
2.1.1 ASUS Update utility
The ASUS Update is a utility that allows you to manage, save, and update the motherboard BIOS in Windows® environment.
This utility is available in the support DVD that comes with the motherboard package.
Installing ASUS Update To...
User Manual - Page 29
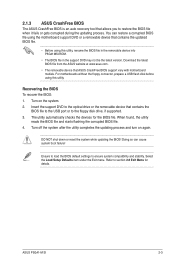
... removable device that ASUS CrashFree BIOS support vary with motherboard models. For motherboards without the floppy connector, prepare a USB flash disk before using this utility.
Recovering the BIOS To recover the BIOS: 1. Turn on the system. 2. Insert the support DVD to the optical drive or the removable device that contains the
BIOS file to the USB port or to the floppy disk drive, if supported...
User Manual - Page 30
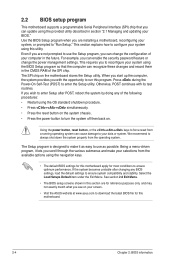
... example, you can enable the security password feature or change the power management settings. This requires you to reconfigure your system using the BIOS Setup program so that the computer can recognize these changes and record them in the CMOS RAM of the SPI chip. The SPI chip on the motherboard stores the Setup utility. When you start up the...
User Manual - Page 41
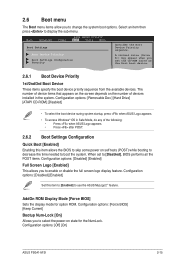
... logo display feature. Configuration options: [Disabled] [Enabled]
Set this item to [Enabled] to use the ASUS MyLogo2™ feature.
AddOn ROM Display Mode [Force BIOS] Sets the display mode for option ROM. Configuration options: [Force BIOS] [Keep Current]
Bootup Num-Lock [On] Allows you to select the power-on state for the NumLock. Configuration options: [Off] [On]
ASUS P5G41-M SI
2-15
User Manual - Page 43
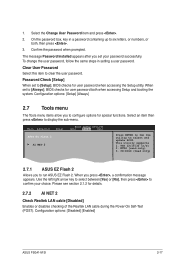
... an item then press to display the sub-menu.
Main Advanced
Power
BIOS SETUP UTILITY Boot Tools Exit
ASUS EZ Flash 2
AI NET 2
Press ENTER to run the utility to select and update BIOS. This utility supports 1. FAT 12/16/32 (r/w) 2. NTFS (read only) 3. CD-DISC (read only)
2.7.1 ASUS EZ Flash 2
Allows you to run ASUS EZ Flash 2. When you press , a confirmation message...