Asus P8Z68-V driver and firmware

Related Asus P8Z68-V Manual Pages
Download the free PDF manual for Asus P8Z68-V and other Asus manuals at ManualOwl.com
User Manual - Page 4


...3.5.1 CPU Configuration 3-15
3.5.2 System Agent Configuration 3-17
3.5.3 PCH Configuration 3-17
3.5.4 SATA Configuration 3-18
3.5.5 USB Configuration 3-20
3.5.6 Onboard Devices Configuration 3-21
3.5.7 APM 3-24
3.6 Monitor menu 3-25
3.7 Boot menu 3-28
3.8 Tools menu 3-29
3.8.1 ASUS EZ Flash 2 Utility 3-29
3.8.2. ASUS O.C. Profile 3-30
3.9 Exit menu 3-31
3.10 Updating BIOS...
User Manual - Page 5

... Serial ATA hard disks 4-18 4.4.3 Setting the RAID item in BIOS 4-18 4.4.4 Intel® Rapid Storage Technology Option ROM utility 4-18 4.5 Creating a RAID driver disk 4-24 4.5.1 Creating a RAID driver disk without entering the OS 4-24 4.5.2 Creating a RAID driver disk in Windows 4-24 4.5.3 Installing the RAID driver during Windows® OS installation....... 4-25 4.5.4 Using a USB...
User Manual - Page 8

... motherboard package and the software. • Chapter 5: Multiple GPU technology support This chapter describes how to install and configure multiple ATI® CrossFireX™ and NVIDIA® SLI™ graphics cards.
Where to find more information
Refer to the following sources for additional information and for product and software updates. 1. ASUS websites
The ASUS website provides updated...
User Manual - Page 12
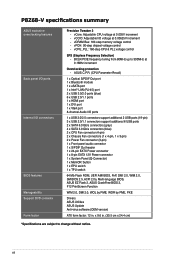

... - ASUS C.P.R. (CPU Parameter Recall)
1 x Optical S/PDIF Out port 1 x Bluetooth module 1 x eSATA port 1 x Intel® LAN (RJ-45) port 2 x USB 3.0/2.0 ports (blue) 6 x USB 2.0/1.1 ports 1 x HDMI port 1 x DVI port 1 x VGA port 8-channel Audio I/O ports
1 x USB 3.0/2.0 connectors support additional 2 USB ports (19-pin) 3 x USB 2.0/1.1 connectors support additional 6 USB ports 2 x SATA 6.0 Gb...
User Manual - Page 33
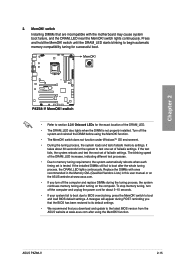

... fail to boot due to BIOS overclocking, press the MemOK! switch to boot and load BIOS default settings. A messgae will appear during POST reminding you that the BIOS has been restored to its default settings.
• We recommend that you download and update to the latest BIOS version from the ASUS website at www.asus.com after using the MemOK! function.
ASUS P8Z68-V
2-15
User Manual - Page 61
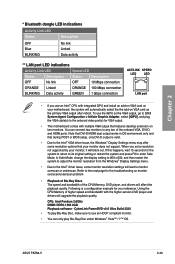

... any two of the onboard VGA, DVI-D, and HDMI ports. Note that DVI-D/HDMI dual output works in OS environment only and that during POST or BIOS setup, only DVI-D output is valid.
• Due to the Intel® VGA driver issue, the Windows® Display Settings menu may offer some resolution options that your monitor does not support. When you set a resolution not supported by your monitor, it...
User Manual - Page 98
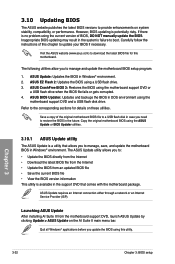

... the instructions of this chapter to update your BIOS if necessary.
Visit the ASUS website (www.asus.com) to download the latest BIOS file for this motherboard.
The following utilities allow you to manage and update the motherboard BIOS setup program.
1. ASUS Update: Updates the BIOS in Windows® environment. 2. ASUS EZ Flash 2: Updates the BIOS using a USB flash drive. 3. ASUS CrashFree BIOS...
User Manual - Page 107
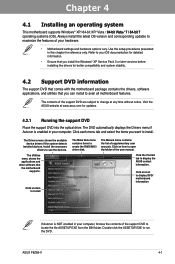

... drivers, software applications, and utilities that you can install to avail all motherboard features.
The contents of the support DVD are subject to change at any time without notice. Visit the ASUS website at www.asus.com for updates.
4.2.1 Running the support DVD
Place the support DVD into the optical drive. The DVD automatically displays the Drivers menu if Autorun is enabled in your computer...
User Manual - Page 109
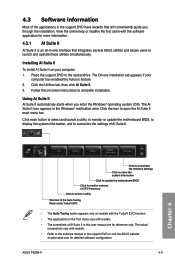

... Suite II on your computer 1. Place the support DVD to the optical drive. The Drivers installation tab appears if your
computer has enabled the Autorun feature. 2. Click the Utilities tab, then click AI Suite II. 3. Follow the onscreen instructions to complete installation.
Using AI Suite II AI Suite II automatically starts when you enter the Windows® operating system (OS...
User Manual - Page 122
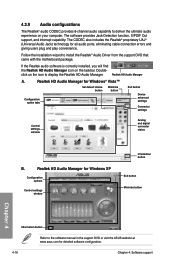

... tabs
Exit button
Device advanced settings
Connector settings
Control settings window
Analog and digital connector status
B.
Realtek HD Audio Manager for Windows XP
Configuration options
Control settings window
Information button
Exit button Minimize button
Chapter 4
Information button
Refer to the software manual in the support DVD or visit the ASUS website at www.asus.com for detailed...
User Manual - Page 123

...
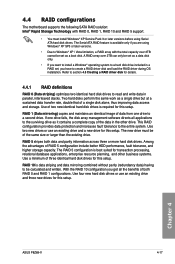
The motherboard supports the following SATA RAID solution: Intel® Rapid Storage Technology with RAID 0, RAID 1, RAID 10 and RAID 5 support.
• You must install Windows® XP Service Pack 3 or later versions before using Serial ATA hard disk drives. The Serial ATA RAID feature is available only if you are using Windows® XP SP3 or later versions.
• Due to Windows®...
User Manual - Page 128
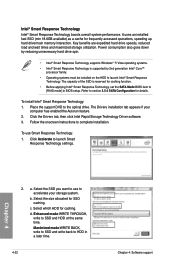

..., set the SATA Mode BIOS item to
[RAID mode] in BIOS setup. Refer to section 3.5.4 SATA Configuration for details.
To install Intel® Smart Response Technology: 1. Place the support DVD to the optical drive. The Drivers installation tab appears if your
computer has enabled the Autorun feature. 2. Click the Drivers tab, then click Intel Rapid Storage Technology Driver software. 3. Follow...
User Manual - Page 130
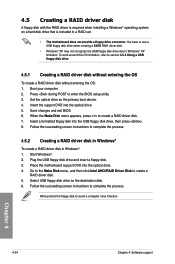

...your computer. 2. Press during POST to enter the BIOS setup utility. 3. Set the optical drive as the primary boot device. 4. Insert the support DVD into the optical drive. 5. Save changes and exit BIOS. 6. When the Make Disk menu appears, press to create a RAID driver disk. 7. Insert a formatted floppy disk into the USB floppy disk drive, then press . 8. Follow the succeeding screen instructions...
User Manual - Page 131
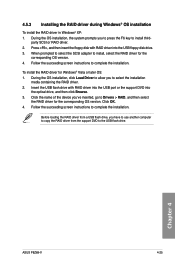

...then insert the floppy disk with RAID driver into the USB floppy disk drive. 3. When prompted to select the SCSI adapter to install, select the RAID driver for the
corresponding OS version. 4. Follow the succeeding screen instructions to complete the installation.
To install the RAID driver for Windows® Vista or later OS: 1. During the OS installation, click Load Driver to allow you to select...
User Manual - Page 132
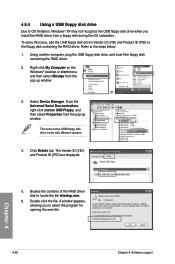

... floppy disk containing the RAID driver. Refer to the steps below: 1. Using another computer, plug the USB floppy disk drive, and insert the floppy disk
containing the RAID driver.
2. Right-click My Computer on the Windows® desktop or start menu, and then select Manage from the pop-up window.
or
3. Select Device Manager. From the Universal Serial Bus controllers, right-click xxxxxx USB Floppy...
User Manual - Page 135

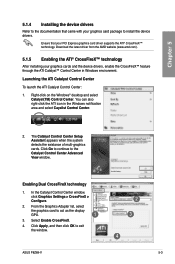
... graphics cards to your system.
To uninstall existing graphics card drivers:
1. Close all current applications. 2. For Windows XP, go to Control Panel > Add/Remove Programs.
For Windows Vista, go to Control Panel > Programs and Features. 3. Select your current graphics card driver/s. 4. For Windows XP, select Add/Remove.
For Windows Vista, select Uninstall. 5. Turn off your computer.
ASUS P8Z68...
User Manual - Page 137

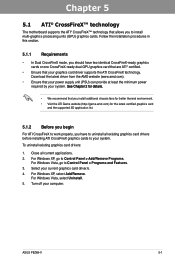
...Go to continue to the Catalyst Control Center Advanced View window.
Enabling Dual CrossFireX technology
1. In the Catalyst Control Center window, click Graphics Settings > CrossFireX > Configure.
2. From the Graphics Adapter list, select
the graphics card to act as the display GPU.
1
3. Select Enable CrossFireX.
4. Click Apply, and then click OK to exit the window.
2 3
4
ASUS P8Z68-V
5-3
User Manual - Page 139
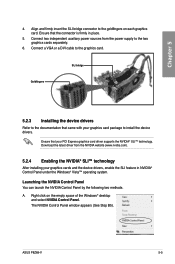

... the power supply to the two graphics cards separately.
6. Connect a VGA or a DVI cable to the graphics card.
SLI bridge
Goldfingers
5.2.3 Installing the device drivers
Refer to the documentation that came with your graphics card package to install the device drivers.
Ensure that your PCI Express graphics card driver supports the NVIDIA® SLI™ technology. Download the latest driver from...
User Manual - Page 142

... Core™ processor family.
• iGPU Multi-Monitor support option has to be enabled in BIOS before installing LucidLogix® Virtu™.
• Supports NVIDIA® GF4xx/ 5xx series & AMD® HD5xxx/ 6xxx series graphic cards.
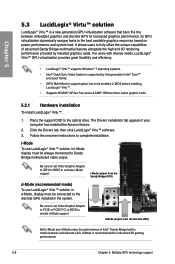
5.3.1 Hardware installation
To install LucidLogix® Virtu™:
1. Place the support DVD to the optical drive. The Drivers installation tab appears if...
User Manual - Page 143

Chapter 5
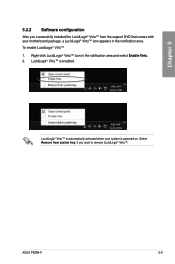
5.3.2 Software configuration
After you successfully installed the LucidLogix® Virtu™ from the support DVD that comes with your motherboard package, a LucidLogix® Virtu™ icon appears in the ... Virtu™ is automatically activated when your system is powered on. Select Remove from system tray, if you want to remove LucidLogix® Virtu™.
ASUS P8Z68-V
5-9

