Asus T3-M2NC51PV - T Series - 0 MB RAM driver and firmware
Drivers and firmware downloads for this Asus item

Related Asus T3-M2NC51PV Manual Pages
Download the free PDF manual for Asus T3-M2NC51PV and other Asus manuals at ManualOwl.com
User Guide - Page 2
... the express written permission of ASUSTeK COMPUTER INC. ("ASUS"). Product warranty or service will not be extended if: (1) the product is repaired, modified or altered, unless such repair, modification of alteration is authorized in writing by ASUS; or (2) the serial number of the product is defaced or missing. ASUS PROVIDES THIS MANUAL "AS IS" WITHOUT WARRANTY OF...
User Guide - Page 4
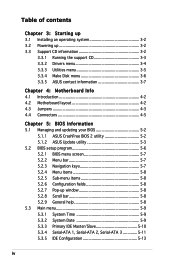
... support CD 3-3 3.3.2 Drivers menu 3-4 3.3.3 Utilities menu 3-5 3.3.4 Make Disk menu 3-6 3.3.5 ASUS contact information 3-7
Chapter 4: Motherboard Info 4.1 Introduction 4-2 4.2 Motherboard layout 4-2 4.3 Jumpers 4-3 4.4 Connectors 4-5
Chapter 5: BIOS Information 5.1 Managing and updating your BIOS 5-2
5.1.1 ASUS CrashFree BIOS 2 utility 5-2 5.1.2 ASUS Update utility 5-3 5.2 BIOS setup...
User Guide - Page 8
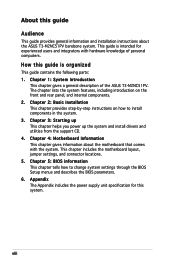
... of the ASUS T3-M2NC51PV. The chapter lists the system features, including introduction on the front and rear panel, and internal components. 2. Chapter 2: Basic installation This chapter provides step-by-step instructions on how to install components in the system. 3. Chapter 3: Starting up This chapter helps you power up the system and install drivers and utilities from the support CD...
User Guide - Page 9
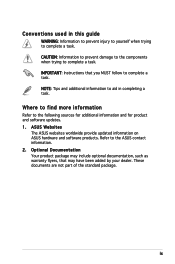
...to complete a task. IMPORTANT: Instructions that you MUST follow to complete a task. NOTE: Tips and additional information to aid in completing a task.
Where to find more information
Refer to the following sources for additional information and for product and software updates. 1. ASUS Websites
The ASUS websites worldwide provide updated information on ASUS hardware and software products. Refer to...
User Guide - Page 18
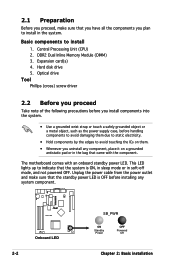
... that you have all the components you plan to install in the system.
Basic components to install 1. Central Processing Unit (CPU) 2. DDR2 Dual Inline Memory Module (DIMM) 3. Expansion card(s) 4. Hard disk drive 5. Optical drive
Tool Phillips (cross) screw driver
2.2 Before you proceed
Take note of the following precautions before you install components into the system.
• Use a grounded wrist...
User Guide - Page 20
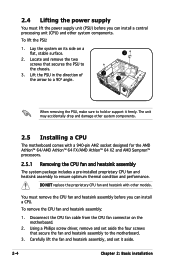
... make sure to hold or support it firmly. The unit may accidentally drop and damage other system components.
2.5 Installing a CPU
The motherboard comes with a 940-pin ...CPU fan and heatsink assembly before you can install a CPU.
To remove the CPU fan and heatsink assembly:
1. Disconnect the CPU fan cable from the CPU fan connector on the motherboard.
2. Using a Phillips screw driver, remove and set...
User Guide - Page 32
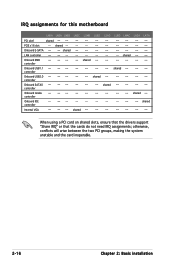
IRQ assignments for this motherboard
LNKA LNEA LNEB LNEC LSMB LUB2 LSA0 LUB0 LMAC LAZA LATA
PCI slot1
PCIE x16 slot
Onboard E-SATA
LAN controller
Onboard SMB controller
Onboard USB1.1 controller
Onboard USB2.0 controller
Onboard SATA0 controller
Onboard Azalia controller
Onboard IDE controller
Internal VGA
shared -- -- -- shared -- -- -- shared
-- -- --
-- -- --
-- -- --
-- -- --
--
-- ...
User Guide - Page 39
Chapter 3
This chapter helps you power up the system and install drivers and utilities from the support CD.
Starting up
User Guide - Page 40
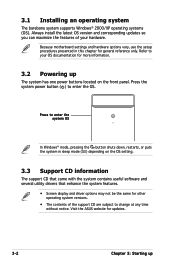
... supports Windows® 2000/XP operating systems (OS). Always install the latest OS version and corresponding updates so you can maximize the features of your hardware.
Because motherboard settings and hardware options vary, use the setup procedures presented in this chapter for general reference only. Refer to your OS documentation for more information.
3.2 Powering up
The system has one power...
User Guide - Page 41
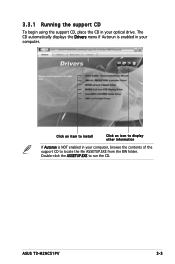
... displays the Drivers menu if Autorun is enabled in your computer.
Click an item to install
Click an icon to display other information
If Autorun is NOT enabled in your computer, browse the contents of the support CD to locate the file ASSETUP.EXE from the BIN folder. Double-click the ASSETUP.EXE to run the CD.
ASUS T3-M2NC51PV...
User Guide - Page 42
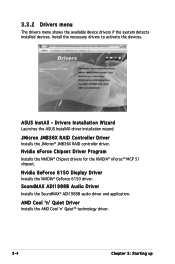
... the devices.
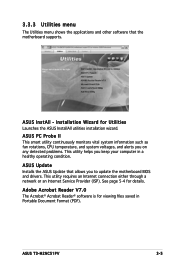
ASUS InstAll - Drivers Installation Wizard Launches the ASUS InstallAll driver installation wizard.
JMicron JMB36X RAID Controller Driver Installs the JMicron® JMB36X RAID controller driver. Nvidia nForce Chipset Driver Program Installs the NVIDIA® Chipset drivers for the NVIDIA® nForce™ MCP 51 chipset.
Nvidia GeForce 6150 Display Driver Installs the NVIDIA...
User Guide - Page 43
....
ASUS Update Installs the ASUS Update that allows you to update the motherboard BIOS and drivers. This utility requires an Internet connection either through a network or an Internet Service Provider (ISP). See page 5-4 for details.
Adobe Acrobat Reader V7.0 The Acrobat® Acrobat Reader® software is for viewing files saved in Portable Document Format (PDF).
ASUS T3-M2NC51PV
3-
User Guide - Page 44
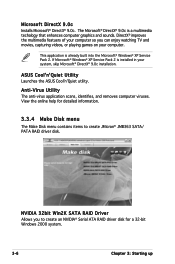
... The anti-virus application scans, identifies, and removes computer viruses. View the online help for detailed information.
3.3.4 Make Disk menu
The Make Disk menu contains items to create JMicron® JMB363 SATA/ PATA RAID driver disk.
NVIDIA 32bit Win2K SATA RAID Driver
Allows you to create an NVIDIA® Serial ATA RAID driver disk for a 32-bit Windows 2000 system.
3-
Chapter 3: Starting...
User Guide - Page 45
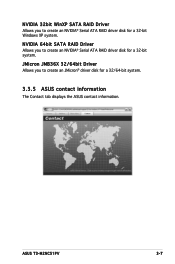
...® Serial ATA RAID driver disk for a 32-bit Windows XP system.
NVIDIA 64bit SATA RAID Driver Allows you to create an NVIDIA® Serial ATA RAID driver disk for a 32-bit system.
JMicron JMB36X 32/64bit Driver Allows you to create an JMicron® driver disk for a 32/64-bit system.
3.3.5 ASUS contact information
The Contact tab displays the ASUS contact information.
ASUS T3-M2NC51PV
3-
User Guide - Page 48

...Introduction
The ASUS M2N5-BN motherboard comes already installed in the ASUS T3-M2NC51PV system. This chapter provides technical information about the motherboard for future upgrades or system reconfiguration.
4.2 Motherboard layout
ESATA
22.4cm (8.8in) VGA_DVI
AUDIO
PS/2KBM S T: Mouse B: Keyboard
LAN_USB34
USBPW56
1394_USB
USBPW34 USBPW12 KBPWR
CR2032 3V Lithium Cell CMOS Power
Marvell...
User Guide - Page 56
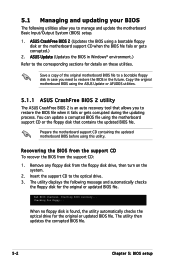
... support CD or the floppy disk that contains the updated BIOS file.
Prepare the motherboard support CD containing the updated motherboard BIOS before using this utility.
Recovering the BIOS from the support CD To recover the BIOS from the support CD:
1. Remove any floppy disk from the floppy disk drive, then turn on the system.
2. Insert the support CD to the optical drive. 3. The utility displays...
User Guide - Page 57
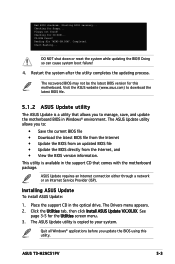
... (ISP).
Installing ASUS Update To install ASUS Update:
1. Place the support CD in the optical drive. The Drivers menu appears. 2. Click the Utilities tab, then click Install ASUS Update VX.XX.XX. See
page 3-5 for the Utilities screen menu. 3. The ASUS Update utility is copied to your system.
Quit all Windows® applications before you update the BIOS using this utility.
ASUS T3-M2NC51PV
5-
User Guide - Page 58
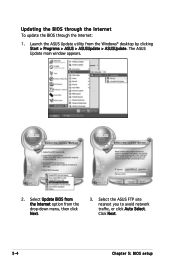
... Internet:
1. Launch the ASUS Update utility from the Windows® desktop by clicking Start > Programs > ASUS > ASUSUpdate > ASUSUpdate. The ASUS Update main window appears.
2. Select Update BIOS from the Internet option from the drop‑down menu, then click Next.
3. Select the ASUS FTP site nearest you to avoid network traffic, or click Auto Select. Click Next.
5-
Chapter 5: BIOS setup
User Guide - Page 59
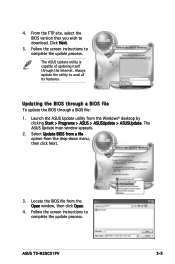
... the BIOS version that you wish to download. Click Next.
5. Follow the screen instructions to complete the update process.
The ASUS Update utility is capable of updating itself through the Internet. Always update the utility to avail all its features.
Updating the BIOS through a BIOS file To update the BIOS through a BIOS file:
1. Launch the ASUS Update utility from the Windows® desktop by...
User Guide - Page 60
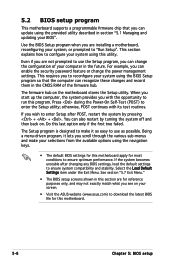
... can enable the security password feature or change the power management settings. This requires you to reconfigure your system using the BIOS Setup program so that the computer can recognize these changes and record them in the CMOS RAM of the firmware hub.
The firmware hub on the motherboard stores the Setup utility. When you start up the computer, the system provides you...