Asus TX97-XE driver and firmware

Related Asus TX97-XE Manual Pages
Download the free PDF manual for Asus TX97-XE and other Asus manuals at ManualOwl.com
TX97-XE User Manual - Page 2
... NOTICE, AND SHOULD NOT BE CONSTRUED AS A COMMITMENT BY ASUS. ASUS ASSUMES NO RESPONSIBLITY OR LIABILITY FOR ANY ERRORS OR INACCURACIES THAT MAY APPEAR IN THIS MANUAL, INCLUDING THE PRODUCTS AND SOFTWARES DESCRIBED IN IT.
Copyright © 1998 ASUSTeK COMPUTER INC. All Rights Reserved.
Product Name: ASUS TX97-XE
Manual Revision: 3.03
Release Date:
July 1998
2
ASUS TX97-XE User's Manual
TX97-XE User Manual - Page 4

...(CPU 22 4. Expansion Cards 23 Expansion Card Installation Procedure 23 Assigning IRQs for Expansion Cards 23 Assigning DMA Channels for ISA Cards 24 ISA Cards and Hardware Monitor 24 5. External Connectors 25 Power Connection Procedures 33
IV. BIOS SOFTWARE 34 Support Software 34 Flash Memory Writer Utility 34 Main Menu 34 Managing and Updating Your Motherboard's BIOS 36 6. BIOS Setup...
TX97-XE User Manual - Page 5
... Audio Driver CD Contents 61
Audio Drivers Installation 61
Win95 Audio Drivers 62
Win3.x Audio Drivers 63 Configuration Manager 63 Creative PnP Configuration Manager (CTCM 63 Audio Software 65 Environment Variables 69 SOUND Environment variable 69 BLASTER Environment Variable 69 MIDI Environment Variable 70 Maximum Recording Rates for the Audio Hardware 70
ASUS TX97-XE User's Manual...
TX97-XE User Manual - Page 7
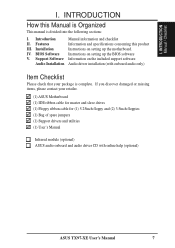
... or missing items, please contact your retailer.
(1) ASUS Motherboard (1) IDE ribbon cable for master and slave drives (1) Floppy ribbon cable for (1) 5.25inch floppy and (2) 3.5inch floppies (1) Bag of spare jumpers (1) Support drivers and utilities (1) User's Manual
Infrared module (optional) ASUS audio onboard and audio driver CD with online help (optional)
ASUS TX97-XE User's Manual
7
TX97-XE User Manual - Page 9
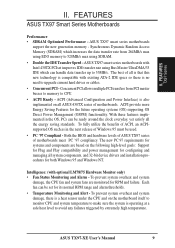
... new technology is compatible with existing ATA-2 IDE specs so there is no need to upgrade current hard drives or cables.
• Concurrent PCI - Concurrent PCI allows multiple PCI transfers from PCI master busses to memory to CPU.
• ACPI Ready - ACPI (Advanced Configuration and Power Interface) is also implemented on all ASUS 430TX series of motherboards. ACPI provide more Energy Saving...
TX97-XE User Manual - Page 23
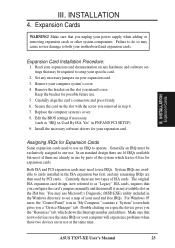
... the slot with the screw you removed in step 4. 7. Replace the computer system's cover. 8. Edit the BIOS settings if necessary.
(such as "IRQ xx Used By ISA: Yes" in PNP AND PCI SETUP) 9. Install the necessary software drivers for your expansion card.
Assigning IRQs for Expansion Cards
Some expansion cards need to use an IRQ to operate. Generally an IRQ must...
TX97-XE User Manual - Page 33
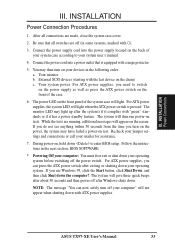
... 30 seconds from the time you turn on the power, the system may have failed a power-on test. Recheck your jumper settings and connections or call your retailer for assistance.
7. During power-on, hold down to enter BIOS setup. Follow the instructions in the next section, BIOS SOFTWARE.
* Powering Off your computer: You must first exit or shut down your operating...
TX97-XE User Manual - Page 35
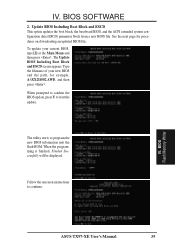
... new BIOS and the path, for example, A:\XX2I1002.AWD, and then press .
When prompted to confirm the BIOS update, press Y to start the update.
The utility starts to program the new BIOS information into the flash ROM. When the programming is finished, Flashed Successfully will be displayed.
Follow the onscreen instructions to continue.
IV. BIOS Flash Memory Writer
ASUS TX97-XE User's Manual
35
TX97-XE User Manual - Page 36
... from booting up. Just repeat the process, and if the problem still persists, update the original BIOS file you saved to disk above. If the Flash Memory Writer utility was not able to successfully update a complete BIOS file, your system may not be able to boot up. If this happens, your system will need service.
IV. BIOS Updating BIOS
36
ASUS TX97-XE User's Manual
TX97-XE User Manual - Page 37
IV. BIOS SOFTWARE
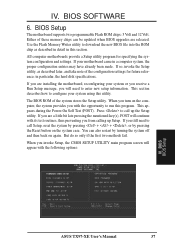
6. BIOS Setup
The motherboard supports two programmable Flash ROM chips: 5 Volt and 12 Volt. Either of these memory chips can be updated when BIOS upgrades are released. Use the Flash Memory Writer utility to download the new BIOS file into the ROM chip as described in detail in this section.
All computer motherboards provide a Setup utility program for specifying the system ...
TX97-XE User Manual - Page 39
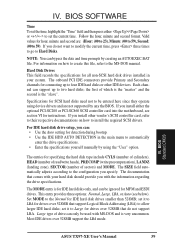
... since they operate using device drivers and are not supported by any the BIOS. If you install either the optional PCI-SC200 or PCI-SC860 SCSI controller card into the motherboard, see section VI for instructions. If you install other vendor's SCSI controller card, refer to their respective documentations on how to install the required SCSI drivers.
For IDE hard disk drive setup, you can: •...
TX97-XE User Manual - Page 47
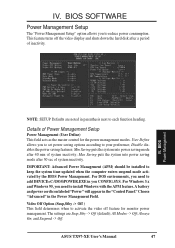
... system time updated when the computer enters suspend mode activated by the BIOS Power Management. For DOS environments, you need to add DEVICE=C:\DOS\POWER.EXE in you CONFIG.SYS. For Windows 3.x and Windows 95, you need to install Windows with the APM feature. A battery and power cord icon labeled "Power" will appear in the "Control Panel." Choose "Advanced" in the Power Management Field...
TX97-XE User Manual - Page 56
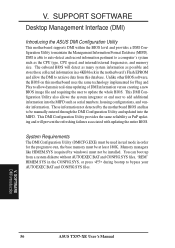
V. SUPPORT SOFTWARE
Desktop Management Interface (DMI)
Introducing the ASUS DMI Configuration Utility
This motherboard supports DMI within the BIOS level and provides a DMI Configuration Utility to maintain the Management Information Format Database (MIFD). DMI is able to auto-detect and record information pertinent to a computer's system such as the CPU type, CPU speed, and internal/external ...
TX97-XE User Manual - Page 60
... number are both printed on the board itself. Manual revisions are released for each board design represented by the digit before and after the period of the manual revision number. Manual updates are represented by the third digit in the manual revision number.
For previous or updated manuals, BIOS, drivers, or product release information, contact ASUS at http://www.asus.com.tw or through any...
TX97-XE User Manual - Page 61
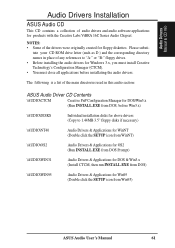
Audio Drivers Manual & CD Info
Audio Drivers Installation
ASUS Audio CD
This CD contains a collection of audio drivers and audio software applications for products with the Creative Labs ViBRA 16C Series Audio Chipset.
NOTES: • Some of the drivers were originally created for floppy diskettes. Please substi-
tute your CD ROM drive letter (such as D:) and the corresponding directory names in ...
TX97-XE User Manual - Page 63
... DOS prompt.
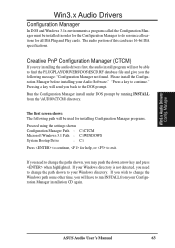
Run the Configuration Manager install under DOS prompt by running INSTALL from the \AUDIO\CTCM\ directory.
The first screen shows: The following path will be used for installing Configuration Manager programs.
Proceed using the settings shown
Configuration Manager Path : C:\CTCM
Microsoft Windows 3.1 Path : C:\WINDOWS
System Bootup Drive
: C:\
Press to continue, for help, or...
TX97-XE User Manual - Page 64
....
The following lines will be added to your system files: C:\AUTOEXEC.BAT file:
SET CTCM=C:\CTCM C:\CTCM\CTCU /S /W=C:\WINDOWS C:\CONFIG.SYS file: DEVICE=C:\CTCM\CTCM.EXE Press to continue, for help, or to exit.
A message will appear on the next screen: Software installation completed. The following files were modified and its original saved with B~K extension...
TX97-XE User Manual - Page 65
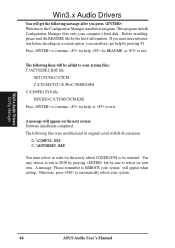
Win3.x Audio Drivers
Audio Software
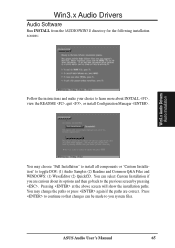
Run INSTALL from the \AUDIO\WIN31\ directory for the following installation screens:
Win3.x Audio Drivers Audio Installation
Follow the instructions and make your choice to learn more about INSTALL , view the README , quit , or install Configuration Manager .
You may choose "Full Installation" to install all components or "Custom Installation" to toggle DOS: ...
TX97-XE User Manual - Page 68
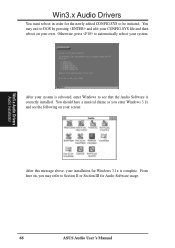
... is rebooted, enter Windows to see that the Audio Software is correctly installed. You should here a musical chime as you enter Windows 3.1x and see the following on your screen:
After this message above, your installation for Windows 3.1x is complete. From here on, you may refer to Section II or Section III for Audio Software usage.
68
ASUS Audio User's Manual
TX97-XE User Manual - Page 69
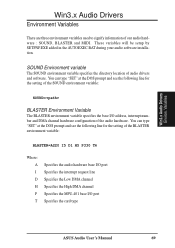
... environment variables used to signify information of our audio hardware : SOUND, BLASTER and MIDI. These variables will be setup by SETPNP.EXE added in the AUTOEXEC.BAT during your audio software installation.
SOUND Environment variable
The SOUND environment variable specifies the directory location of audio drivers and software. You can type "SET" at the DOS prompt and see the...