Biostar M7VIG PRO D driver and firmware

Related Biostar M7VIG PRO D Manual Pages
Download the free PDF manual for Biostar M7VIG PRO D and other Biostar manuals at ManualOwl.com
M7VIG Pro D user's manual - Page 1
...digital device, pursuant to Part 15 of the FCC Rules. These limits are designed to provide reasonable protection against harmful interference in a residential installation.... This equipment generates, uses and can radiate radio frequency energy and, if not installed and used in accordance with the instructions...content of this user's manual is subject to be changed without notice and we ...
M7VIG Pro D user's manual - Page 2
...;sse & Slots 16
WARPSPEEDER 23
Introduction...23 System Requirement 23 Installation...24 Usage...25
STUDIOFUN!TM 33
Introduction...33 Hardware Requirements 33 Installation Procedure 33 Booting to StudioFun 35 Media control ...36 Control Panel ...37 Software Details...39 Select Region...41 Screensaver ...42 Display Settings...43 File Manager...44
TROUBLE SHOOTING 1 PROBLEMLÖSUNG 2
ii
M7VIG Pro D user's manual - Page 6
... 2.88Mbytes. 2 USB2.0 ports. 1 front audio header.
Dimensions Micro ATX Form Factor: 21.3 X 24.4cm (W X L)
B. BIOS & Software
BIOS Award legal Bios. Supports APM1.2. Supports ACPI. Supports USB Function.
Software Supports WarpspeederTM, 9th TouchTM, FLASHER™, WinFlasherTM and StudioFun!TM (optional). Offers the highest performance for Windows 98 SE, Windows 2000, Windows Me, Windows XP, SCO...
M7VIG Pro D user's manual - Page 7
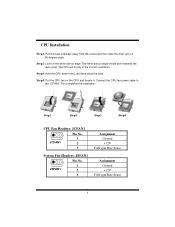
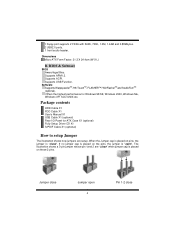
... fit only in the correct orientation.
Step3: Hold the CPU down firmly, and then close the lever.
Step4: Put the CPU fan on the CPU and buckle it. Connect the CPU fan power cable to the JCFAN1. This completes the installation.
Step1
Step2
Step3
Step4
CPU Fan Headers: JCFAN1
1
3
JCFAN1
Pin No. 1 2
3
System Fan Headers: JSFAN1
1
3
JSFAN1
Pin...
M7VIG Pro D user's manual - Page 8
...***
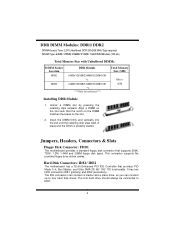
Total Memory Size (MB)
Max is 2GB
Installing DDR Module...Disk Connector: FDD1
The motherboard provides a standard floppy disk connector that supports 360K, 720K, 1.2M, 1.44M and 2.88M floppy disk types. This connector supports the provided floppy drive ribbon cables.
Hard Disk Connectors: IDE1/ IDE2
The motherboard has a 32-bit Enhanced PCI IDE Controller that provides PIO Mode 0~4, Bus...
M7VIG Pro D user's manual - Page 25

.... Also, in the About panel, you can get detail descriptions about BIOS model and chipsets. In addition, the frequency status of CPU, memory, AGP and PCI along with the CPU speed are synchronically shown on our main panel. Moreover, to protect users' computer systems if the setting is not appropriate when testing and results in system fail or...
M7VIG Pro D user's manual - Page 26
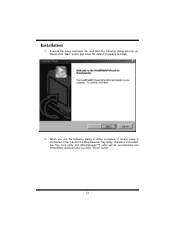
... file, and then the following dialog will pop up. Please click "Next" button and follow the default procedure to install.
2. When you see the following dialog in setup procedure, it means setup is completed. If the "Launch the WarpSpeeder Tray Utility" checkbox is checked, the Tray Icon utility and [WarpSpeeder™] utility will...
M7VIG Pro D user's manual - Page 27
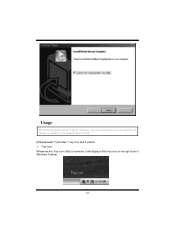
Usage
The following figures are just only for reference, the screen printed in this user manual will change according to your motherboard on hand. [WarpSpeeder™] includes 1 tray icon and 5 panels: 1. Tray Icon: Whenever the Tray Icon utility is launched, it will display a little tray icon on the right side of Windows Taskbar.
25
M7VIG Pro D user's manual - Page 28

..., [ WarpSpeeder™ ] utility will be invoked. Please refer do the following figure; the utility's first window you will see is Main Panel.
Main Panel contains features as follows:
a. Display the CPU Speed, CPU external clock, Memory clock, AGP clock, and PCI clock information. b. Contains About, Voltage, Overclock, and Hardware Monitor Buttons for invoking respective panels. c. With...
M7VIG Pro D user's manual - Page 35
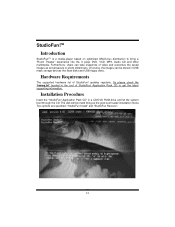
... can be stored in USB mass storage devices like flash disks and USB floppy disks.
Hardware Requirements
The supported hardware list of StudioFun! updates regularly. So please check the "hwreq.txt" located in the root of StudioFun! Application Pack CD to get the latest supporting information.
Installation Procedure
Insert the "StudioFun! Application Pack CD" in a CD/DVD ROM drive and let the system...
M7VIG Pro D user's manual - Page 36
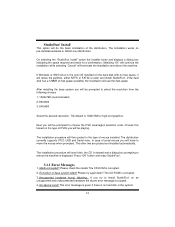
... installed. The distribution currently supports PS/2, USB and Serial mice. In case of serial mouse you will have to move the mouse when prompted. The other two are probed and installed automatically.
The installation procedure will now finish, the CD is ejected and a dialog box prompting to reboot the machine is displayed. Press "OK" button and enjoy StudioFun!.
3.1.1 Error...
M7VIG Pro D user's manual - Page 37
...MBR (Master Boot record) corruption, the "StudioFun Recover" will automatically probe the hard disk master boot record and find out the installed operating system(s). Once success, it will re-install the boot loader...boot loader option specified from other GNU/Linux installations.
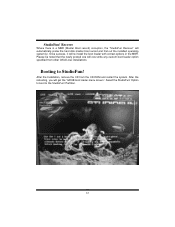
Booting to StudioFun!
After the Installation, remove the CD from the CD-ROM and restart the system. After the rebooting,...
M7VIG Pro D user's manual - Page 38
... of the Desktop application.
Desktop
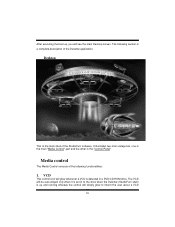
This is the main shell of the StudioFun! software. It illustrates two main categories, one is the main "Media Control" part and the other is the "Control Panel".
Media control
The Media Control consists of the following functionalities:
1. VCD
This control icon will glow whenever a VCD is detected in a DVD/CD-ROM drive. The VCD...
M7VIG Pro D user's manual - Page 41

Software Details
XINE
XINE is a multimedia player. It plays back Audio CD, DVD, and VCD. It also decodes multimedia files like AVI, MOV, WMV, and MP3 from local disk drives. It interprets most of the common multimedia formats.
• Features of Xine a. Skinnable GUI b. Navigation controls (seeking, pause, fast, slow, next chapter, etc) c. On Screen Display (OSD) features...
M7VIG Pro D user's manual - Page 42
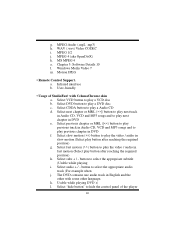
... j. MPEG 4 (aka OpenDivX) k. MS MPEG 4 a. Chapter 5: Software Details 10 l. Windows Media Video 7 m. Motion JPEG
• Remote Control Support. a. Infrared interface b. User-friendly
• Usage of StudioFun! with CelomaChrome skin a. Select VCD button to play a VCD disc b. Select DVD button to play a DVD disc c. Select CDDA button to play a Audio CD d. Select next chapter or MRL (>>|) button...
M7VIG Pro D user's manual - Page 48
... the
power indicator lights are lit, hard drive is DIMM, press down firmly until the module
spinning.
snaps into place.
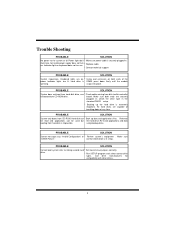
PROBABLE
SOLUTION
System does not boot from hard disk drive, can * Check cable running from disk to disk controller
be booted from CD-ROM drive.
board. Make sure both ends are securely
plugged in; check the drive type in the
standard CMOS setup...
M7VIG Pro D BIOS setup guide - Page 2
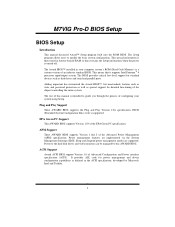
... it retains the Setup information when the power is turned off.
The Award BIOS™ installed in your computer system's ROM (Read Only Memory) is a custom version of an industry standard BIOS. This means that it supports Intel Pentium ® 4 processor input/output system. The BIOS provides critical low-level support for standard devices such as disk drives and serial and parallel ports.
Adding...
M7VIG Pro D BIOS setup guide - Page 4

... Menu allows you to select from several setup functions. Use the arrow keys to select among the items and press to accept and enter the sub-menu.
!! WARNING !! The information about BIOS defaults on manual (Figure 1,2,3,4,5,6,7,8,9) is just for reference, please refer to the BIOS installed on board, for update information.
Figure 1. Main Menu
Standard CMOS Features...
M7VIG Pro D BIOS setup guide - Page 19
M7VIG Pro-D BIOS Setup
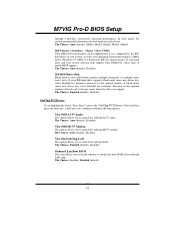
through 4 provides successively increased performance. In Auto mode, the system automatically determines the best mode for each device. The Choices: Auto (default), Mode0, Mode1, Mode2, Mode3, Mode4.
IDE Primary / Secondary Master / Slave UDMA Ultra DMA/100 functionality can be implemented if it is supported by the IDE hard drives in your system. As well...
M7VIG Pro D BIOS setup guide - Page 27
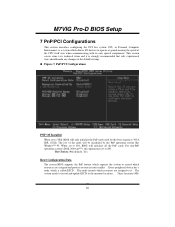
M7VIG Pro-D BIOS Setup
7 PnP/PCI Configurations
This section describes configuring the PCI bus system. PCI, or Personal Computer Interconnect, is a system which allows I/O devices to operate at speeds nearing the speed of the CPU itself uses when communicating with its own special components. This section covers some very technical items and it is strongly recommended that only experienced users ...