Brother International PEDESIGN 5.0 driver and firmware
Drivers and firmware downloads for this Brother International item


Related Brother International PEDESIGN 5.0 Manual Pages
Download the free PDF manual for Brother International PEDESIGN 5.0 and other Brother International manuals at ManualOwl.com
Users Manual - English - Page 3
... nearest service center.
Notice
This Instruction Manual does not explain how to use your computer under Windows. Please refer to the Windows manuals.
Copyright acknowledgment
MS-DOS and Windows are registered trademarks of Microsoft Corp. IBM is a registered trademark of International Business Machine Corporation.
Important
Using this unit for unauthorized copying of material from Embroidery Cards...
Users Manual - English - Page 5
...I Optional Supplies 1 I Installing the Software 2
System Requirements 2 Installation 2 Online Registration 7 Uninstallation 7 Technical Support 7
I Tips and Techniques ... the Rays 46 Setting Hole Sewing 47 Previewing the Sewing Image 48 Transferring the Data to a Card 49 Saving the ...8226; Erasing 63
Zoom-in Mode 64 Fit Design Page to Window 64 Zoom-out Mode 64
I Using the Stage 3 Tool...
Users Manual - English - Page 10
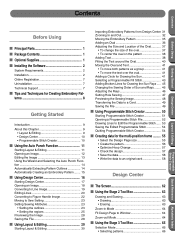
Contents
Before Using
Getting Started
Installing the Software
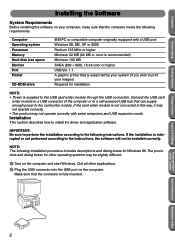
System Requirements
Before installing the software on your computer, make sure that the computer meets the following requirements.
Computer Operating system Processor Memory Hard disk free space Monitor Port Printer
CD-ROM drive
IBM-PC or compatible computer originally equipped with a USB port Windows 98, ME, XP or 2000 Pentium ...
Users Manual - English - Page 11
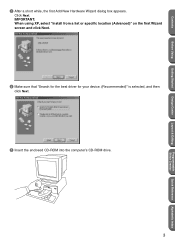
.... IMPORTANT: When using XP, select "Install from a list or specific location (Advanced)" on the first Wizard screen and click Next.
4 Make sure that "Search for the best driver for your device. (Recommended)" is selected, and then
click Next.
5 Insert the enclosed CD-ROM into the computer's CD-ROM drive.
3
Programmable Stitch Creator
Quick Reference Alphabetic...
Users Manual - English - Page 12
... Using
Getting Started
Design Center
Layout & Editing
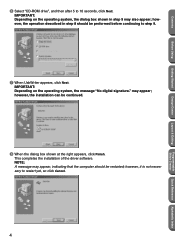
6 Select "CD-ROM drive", and then after 5 to 10 seconds, click Next.
IMPORTANT:..."No digital signature." may appear; however, the installation can be continued.
8 When the dialog box shown at the right appears, click Finish.
This completes the installation of the driver software. NOTE: A message may appear, indicating that the computer should...
Users Manual - English - Page 14
...
Layout & Editing
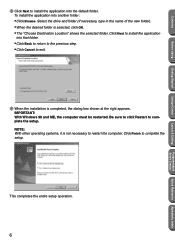
B Click Next to install the application into the default folder.
To install the application into another folder:
• Click Browse. Select the drive and folder (if necessary, type in ... the installation is completed, the dialog box shown at the right appears.
IMPORTANT: With Windows 98 and ME, the computer must be restarted. Be sure to click Restart to complete the setup. NOTE...
Users Manual - English - Page 15
... bar, select Setting, and then click Control Panel. 3 In the Control Panel window, double-click "Add/Remove Programs". 4 In the Add/Remove Programs Properties dialog box, select program, and then click Add/Remove.
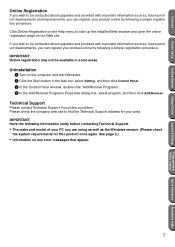
Technical Support
Please contact Technical Support if you have a problem. Please check the company web site to find the Technical Support address for your...
Users Manual - English - Page 65
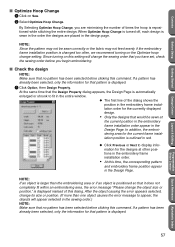
...embroidery frame installation position is changed too often, we recommend turning on the Optimize hoop change setting. Since turning on this setting will change the sewing order that you have set, check the...to fit in the entire window.
N The first line of the dialog shows the position in the embroidery frame installation order for the currently displayed design.
• Only the designs...
Users Manual - English - Page 89
... BMP (*.bmp), Exif (*.tif, *.jpg), ZSoftPCX (*.pcx), Windows Meta File (*.wmf), Portable Network Graphics (*.png), Encapsulated PostScript (*.eps), Kodak PhotoCD (*.pcd), FlashPix (*.fpx), JPEG2000 (*.j2k).
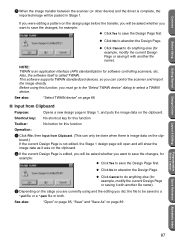
Select TWAIN device Selects which TWAIN device installed in the computer to use.
Input from TWAIN device
Operates a TWAIN standardized scanner or other device to import an image.
Input from...
Users Manual - English - Page 94

....
NOTE: If there is no TWAIN device installed, there will be no names displayed on the Sources list. Use this function after installing the driver software for the TWAIN device you want to use.
See also:
"Input from TWAIN device" below
I Input from TWAIN device
Purpose:
Operates a TWAIN standardized scanner or other device to import an image.
Shortcut key: No...
Users Manual - English - Page 95
... between the scanner (or other device) and the driver is complete, the
imported image will...API) standardization for software controlling scanners, etc. Also, the software itself is called TWAIN. This software supports TWAIN standardized devices, so you can control the scanner and import... only be done when there is image data on the clip-
board.) If the current Design Page is not edited, the Stage ...
Users Manual - English - Page 111
... screen.
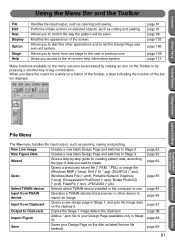
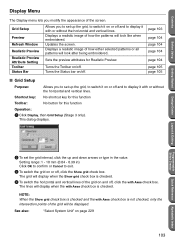
Grid Setup
Preview Refresh Window Realistic Preview Realistic Preview Attribute Setting Toolbar Status Bar
Allows you to set up the grid, to switch it on or off and to display it with or without the horizontal and vertical lines. Displays a realistic image of how the patterns will look like when embroidered. Updates the screen. Displays a realistic image...
Users Manual - English - Page 112
...).
A preview of your embroidery patterns will appear. You cannot make any settings while previewing a pattern.
2 To return to the normal working screen, click Display, then Preview again or press the Esc key.
See also:
"Sewing Order" on page 100
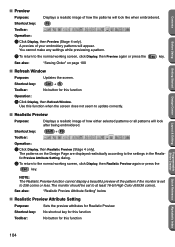
I Refresh Window
Purpose:
Updates the screen.
Shortcut key:
Ctrl + R
Toolbar:
No button for this function...
Users Manual - English - Page 121
... your Windows manual for the next operation.
See also:
"About Design Center" below
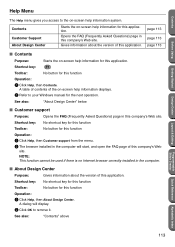
I Customer support
Purpose:
Opens the FAQ (Frequently Asked Questions) page in this company's Web site.
Shortcut key: No shortcut key for this function
Toolbar:
No button for this function
Operation:
1 Click Help, then Customer support from the menu.
2 The browser installed in the computer...
Users Manual - English - Page 164

....
See also:
"Save As" below, "Write to Card - Current Design" on page 157
I Save As
Purpose:
Saves your Design Page on the disk under a new file name.
NOTE: If you select a previous version, saved *.pes files can be opened with a previous version of the software. However, all saved data will be converted to...
Users Manual - English - Page 172
...settings of the printer.
Getting Started
Design Center
Layout & Editing
Programmable Stitch Creator
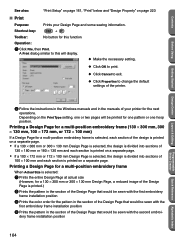
2 Follow the instructions in the Windows manuals and in the manuals of your printer for the next
operations. Depending on the Print Type setting... Design Page that would be sewn with the first embroidery
frame installation position
3 Prints the color order for the pattern in the section of...
Users Manual - English - Page 185
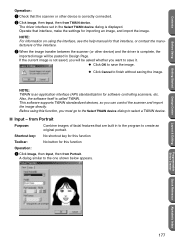
...device.
The driver interface set in the Select TWAIN device dialog is displayed. Operate that interface, make the settings for importing an image, and import the image.
NOTE: For information on using the interface, see the help manual... for software controlling scanners, etc. Also, the software itself is called TWAIN. This software supports TWAIN standardized devices, so you can control the ...
Users Manual - English - Page 187

...2 Your Design Page will display the image.
If the ...drive, the folder and the format in which you wish to save the image data.
N Type the file name.
• The correct extension is automatically
set.
• The image data can be saved in any of
the following formats: Windows...copied onto the clipboard.
I Select TWAIN device
Purpose:
Selects which TWAIN device installed in the computer...
Users Manual - English - Page 188
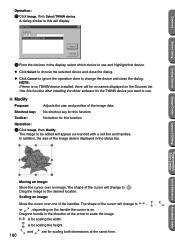
... the dialog.
N Click Cancel to ignore the operation done to change the device and close the dialog. NOTE: If there is no TWAIN device installed, there will be no names displayed on the Sources list. Use this function after installing the driver software for the TWAIN device you want to use.
I Modify
Purpose:
Adjusts the size and position...
Users Manual - English - Page 228
...210
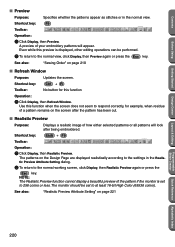
I Refresh Window
Purpose:
Updates the screen.
Shortcut key:
Ctrl + R
Toolbar:
No button for this function
Operation:
1 Click Display, then Refresh Window.
Use this...Display, then Realistic Preview.
The patterns on the Design Page are displayed realistically according to the settings in the Realistic Preview Attribute Setting dialog.
2 To return to the normal working screen, click Display...