Canon XL2 Body Kit driver and firmware
Related Canon XL2 Body Kit Manual Pages
Download the free PDF manual for Canon XL2 Body Kit and other Canon manuals at ManualOwl.com
Instruction Manual - Page 2
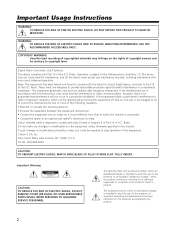
... SHOCK AND TO REDUCE ANNOYING INTERFERENCE, USE THE RECOMMENDED ACCESSORIES ONLY.
COPYRIGHT WARNING: Unauthorized recording of copyrighted materials may infringe on the rights of copyright owners and be contrary to copyright laws.
Digital Video Camcorder, XL2A Systems. This device complies with Part 15 of the FCC Rules. Operation is subject to the following...
Instruction Manual - Page 3

... the marking label. If you are not sure of the type of power supply to your home, consult your product dealer or local power company. Regarding other power sources such as battery power, refer to instructions in this manual.
11. Polarization - The CA-920 Compact Power Adapter is equipped with a polarized 2-prong plug (a plug having one blade wider...
Instruction Manual - Page 5
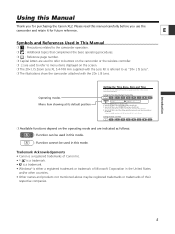
...; Capital letters are used to refer to buttons on the camcorder or the wireless controller. ❍ [ ] are used to refer to menu items displayed on the screen. ❍ The 20× L IS Zoom Lens XL 5.4-108 mm supplied with the Lens Kit is referred to as "20× L IS Lens". ❍ The illustrations show...
Instruction Manual - Page 6
... Safety Instructions ...3 Using this Manual ...5 Checking Supplied Accessories ...8 Components Guide ...9
Preparation
Preparing the Power Supply ...13 Installing the Backup Battery ...16 Preparing the Camcorder ...17 Preparing the Lens...22 Using the Wireless Controller ...24 Loading/Unloading a Cassette ...25 Menus and Settings ...26 Setting the Time Zone, Date and Time ...30
Recording
Recording...
Instruction Manual - Page 16
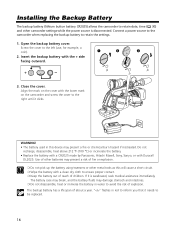
Installing the Backup Battery
The backup battery (lithium button battery CR2025) allows the camcorder to retain date, time ( 30) and other camcorder settings while the power source is disconnected. Connect a power source to the camcorder when replacing the backup battery to retain the settings... used in this device may present a fire...flashes in red to inform you that it needs to be replaced.
16
Instruction Manual - Page 25
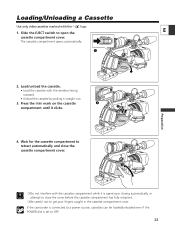
... switch to open the cassette compartment cover. The cassette compartment opens automatically.
q
Preparation
2. Load/unload the cassette.
• Load the cassette with the window facing
outward.
• Unload the cassette by pulling it straight out.
3. Press the ... cover. If the camcorder is connected to a power source, cassettes can be loaded/unloaded even if the POWER dial is set to OFF.
25
Instruction Manual - Page 34

... 1/48 of a second
i REC lamp
Lights up during recording. The REC lamp starts flashing when the remaining tape is less than 5 minutes (it does not flash when the remaining tape information is not displayed on the screen.)
o GAIN lamp
Lights up when the AGC (auto gain control) becomes set to -3 dB or +3 dB or higher.
34
Instruction Manual - Page 40
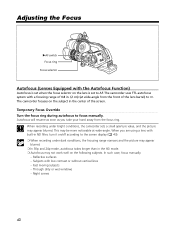
...ring during autofocus to focus manually.
Autofocus will resume as soon as you take your hand away from the focus ring. When recording under bright conditions, the camcorder sets a small aperture value, and... subjects. In such case, focus manually. - Reflective surfaces - Subjects with low contrast or without vertical lines - Fast moving subjects - Through dirty or wet windows - Night scenes
40
Instruction Manual - Page 48
... the MENU button in the middle of the setting, or when you press the SET dial after setting the last digits.
❍ To reset the time code to...recording start may
be discontinuous. ❍ When recording over existing scenes: When a time code discontinuity occurred near the recording
start point, the time code at recording start may be discontinuous. ❍ When the backup battery is installed...
Instruction Manual - Page 82
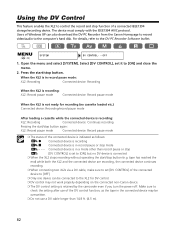
...feature enables the XL2 to control the record and stop function of a connected IEEE1394 storage/recording device. The device must comply with the IEEE1394 AV/C protocol. Users of Windows XP can also download the DV-PC Recorder from the Canon Homepage to record video/audio to the computer's hard disk. For details, refer to the DV-PC Recorder Software leaflet.
( 26)
SYSTEM
DV CONTROL••...
Instruction Manual - Page 98
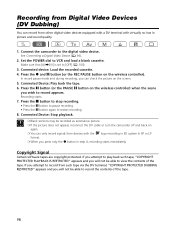
... Connect the camcorder to the digital video device. See Connecting a Digital Video Device ( 96).
2. Set the POWER dial to VCR and load a blank cassette. Make sure that [AV\DV] is set to [OFF] ( 100).
3. Connected device: Load the recorded cassette. 4. Press the 2 and a button (or the REC PAUSE button on the wireless controller).
In record pause mode and during recording, you can check the picture...
Instruction Manual - Page 100
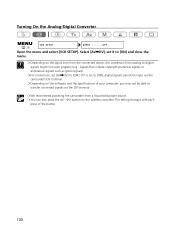
...'s DV terminal.
❍ Depending on the software and the specifications of your computer, you may not be able to transfer converted signals via the DV terminal.
❍ We recommend powering the camcorder from a household power source. ❍ You can also press the AV/DV button on the wireless controller. The setting changes with each
press of the...
Instruction Manual - Page 101
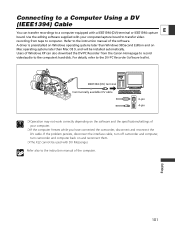
...from tape to computer. Refer to the instruction manual of the software. A driver is preinstalled on Windows operating systems later than Windows 98 Second Edition and on Mac operating systems later than Mac OS 9, and will be installed automatically. Users of Windows XP can also download the DV-PC Recorder from the Canon Homepage to record video/audio to the computer's hard disk. For details, refer...
Instruction Manual - Page 102
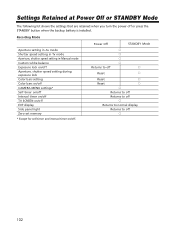
... installed.
Recording Mode
Aperture setting in Av mode Shutter speed setting in Tv mode Aperture, shutter speed setting in Manual mode Custom white balance Exposure lock on/off Aperture, shutter speed setting during exposure lock Color bars setting Color bars on/off CAMERA MENU settings* Self-timer on/off Interval timer on/off TV SCREEN on/off EVF display Side panel light Zero set memory...
Instruction Manual - Page 123
...Driver
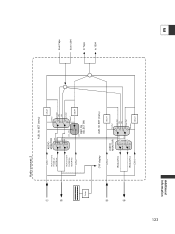
Audio process 2
AUD. M. SET (menu)
CH 1
RCA CH 1/CH 3 PHONE Lch METER Lch
RCA CH 2/CH 4 PHONE Rch METER Rch
CH 2
AUDIO MONITOR
CH1 CH3
MIX CH2 CH4
MIX CH1 CH2
DELAY
normal
Line Out PB PB
Line Out normal
DELAY
CH1
REC CH SELECT SW
CVF display
AUD. M. SET... (menu)
CH 3 RCA CH 3
RCA CH 4 CH 4
AUDIO MONITOR
MUTE MUTE
CH3 MUTE
CH4 ...
Instruction Manual - Page 124
... modification or failure to follow instructions contained in the instruction manual; ii) the use of accessories, attachments, products, supplies, parts or devices with this Canon product that do not conform to Canon specifications or that cause abnormally frequent service problems; iii) repairs or services performed by any party other than a Canon Service Facility; iv) defective batteries or...