Dell Inspiron M5040 driver and firmware
Related Dell Inspiron M5040 Manual Pages
Download the free PDF manual for Dell Inspiron M5040 and other Dell manuals at ManualOwl.com
Owners Manual - Page 2
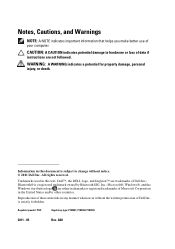
...better use of your computer. CAUTION: A CAUTION indicates potential damage to hardware or loss of data if instructions are not followed. ...Dell Inc. All rights reserved.
Trademarks used in this text: Dell™, the DELL logo, and Inspiron™ are trademarks of Dell Inc.; Bluetooth® is a registered trademark owned by Bluetooth SIG, Inc.; Microsoft®, Windows®, and the Windows...
Owners Manual - Page 9
... replaced or-if purchased separately-installed by
performing the removal procedure in the reverse order.
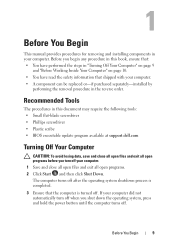
Recommended Tools
The procedures in this document may require the following tools: • Small flat-blade screwdriver • Phillips screwdriver • Plastic scribe • BIOS executable update program available at support.dell.com
Turning Off Your Computer
CAUTION: To avoid losing...
Owners Manual - Page 10
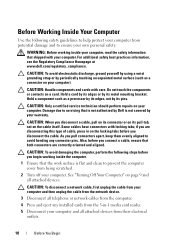
..." on page 9 and all attached devices.
CAUTION: To disconnect a network cable, first unplug the cable from your computer and then unplug the cable from the network device.
3 Disconnect all telephone or network cables from the computer.
4 Press and eject any installed cards from the 3-in-1 media card reader.
5 Disconnect your computer and all attached devices from their electrical outlets.
10...
Owners Manual - Page 19
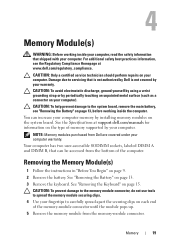
..." on page 13, before working inside the computer. You can increase your computer memory by installing memory modules on the system board. See the Specifications at support.dell.com/manuals for information on the type of memory supported by your computer.
NOTE: Memory modules purchased from Dell are covered under your computer warranty. Your computer has two user-accessible SODIMM sockets, labeled...
Owners Manual - Page 20
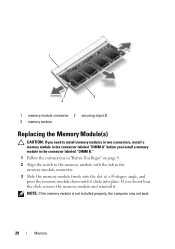
...-module connector 2 securing clips (2) 3 memory module
Replacing the Memory Module(s)
CAUTION: If you need to install memory modules in two connectors, install a memory module in the connector labeled "DIMM A" before you install a memory module in the connector labeled "DIMM B." 1 Follow the instructions in "Before You Begin" on page 9. 2 Align the notch in the memory module with the tab in the...
Owners Manual - Page 21
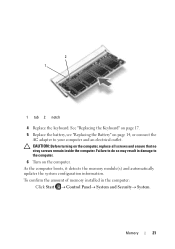
... that no stray screws remain inside the computer. Failure to do so may result in damage to the computer. 6 Turn on the computer. As the computer boots, it detects the memory module(s) and automatically updates the system configuration information. To confirm the amount of memory installed in the computer:
Click Start Control PanelSystem and Security...
Owners Manual - Page 25
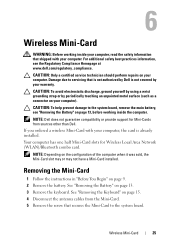
... to the system board, remove the main battery, see "Removing the Battery" on page 13, before working inside the computer.
NOTE: Dell does not guarantee compatibility or provide support for Mini-Cards from sources other than Dell. If you ordered a wireless Mini-Card with your computer, the card is already installed. Your computer has one half Mini-Card slots for Wireless Local Area Network (WLAN...
Owners Manual - Page 28
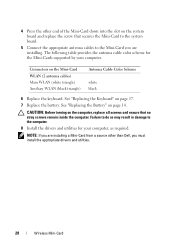
... into the slot on the system board and replace the screw that secures the Mini-Card to the system board.
5 Connect the appropriate antenna cables to the Mini-Card you are installing. The following table provides the antenna cable color scheme for the Mini-Cards supported by your computer.
Connectors on the Mini-Card WLAN (2 antenna cables) Main WLAN (white triangle) Auxiliary...
Owners Manual - Page 37
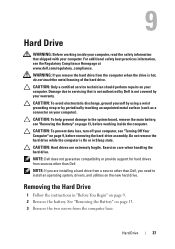
.... Exercise care when handling the hard drive.
NOTE: Dell does not guarantee compatibility or provide support for hard drives from sources other than Dell.
NOTE: If you are installing a hard drive from a source other than Dell, you need to install an operating system, drivers, and utilities on the new hard drive.
Removing the Hard Drive
1 Follow the instructions in "Before You Begin" on...
Owners Manual - Page 48
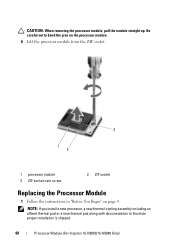
... 3 ZIF-socket cam screw
2 ZIF socket
Replacing the Processor Module
1 Follow the instructions in "Before You Begin" on page 9. NOTE: If you install a new processor, a new thermal-cooling assembly including an affixed thermal pad or a new thermal pad along with documentation to illustrate proper installation is shipped.
48
Processor Module (For Inspiron 15-N5050/15-N5040 Only)
Owners Manual - Page 67
... System Board
1 Follow the instructions in "Before You Begin" on page 9. 2 Press and eject any installed cards from the 3-in-1 media card reader. 3 Remove the battery. See "Removing the Battery" on page 13. 4 Remove the keyboard. See "Removing the Keyboard" on page 15. 5 Remove the memory module(s). See "Removing the Memory Module(s)"
on page 19. 6 Remove the optical drive. See...
Owners Manual - Page 70
... in the BIOS" on page 70.
Entering the Service Tag in the BIOS
1 Ensure that the AC adapter is plugged in and that the main battery is installed properly.
2 Turn on the computer. 3 Press during POST to enter the system setup program. 4 Navigate to the security tab and enter the service tag in the Set Service
Tag field.
70
System Board
Owners Manual - Page 71
18
Flashing the BIOS
The BIOS may require flashing when an update is available or when replacing the system board. To flash the BIOS:
1 Turn on the computer. 2 Go to support.dell.com/support/downloads. 3 Locate the BIOS update file for your computer:
NOTE: The Service Tag for your computer is located on a label at the bottom of your computer. If you have your computer's Service Tag:
a Click Enter...