Dell Inspiron One 2320 driver and firmware
Related Dell Inspiron One 2320 Manual Pages
Download the free PDF manual for Dell Inspiron One 2320 and other Dell manuals at ManualOwl.com
Owners Manual - Page 2
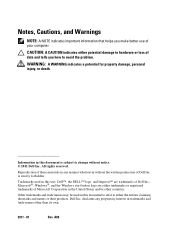
...: A NOTE indicates important information that helps you make better use of your computer. CAUTION: A CAUTION indicates either potential damage to hardware or loss of data... permission of Dell Inc. is strictly forbidden.
Trademarks used in this text: Dell™, the DELL™ logo, and Inspiron™ are trademarks of Dell Inc.; Microsoft®, Windows®, and the Windows start button logo...
Owners Manual - Page 11
... can be replaced or-if purchased separately-installed by
performing the removal procedure in reverse order.
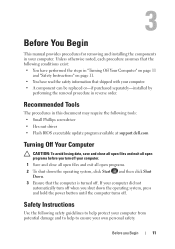
Recommended Tools
The procedures in this document may require the following tools: • Small Phillips screwdriver • Hex nut driver • Flash BIOS executable update program available at support.dell.com
Turning Off Your Computer
CAUTION: To avoid losing data, save and...
Owners Manual - Page 12
... cable, first unplug the cable from your computer and then unplug the cable from the network device.
3 Disconnect all telephone or network cables from the computer.
4 Disconnect your computer and all attached devices from their electrical outlets.
5 Disconnect all attached devices from your computer.
6 Press and hold the power button while the computer is unplugged to ground the system board...
Owners Manual - Page 23
.... Exercise care when handling the hard drive. NOTE: Dell does not guarantee compatibility or provide support for hard drives from sources other than Dell. NOTE: If you are installing a hard drive from a source other than Dell, you need to install an operating system, drivers, and utilities on the new hard drive.
Removing the Hard Drive
1 Follow the instructions in "Before You Begin" on...
Owners Manual - Page 33
... computer and all attached devices to electrical outlets, and then turn them on.
6 When the message appears stating that memory size has changed, press to continue.
7 Log on to your computer. To verify that the memory is installed correctly, click Start PanelSystem and Security System. Check the amount of memory (RAM) listed.
Control
Memory...
Owners Manual - Page 57
... can explode if it is incorrectly installed. Replace the battery only with the same or equivalent type recommended by the manufacturer. Discard used batteries according to the manufacturer's instructions.
CAUTION: Only a certified service technician should perform repairs on your computer. Damage due to servicing that is not authorized by Dell is not covered by your warranty...
Owners Manual - Page 61
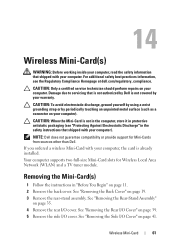
... Discharge" in the safety instructions that shipped with your computer).
NOTE: Dell does not guarantee compatibility or provide support for Mini-Cards from sources other than Dell. If you ordered a wireless Mini-Card with your computer, the card is already installed. Your computer supports two full-size Mini-Card slots for Wireless Local Area Network (WLAN) and a TV tuner module.
Removing the...
Owners Manual - Page 63
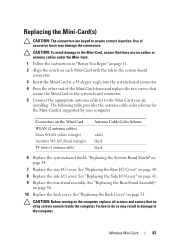
...the Mini-Card to the system-board connector. 5 Connect the appropriate antenna cable(s) to the Mini-Card you are installing. The following table provides the antenna cable color scheme for the Mini-Card(s) supported by your computer.
Connectors on the Mini-Card WLAN (2 antenna cables) Main WLAN (white triangle) Auxiliary WLAN (black triangle)
TV tuner (1 antenna cable)
Antenna Cable Color Scheme...
Owners Manual - Page 125
... option such as the user password • Read the current amount of memory or set the type of hard drive installed
NOTE: Before you change system setup, it is recommended that you write down the system setup screen information for future reference.
Entering System Setup
1 Turn on (or restart) your computer. 2 When the DELL logo is displayed, watch for the F2...
Owners Manual - Page 126
... within the active system setup field.
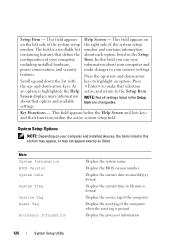
System Setup Options
NOTE: Depending on your computer and installed devices, the items listed in this section may appear, or may not appear exactly as listed.
Main System Information BIOS Version System Date
System Time
Service Tag Asset Tag
Processor Information
Displays the system name Displays the BIOS version number Displays the current date in...
Owners Manual - Page 127
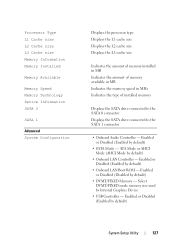
... speed in MHz Indicates the type of installed memory
Displays the SATA drive connected to the SATA 0 connector Displays the SATA drive connected to the SATA 1 connector
• Onboard Audio Controller - Enabled or Disabled (Enabled by default)
• SATA Mode - ATA Mode or AHCI Mode (AHCI Mode by default)
• Onboard LAN Controller - Enabled or Disabled (Enabled by default)
• Onboard...
Owners Manual - Page 131
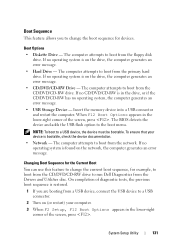
...-RW is in the drive, or if the CD/DVD/CD-RW has no operating system, the computer generates an error message. • USB Storage Device - Insert the memory device into a USB connector and restart the computer. When F12 Boot Options appears in the lower-right corner of the screen, press . The BIOS detects the device and adds the USB flash option to the...
Owners Manual - Page 132
... you see the Microsoft Windows desktop. Then shut down your computer and try again. The Boot Device Menu appears, listing all available boot devices. 4 On the Boot Device Menu choose the device you want to boot from. For example, if you are booting to a USB memory key, highlight USB Storage Device and press . NOTE: To boot to a USB device, the device must be bootable. To...
Owners Manual - Page 137
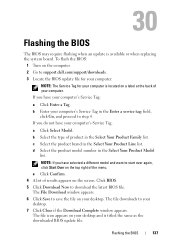
30
Flashing the BIOS
The BIOS may require flashing when an update is available or when replacing the system board. To flash the BIOS:
1 Turn on the computer. 2 Go to support.dell.com/support/downloads. 3 Locate the BIOS update file for your computer:
NOTE: The Service Tag for your computer is located on a label at the back of your computer. If you have your computer's Service Tag:
a Click Enter a...