Dell Precision R7600 driver and firmware


Related Dell Precision R7600 Manual Pages
Download the free PDF manual for Dell Precision R7600 and other Dell manuals at ManualOwl.com
Dell Precision Workstation R7610 Owner's Manual - Page 2
... Association (BDA) and licensed for use on discs and players. The Bluetooth® word mark is a registered trademark and owned by the Bluetooth® SIG, Inc. and any use of such mark by Dell Inc. is under license. Wi-Fi® is a registered trademark of Wireless Ethernet Compatibility Alliance, Inc. 2013 - 05 Rev. A00
Dell Precision Workstation R7610 Owner's Manual - Page 3
... Cover...19 7 Removing the Power Supply 21 8 Installing the Power Supply Unit 23 9 Removing the Hard Drive Carrier 25 10 Installing the Hard Drive Carrier 27 11 Removing the Hard Drive Assembly 29 12 Installing the Hard Drive Assembly 31 13 Removing the Control Panel 33 14 Installing the Control Panel 35 15 Removing the Optical Drive 37 16 Installing the Optical Drive...39 17 Removing the...
Dell Precision Workstation R7610 Owner's Manual - Page 4
... Battery 63 29 Removing the Memory...65 30 Installing the Memory...67 31 Removing the Heat Sink...69 32 Installing the Heat Sink...71 33 Removing the Processor...73 34 Installing the Processor...75 35 Removing the Expansion Card Cages 77 36 Installing the Expansion Card Cages 81 37 Removing the Power-Distribution Unit 83 38 Installing the Power-Distribution Unit 85 39...
Dell Precision Workstation R7610 Owner's Manual - Page 5

... Controller Card 91
42 Installing the SAS Controller Card 93
43 Removing the System Board 95
44 Installing the System Board 97
45 System Board Components 99
46 Troubleshooting...101
Diagnostic LEDs...101 Error Messages...107
Errors That Halt the System Completely...107 Errors That Soft Halt the System...107 Errors That Do Not Halt the System...108
47 Specifications...109
48 System Setup...
Dell Precision Workstation R7610 Owner's Manual - Page 7
... Off Your Computer).
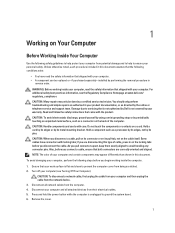
CAUTION: To disconnect a network cable, first unplug the cable from your computer and then unplug the cable from the network device. 3. Disconnect all network cables from the computer. 4. Disconnect your computer and all attached devices from their electrical outlets. 5. Press and hold the power button while the computer is unplugged to ground the system board. 6. Remove the...
Dell Precision Workstation R7610 Owner's Manual - Page 8

... computer and all attached devices are turned off. If your computer and attached devices did not
automatically turn off when you shut down your operating system, press and hold the power button for about 6 seconds to turn them off.
After Working Inside Your Computer
After you complete any replacement procedure, ensure you connect any external devices, cards, and cables...
Dell Precision Workstation R7610 Owner's Manual - Page 15
4
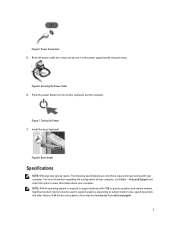
Installing the Front Bezel
1. Insert the front bezel in its slot in a downward direction and push it towards the computer. 2. Secure the release tab. 3. Lock the front bezel using the key provided. 4. Follow the procedures in After Working Inside Your Computer.
15
Dell Precision Workstation R7610 Owner's Manual - Page 19
6
Installing the Cover
1. Place the cover on the computer and press it down until it clicks into place. 2. Press down the cover latch. 3. Install the front bezel. 4. Follow the procedures in After Working Inside Your Computer.
19
Dell Precision Workstation R7610 Owner's Manual - Page 23

8
Installing the Power Supply Unit
1. Insert the power supply unit into the computer until it clicks into place. 2. Follow the procedures in After Working Inside Your Computer.
23
Dell Precision Workstation R7610 Owner's Manual - Page 27
Installing the Hard Drive Carrier
1. Insert the hard drive into the drive bay. 2. Press the hard-drive carrier handle until it clicks into place. 3. Install the front bezel. 4. Follow the procedures in After Working Inside Your Computer.
10
27
Dell Precision Workstation R7610 Owner's Manual - Page 31
Installing the Hard Drive Assembly
1. Place the hard drive in the hard-drive caddy. 2. Tighten the screws that secure the hard drive on either side of the hard-drive caddy. 3. Install :
- hard drive carrier - front bezel 4. Follow the procedures in After Working Inside Your Computer.
12
31
Dell Precision Workstation R7610 Owner's Manual - Page 35
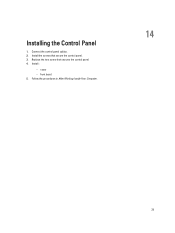
Installing the Control Panel
1. Connect the control panel cables. 2. Install the screws that secure the control panel. 3. Replace the torx screw that secures the control panel. 4. Install :
- cover - front bezel. 5. Follow the procedures in After Working Inside Your Computer.
14
35
Dell Precision Workstation R7610 Owner's Manual - Page 39
16
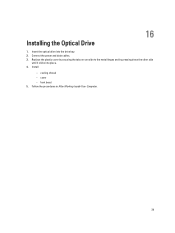
Installing the Optical Drive
1. Insert the optical drive into the drive bay. 2. Connect the power and data cables. 3. Replace the plastic cover by securing the tabs on one side to the metal hinges and by pressing down the other side
until it clicks into place. 4. Install:
- cooling shroud - cover - front bezel 5. Follow the procedures in After Working Inside Your Computer.
39
Dell Precision Workstation R7610 Owner's Manual - Page 43
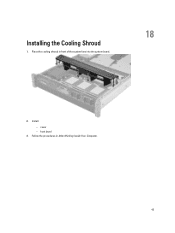
Installing the Cooling Shroud
1. Place the cooling shroud in front of the system fans into the system board.
18
2. Install:
- cover - front bezel 3. Follow the procedures in After Working Inside Your Computer.
43
Dell Precision Workstation R7610 Owner's Manual - Page 47
20
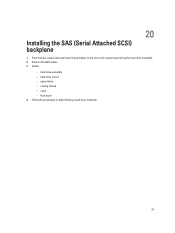
Installing the SAS (Serial Attached SCSI) backplane
1. Push the blue release tabs and insert the backplane in the slot on the system board along the hard-drive assembly. 2. Connect the SAS cables. 3. Install:
- hard-drive assembly - hard-drive carrier - optical drive - cooling shroud - cover - front bezel 4. Follow the procedures in After Working Inside Your Computer.
47
Dell Precision Workstation R7610 Owner's Manual - Page 51
Installing the Front-Chassis Assembly
1. Slide the front-chassis assembly towards the back of the computer until it clicks into place. 2. Install:
- cooling shroud - cover - front bezel 3. Follow the procedures in After Working Inside Your Computer.
22
51
Dell Precision Workstation R7610 Owner's Manual - Page 55
Installing the Fan Bracket
1. Place the fan bracket in the computer. 2. Ensure that there are no cables on top of the fan connectors. 3. Press both release tabs downwards simultaneously to secure the bracket. 4. Install:
- cooling shroud - cover 5. Follow the procedures in After Working Inside Your Computer.
24
55
Dell Precision Workstation R7610 Owner's Manual - Page 85
... the power-distribution unit on the computer. 2. Install the screws that secure the power distribution unit. 3. Route all the power cables through their routing channels. 4. Connect the CPU 1, CPU 2, SAS Backplane and optical driver power connectors. 5. Slide the front chassis assembly to its original position. 6. Install:
- expansion card cages - fan bracket - system fans - hard-drive assembly...
Dell Precision Workstation R7610 Owner's Manual - Page 116
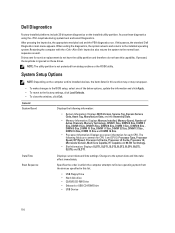
..., update the information and click Apply. • To revert to the factory settings, click Load Defaults. • To close the window, click Exit.
General System Board
Displays the following information:
• System Information: Displays BIOS Version, Service Tag, Express Service Code, Asset Tag, Manufacture Date, and the Ownership Date.
• Memory Information: Displays Memory Installed...
Setup Guide - Page 3
... and Support and select the option to view information about your computer. NOTE: A 64-bit operating system is required to support systems with 4 GB or greater graphics and system memory. Significant system memory may be used to support graphics, depending on system memory size, operating system, and other factors. A 64-bit discrete graphics driver may be downloaded from dell.com/support.
3