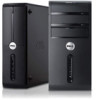
Dell Vostro 270s driver and firmware
Related Dell Vostro 270s Manual Pages
Download the free PDF manual for Dell Vostro 270s and other Dell manuals at ManualOwl.com
User Manual - Page 6

...™ are trademarks of Advanced Micro Devices, Inc. Microsoft®, Windows®, MS-DOS®, Windows Vista®, the Windows Vista start button, and Office Outlook®...players. The Bluetooth® word mark is a registered trademark and owned by the Bluetooth® SIG, Inc. and any use of such mark by Dell Inc. is under license. Wi-Fi® is a registered trademark of Wireless Ethernet...
Owner's Manual - Page 2
...™ are trademarks of Advanced Micro Devices, Inc. Microsoft®, Windows®, MS-DOS®, Windows Vista®, the Windows Vista start button, and Office Outlook®...players. The Bluetooth® word mark is a registered trademark and owned by the Bluetooth® SIG, Inc. and any use of such mark by Dell Inc. is under license. Wi-Fi® is a registered trademark of Wireless Ethernet...
Owner's Manual - Page 3
...10 Installing the Drive Cage...12 Removing the Optical Drive...12 Installing the Optical drive...12 Removing the Hard Drive...13 Installing the Hard drive...13 Removing the Expansion Card...14 Installing the Expansion Card...14 Removing the Coin-Cell Battery...14 Installing the Coin-Cell Battery...15 Removing the Memory...15 Installing the Memory...15 Removing the Power Switch...15 Installing the...
Owner's Manual - Page 4
... the System Board...21 Removing the Power-Supply Unit...22 Installing the Power-Supply Unit...22
3 System Setup...25
Boot Sequence...25 Navigation Keys...25 System Setup Overview...26 Enter System Setup...26 System Setup Screens...26 System Setup Options...27
Exit...29 Updating the BIOS ...29 Clearing Forgotten Password...30 Clearing CMOS...31 System and Setup Password...32
Assigning a System...
Owner's Manual - Page 5
... Off Your Computer).
CAUTION: To disconnect a network cable, first unplug the cable from your computer and then unplug the cable from the network device. 3. Disconnect all network cables from the computer. 4. Disconnect your computer and all attached devices from their electrical outlets. 5. Press and hold the power button while the computer is unplugged to ground the system board. 6. Remove the...
Owner's Manual - Page 6
... system, press and hold the power button for about 6 seconds to turn them off.
After Working Inside Your Computer
After you complete any replacement procedure, ensure you connect any external devices, cards, and cables before turning on your computer. 1. Replace the cover.
CAUTION: To connect a network cable, first plug the cable into the network device and then plug it into the...
Owner's Manual - Page 7
... information on how to remove or install the components from your computer.
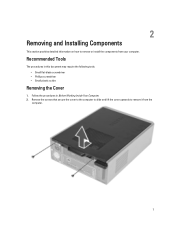
Recommended Tools
The procedures in this document may require the following tools: • Small flat-blade screwdriver • Phillips screwdriver • Small plastic scribe
Removing the Cover
1. Follow the procedures in Before Working Inside Your Computer. 2. Remove the screws that secure...
Owner's Manual - Page 8
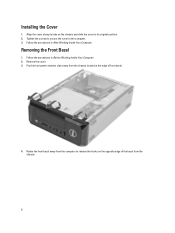
Installing the Cover
1. Align the cover along its tabs on the chassis and slide the cover to its original position. 2. Tighten the screws to secure the cover to the computer. 3. Follow the procedures in After Working Inside Your Computer.
Removing the Front Bezel
1. Follow the procedures in Before Working Inside Your Computer. 2. Remove the cover...
Owner's Manual - Page 9
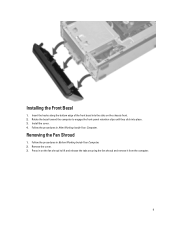
... of the front bezel into the slots on the chassis front. 2. Rotate the bezel toward the computer to engage the front-panel retention clips until they click into place. 3. Install the cover. 4. Follow the procedures in After Working Inside Your Computer.
Removing the Fan Shroud
1. Follow the procedures in Before Working Inside Your...
Owner's Manual - Page 10
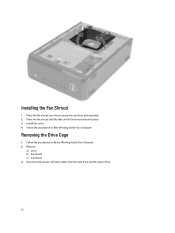
... the fan shroud until the tabs on the fan shroud snap into place. 3. Install the cover. 4. Follow the procedures in After Working Inside Your Computer.
Removing the Drive Cage
1. Follow the procedures in Before Working Inside Your Computer. 2. Remove:
a) cover b) fan shroud c) front bezel 3. Disconnect the power and data cables from the hard drive and the optical drive.
10
Owner's Manual - Page 12
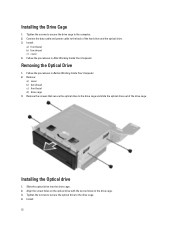
... the screws to secure the drive cage to the computer. 2. Connect the data cable and power cable to the back of the hard drive and the optical drive. 3. Install:
a) front bezel b) fan shroud c) cover 4. Follow the procedures in After Working Inside Your Computer.
Removing the Optical Drive
1. Follow the procedures in Before Working Inside Your Computer. 2. Remove:
a) cover b) fan shroud c) front...
Owner's Manual - Page 13
... After Working Inside Your Computer.
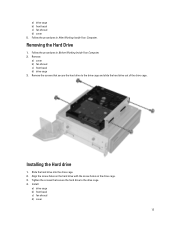
Removing the Hard Drive
1. Follow the procedures in Before Working Inside Your Computer. 2. Remove:
a) cover b) fan shroud c) front bezel d) drive cage 3. Remove the screws that secure the hard drive to the drive cage and slide the hard drive out of the drive cage.
Installing the Hard drive
1. Slide the hard drive into the drive cage. 2. Align the...
Owner's Manual - Page 14
... the system board and press down until it is securely in place. 2. Tighten the screw to secure the expansion card to the chassis. 3. Install:
a) fan shroud. b) cover. 4. Follow the procedures in After Working Inside Your Computer.
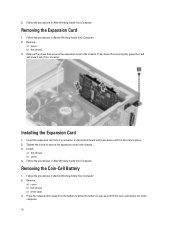
Removing the Coin-Cell Battery
1. Follow the procedures in Before Working Inside Your Computer. 2. Remove:
a) cover b) fan shroud c) drive cage...
Owner's Manual - Page 15
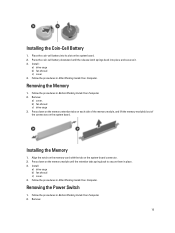
... connectors on the system board.
Installing the Memory
1. Align the notch on the memory-card with the tab on the system-board connector. 2. Press down on the memory module until the retention tabs spring back to secure them in place. 3. Install:
a) drive cage b) fan shroud c) cover. 4. Follow the procedures in After Working Inside Your Computer.
Removing the Power Switch
1. Follow the...
Owner's Manual - Page 16
... on the front panel.
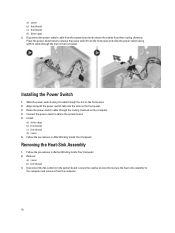
Installing the Power Switch
1. Slide the power-switch along its cable through the slot on the front panel. 2. Align and push the power-switch tabs into the slots on the front panel. 3. Route the power-switch cable through the routing channels on the computer. 4. Connect the power-switch cable to the system board. 5. Install:
a) drive cage b) front bezel c) fan...
Owner's Manual - Page 17
... board. 3. Connect the fan cable to the system board. 4. Install:
a) fan shroud. b) cover. 5. Follow the procedures in After Working Inside Your Computer.
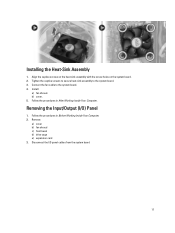
Removing the Input/Output (I/O) Panel
1. Follow the procedures in Before Working Inside Your Computer. 2. Remove:
a) cover b) fan shroud c) front bezel d) drive cage e) expansion card 3. Disconnect the I/O panel cables from the system board...
Owner's Manual - Page 19
...through the routing channels on the chassis. 5. Connect the I/O panel cables to the system board. 6. Install:
a) expansion card b) drive cage c) front bezel d) fan shroud e) cover 7. Follow the procedures in After Working Inside Your Computer.
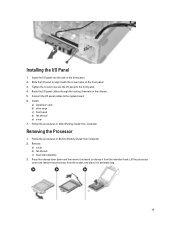
Removing the Processor
1. Follow the procedures in Before Working Inside Your Computer. 2. Remove:
a) cover b) fan shroud c) heat-sink assembly 3. Press the...
Owner's Manual - Page 26
... the system. Displays the System Setup help file.
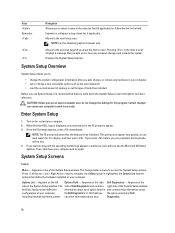
System Setup Overview
System Setup allows you to:
• change the system configuration information after you add, change, or remove any hardware in your computer. • set or change a user-selectable option such as the user password. • read the current amount of memory or set the type of hard drive installed.
Before...
Owner's Manual - Page 29
... load default settings before exiting from System Setup.
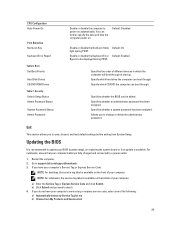
Updating the BIOS
It is recommended to update your BIOS (system setup), on replacing the system board or if an update is available. For notebooks, ensure that your computer battery is fully charged and connected to a power outlet
1. Restart the computer. 2. Go to support.dell.com/support/downloads. 3. If you have your computer's Service Tag...
Owner's Manual - Page 30
... select your download method below window; click Download
Now. The File Download window appears. 8. Click Save to save the file on your computer. 9. Click Run to install the updated BIOS settings on your computer. Follow the instructions on the screen.
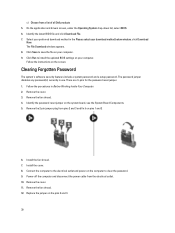
Clearing Forgotten Password
The system's software security features include a system password and a setup password. The password jumper disables...