Edimax AR-7186WnA driver and firmware

Related Edimax AR-7186WnA Manual Pages
Download the free PDF manual for Edimax AR-7186WnA and other Edimax manuals at ManualOwl.com
Datasheet - Page 2
...
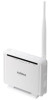
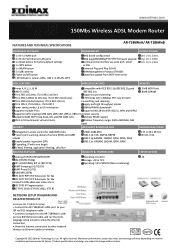
Example AR-7168WnA Setup: • Connect the AR-7186WnA's ADSL port to your ISP via RJ11 telephone cable . • Connect a computer to the AR-7186WnA's LAN port via RJ45 Ethernet cable, and run the multilanguage setup wizard to setup the Internet connection. • Share the Internet connection to other network devices via Ethernet cables or wireless.
Copyright © 2012 Edimax Technology...
Quick Install Guide - Page 2
... you have purchased and the setup screen may appear slightly different from those shown in this QIG. For more information about this product, please refer to the user manual on the CD-ROM. The software and specifications are subject to change without notice. Please visit our website www.edimax.com for updates. All brand and product...
Quick Install Guide - Page 4
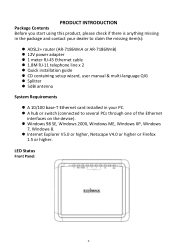
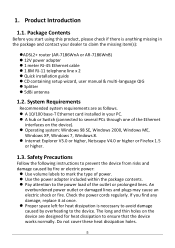
...in the package and contact your dealer to claim the missing item(s):
ADSL2+ router (AR-7186WnA or AR-7186WnB) 12V power adapter 1 meter RJ-45 Ethernet cable 1.8M RJ-11 telephone line x 2 Quick installation guide CD containing setup wizard, user manual & multi-language QIG Splitter 5dBi antenna System Requirements A 10...
Quick Install Guide - Page 5
... negotiation is in progress.
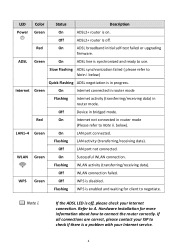
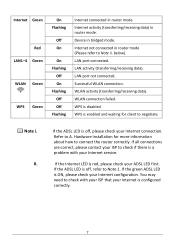
Internet Green
On
Internet connected in router mode
Flashing
Internet activity (transferring/receiving data) in router mode.
Off
Device in bridged mode.
Red
On
Internet not connected in router mode
(Please refer to Note ii. below).
LAN1-4 Green
On
LAN port connected.
Flashing LAN activity (transferring/receiving data).
Off
LAN port not connected.
WLAN...
Quick Install Guide - Page 7
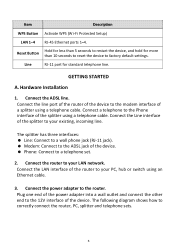
...; Line: Connect to a wall phone jack (RJ-11 jack). Modem: Connect to the ADSL jack of the device. Phone: Connect to a telephone set.
2. Connect the router to your LAN network. Connect the LAN interface of the router to your PC, hub or switch using an Ethernet cable.
3. Connect the power adapter to the router. Plug one end of the power adapter into a wall outlet and...
Quick Install Guide - Page 11

... your Internet connection, upgrade the firmware and change the router's password. When you start the setup wizard, you will see the following screen. Please choose a language and follow the on screen instructions until setup is complete.
Alternatively, if you lose the CD-ROM or prefer a web based setup, you can login to the ADSL router using Internet Explorer, and configure the router from...
Manual - Page 2
... you have purchased and the setup screen may appear slightly different from those shown in this QIG. For more information about this product, please refer to the user manual on the CD-ROM. The software and specifications are subject to change without notice. Please visit our website www.edimax.com for updates. All brand and product...
Manual - Page 4

...84 5.7. MAINTENANCE ...85 5.7.1. Administration ...85 5.7.2. Time Zone...85 5.7.3. Firmware ...86 5.7.4. SysRestart ...87 5.7.5. Diagnostics...88 6. TROUBLE SHOOTING ...89
Note: The images/screenshots used in this manual are for reference only - actual screens may vary according to firmware version. The contents of this manual are based on the most recent firmware version at the time of writing.
4
Manual - Page 5
... the package and contact your dealer to claim the missing item(s):
ADSL2+ router (AR-7186WnA or AR-7186WnB) 12V power adapter 1 meter RJ-45 Ethernet cable 1.8M RJ-11 telephone line x 2 Quick installation guide CD containing setup wizard, user manual & multi-language QIG Splitter 5dBi antenna
1.2. System Requirements
Recommended...
Manual - Page 6
....
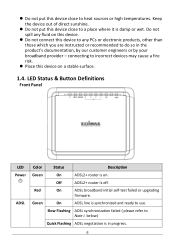
Place this device on a stable surface.
1.4. LED Status & Button Definitions
Front Panel
LED Power
ADSL
Color
Status
Description
Green
On
ADSL2+ router is on.
Off
ADSL2+ router Is off.
Red
On
ADSL broadband initial self-test failed or upgrading
firmware.
Green
On
ADSL line is synchronized and ready to use.
Slow Flashing ADSL synchronization failed ( please...
Manual - Page 7
... WLAN Green
WPS Green
On Flashing
Off On
On Flashing
Off On Flashing Off Off Flashing
Internet connected in router mode Internet activity (transferring/receiving data) in router mode. Device in bridged mode. Internet not connected in router mode (Please refer to Note ii. below). LAN port connected. LAN activity (transferring/receiving data). LAN port not connected. Successful WLAN connection...
Manual - Page 9
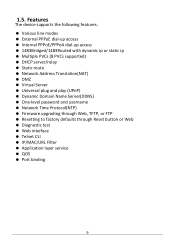
...; Dynamic Domain Name Server(DDNS) One-level password and username Network Time Protocol(NTP) Firmware upgrading through Web, TFTP, or FTP Resetting to factory defaults through Reset button or Web Diagnostic test Web interface Telnet CLI IP/MAC/URL Filter Application layer service QOS Port binding
9
Manual - Page 10
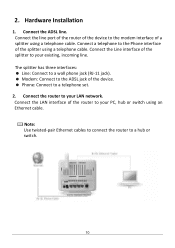
...: Line: Connect to a wall phone jack (RJ-11 jack). Modem: Connect to the ADSL jack of the device. Phone: Connect to a telephone set.
2. Connect the router to your LAN network. Connect the LAN interface of the router to your PC, hub or switch using an Ethernet cable.
Note: Use twisted-pair Ethernet cables to connect the router to a hub or switch.
10
Manual - Page 12
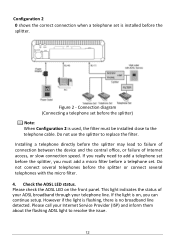
... (Connecting a telephone set before the splitter) Note: When Configuration 2 is used, the filter must be installed close to the telephone cable. Do not use the splitter to replace the filter. Installing a telephone directly before the splitter may lead to failure of connection between the device and the central office, or failure of Internet access, or slow...
Manual - Page 17
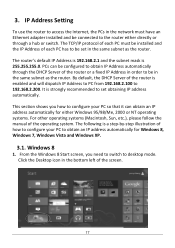
... Address Setting
To use the router to access the Internet, the PCs in the network must have an Ethernet adapter installed and be connected to the router either directly or through a hub or switch. The TCP/IP protocol of each PC must be installed and the IP Address of each PC has to be set in the same subnet as the router.
The router...
Manual - Page 18
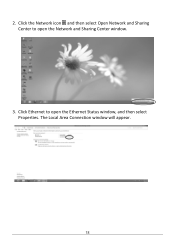
2. Click the Network icon and then select Open Network and Sharing Center to open the Network and Sharing Center window.
3. Click Ethernet to open the Ethernet Status window, and then select Properties. The Local Area Connection window will appear.
18
Manual - Page 24

... wizard enables you to configure your Internet connection, upgrade the firmware and change the router's password. Please follow the instructions below. Alternatively, if you lose the CD-ROM or prefer a web based setup, you can login to the ADSL router using Internet Explorer, and configure the router from there using the web-based interface. Instructions for how to do so can be...
Manual - Page 36
....
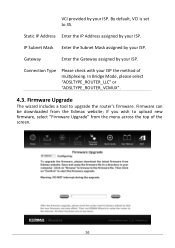
Connection Type
Please check with your ISP the method of multiplexing. In Bridge Mode, please select "ADSLTYPE_ROUTER_LLC" or "ADSLTYPE_ROUTER_VCMUX".
4.3. Firmware Upgrade
The wizard includes a tool to upgrade the router's firmware. Firmware can be downloaded from the Edimax website; if you wish to upload new firmware, select "Firmware Upgrade" from the menu across the top of the screen.
36
Manual - Page 86
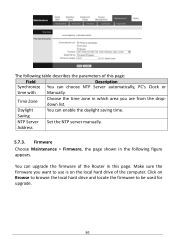
... enable the daylight saving time.
Saving
NTP Server Set the NTP server manually.
Address
5.7.3. Firmware Choose Maintenance > Firmware, the page shown in the following figure appears.
You can upgrade the firmware of the Router in this page. Make sure the firmware you want to use is on the local hard drive of the computer. Click on Browse to browse the local...
Manual - Page 87
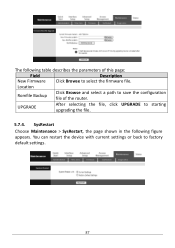
... the firmware file.
Location
Romfile Backup
Click Browse and select a path to save the configuration file of the router.
UPGRADE
After selecting the file, click UPGRADE to starting upgrading the file.
5.7.4. SysRestart
Choose Maintenance > SysRestart, the page shown in the following figure appears. You can restart the device with current settings or back to factory default settings.
87