Epson Stylus Photo R3000 - Ink Jet Printer driver and firmware
Drivers and firmware downloads for this Epson item

Related Epson Stylus Photo R3000 Manual Pages
Download the free PDF manual for Epson Stylus Photo R3000 and other Epson manuals at ManualOwl.com
Basics - Page 3
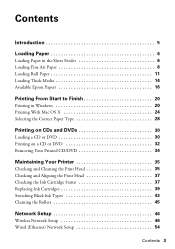
... Printing on a CD or DVD 32 Removing Your Printed CD/DVD 34
Maintaining Your Printer 35
Checking and Cleaning the Print Head 35 Checking and Aligning the Print Head 37 Checking the Ink Cartridge Status 37 Replacing Ink Cartridges 39 Switching Black Ink Types 43 Cleaning the Rollers 45
Network Setup 46
Wireless Network Setup 46 Wired (Ethernet) Network Setup 54
Contents 3
Basics - Page 4

Solving Problems 57
Checking for Software Updates 57 Problems and Solutions 57 Where to Get Help 61
Notices 62
4 Contents
Basics - Page 20
... ink jet-printable CDs or DVDs. See page 30 and the online User's Guide for details. To print photos directly from a PictBridge®-compatible digital camera connected to the R3000 Series, see the online User's Guide.
Tip: It's a good idea to check for updates to your Epson Stylus Photo R3000 Series software. See "Checking for Software Updates" on page 57 for instructions.
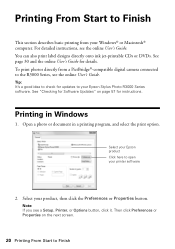
Printing in Windows...
Basics - Page 28
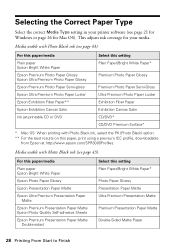
... Media Type setting in your printer software (see page 21 for Windows or page 26 for Mac OS). This adjusts ink coverage for your media.
Media usable with Photo Black ink (see page 43):
For this paper/media Plain paper Epson Bright White Paper Epson Premium Photo Paper Glossy Epson Ultra Premium Photo Paper Glossy Epson Premium Photo Paper Semi-gloss Epson Ultra Premium Photo Paper Luster...
Basics - Page 32
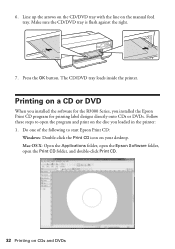
... installed the software for the R3000 Series, you installed the Epson Print CD program for printing label designs directly onto CDs or DVDs. Follow these steps to open the program and print on the disc you loaded in the printer: 1. Do one of the following to start Epson Print CD:
Windows: Double-click the Print CD icon on your desktop. Mac...
Basics - Page 33
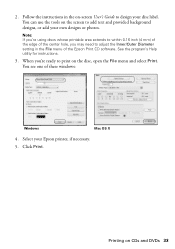
... to adjust the Inner/Outer Diameter setting in the File menu of the Epson Print CD software. See the program's Help utility for instructions.
3. When you're ready to print on the disc, open the File menu and select Print. You see one of these windows:
Windows
Mac OS X
4. Select your Epson printer, if necessary. 5. Click Print.
Printing on...
Basics - Page 37

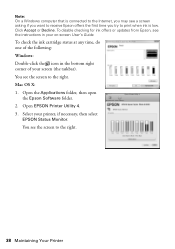
... select Print Head Alignment.
Mac OS X: Open the Applications folder, open the Epson Software folder, and open EPSON Printer Utility 4. Select your printer, if necessary, then select Print Head Alignment.
3. Follow the on-screen instructions to print the alignment check patterns and align the print head as necessary.
Checking the Ink Cartridge Status
Your R3000 Series will let you...
Basics - Page 38
... the instructions in your on-screen User's Guide.
To check the ink cartridge status at any time, do one of the following: Windows: Double-click the icon in the bottom right corner of your screen (the taskbar). You see the screen to the right. Mac OS X: 1. Open the Applications folder, then open
the Epson Software folder. 2. Open EPSON Printer...
Basics - Page 39
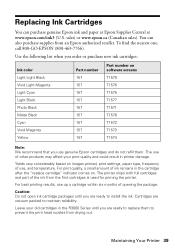
... number on software screens T1579 T1576 T1575 T1577 T1571 T1578 T1572 T1573 T1574
Note: We recommend that you use genuine Epson cartridges and do not refill them. The use of other products may affect your print quality and could result in printer damage.
Yields vary considerably based on images printed, print settings, paper type...
Basics - Page 46
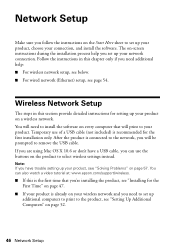
... additional help: ■ For wireless network setup, see below. ■ For wired network (Ethernet) setup, see page 54.
Wireless Network Setup
The steps in this section provide detailed instructions for setting up your product on a wireless network. You will need to install the software on every computer that will print to your product. Temporary use of a USB cable (not included) is recommended...
Basics - Page 47
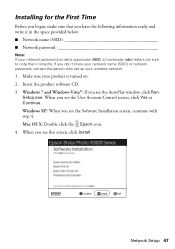
...) or network password, contact the person who set up your wireless network.
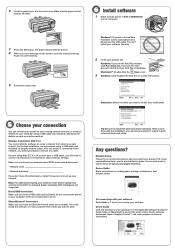
1. Make sure your product is turned on. 2. Insert the product software CD. 3. Windows 7 and Windows Vista®: If you see the AutoPlay window, click Run
Setup.exe. When you see the User Account Control screen, click Yes or Continue. Windows XP: When you see the Software Installation screen, continue with step 4. Mac OS...
Basics - Page 51
... your password has uppercase (ABC) or lowercase (abc) letters, or numbers (123), be sure to enter them correctly.
Note: If the product still doesn't connect to your wireless network, see "Network setup failed" on page 60.
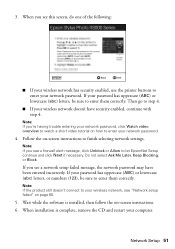
5. Wait while the software is installed, then follow the on-screen instructions. 6. When installation is complete, remove the CD and restart your computer.
Network Setup 51
Basics - Page 52
... 3 on page 51 to enter your network password.
Setting Up Additional Computers
1. Make sure your product is turned on. 2. Insert the product software CD. 3. Windows 7 and Windows Vista: If you see the AutoPlay window, click
Run Setup.exe. When you see the User Account Control screen, click Yes or Continue. Windows XP: When you see the Software Installation screen, continue with step 4.
52...
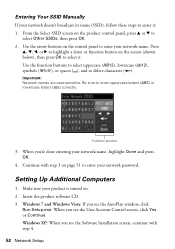
Basics - Page 54
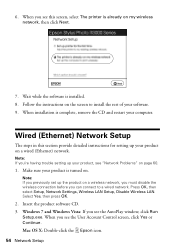
... you can connect to a wired network. Press OK, then
select Setup, Network Settings, Wireless LAN Setup, Disable Wireless LAN. Select Yes, then press OK.
2. Insert the product software CD. 3. Windows 7 and Windows Vista: If you see the AutoPlay window, click Run
Setup.exe. When you see the User Account Control screen, click Yes or Continue. Mac OS X: Double-click the Epson icon. 54 Network Setup
Basics - Page 55

... set up for network printing and you want to be able to print from an additional computer, choose The printer is already on my Ethernet network, then click Next.
7. For first-time installation only: Connect the product to your router, access point, or hub with an Ethernet network cable, then click Next.
8. Mac OS X 10.6: Skip to step 15. 9. Wait while the software...
Basics - Page 56

... to set up, then click Next.
12. Wait while EpsonNet Setup configures your product for the network. 13. If you see an Installation Complete screen that includes a Print Test Page
button, click it to print a test page. 14. Click Finish. 15. Follow the instructions on the screen to install the rest of your software. 16. When installation is...
Basics - Page 57
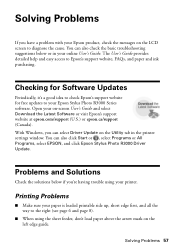
... it's a good idea to check Epson's support website for free updates to your Epson Stylus Photo R3000 Series software. Open your on-screen User's Guide and select Download the Latest Software or visit Epson's support website at epson.com/support (U.S.) or epson.ca/support (Canada). With Windows, you can select Driver Update on the Utility tab in the printer settings window. You can also click Start...
Basics - Page 61
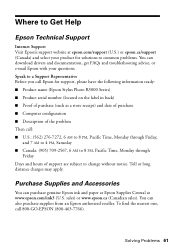
... product for solutions to common problems. You can download drivers and documentation, get FAQs and troubleshooting advice, or e-mail Epson with your questions. Speak to a Support Representative Before you call Epson for support, please have the following information ready: ■ Product name (Epson Stylus Photo R3000 Series) ■ Product serial number (located on the label in back) ■...
Product Brochure - Page 6

... Hi-Speed USB 2.0 (1 port) 100Base-T Ethernet (1 port) Wi-Fi CERTIFIED™ (802.11n only)
Operating Systems Supported
Mac®
Mac OS® X, 10.5.x - 10.6.x
Windows
Windows® 7 (32-bit, 64-bit),
Windows Vista® (32-bit, 64-bit),
Windows XP, Windows XP Professional x64 Edition
Product Epson Stylus Photo R3000 printer
Part Number C11CA86201
Extended Service Programs 1-year...
Start Here - Page 3
..., your wireless router and/or laptop must conform to the 802.11n standard. Earlier standards (802.11a/b/g) are not supported.
Direct USB Connection Make sure you have a USB cable (not included). Do not connect the printer to your computer until you're instructed to do so.
Wired Ethernet® Connection Make sure you have an Ethernet network cable (not included). You must install the software on...