Gigabyte GA-6QPCV-RH driver and firmware
Drivers and firmware downloads for this Gigabyte item

Related Gigabyte GA-6QPCV-RH Manual Pages
Download the free PDF manual for Gigabyte GA-6QPCV-RH and other Gigabyte manuals at ManualOwl.com
Manual - Page 2
... assist in the use of this product, Gigabyte has categorized the user manual in the following:
For detailed product information and specifications, please carefully read the "Product User Manual".
For detailed information related to Gigabyte's unique features, please go to "Technology Guide" section on Gigabyte's website to read or download the information you need.
For more product...
Manual - Page 3
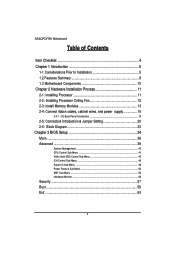
... Process 11 2-1: Installing Processor 11 2-2: Installing Processor Colling Fan 12 2-3: Install Memory Modules 13 2-4: Connect ribbon cables, cabinet wires, and power supply 15
2-4-1 : I/O Back Panel Introduction 15
2-5: Connectors Introduction & Jumper Setting 20 2-6: Block Diagram 33 Chapter 3 BIOS Setup 34 Main ...36 Advanced 39
System Management ...40 CPU Control Sub-Menu 41...
Manual - Page 4
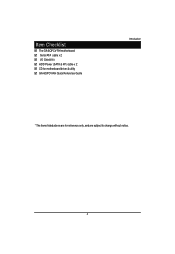
Item Checklist
The GA-6QPCV-RH motherboard Serial ATA cable x 2 I/O Shield Kit HDD Power (SATA & 4P) cable x 2 CD for motherboard driver & utility GA-6QPCV-RH Quick Reference Guide
Introduction
* The items listed above are for reference only, and are subject to change without notice.
4
Manual - Page 5
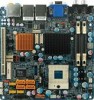
GA-6QPCV-RH Motherboard
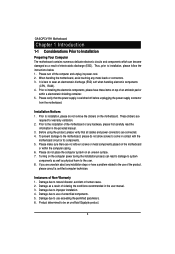
Chapter 1 Introduction
1-1 Considerations Prior to Installation
Preparing Your Computer The motherboard contains numerous delicate electronic circuits and components which can become damaged as a result of electrostatic discharge (ESD). Thus, prior to installation, please follow the instructions below: 1. Please turn off the computer and unplug its power cord. 2. When ...
Manual - Page 6
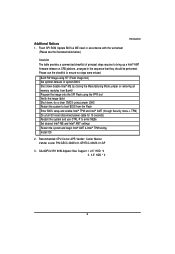
... power cable for 10 seconds) Restart the system and use CTRL-P to enter MEBx Set desired Intel® ME and Intel® AMT settings Restart the system and begin Intel® AMT & Intel® TPM testing Install OS
2. Recommanded CPU Cooler APR Vender: Cooler Master Vender cooler P/N:GECC-00633-01-GP/ECC-00633-01-GP
3. GA-6QPCV-RH 90W Adpater Max Support...
Manual - Page 9
GA-6QPCV-RH Motherboard
y
y
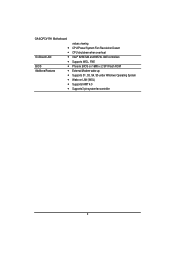
On-Board LAN
y
y
BIOS
y
Additional Features
y
y
y
y
y
values viewing CPU/Power/System Fan Revolution Detect CPU shutdown when overheat Intel® 82567LM and 82574L GbE controllers Supports WOL, PXE Phoenix BIOS on 16Mb x 2 SPI Flash ROM External Modem wake up Supports S1, S3, S4, S5 under Windows Operating System Wake on LAN (WOL) Supports IAMT 4.0 ...
Manual - Page 11
GA-6QPCV-RH Motherboard
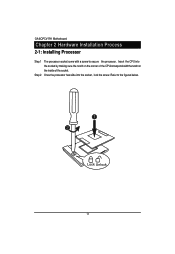
Chapter 2 Hardware Installation Process
2-1: Installing Processor
Step 1 Step 2
The processor socket come with a screw to secure the processor. Insert the CPU into the socket by making sure the notch on the corner of the CPUcorresponds with the notch on the inside of the socket. Once the processor has slide into the socket, lock the screw. Refer to the...
Manual - Page 12
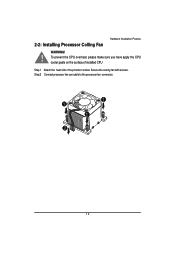
2-2: Installing Processor Colling Fan
Hardware Installation Process
WARNING!
! To prevent the CPU overheat, please make sure you have apply the CPU cooler paste on the surface of installed CPU
Step 1 Attach the heat sink n the procssor socket. Secure the cooing fan with screws. Step 2 Connect processor fan can cable to the processor fan connector.
1 1
1
2
12
Manual - Page 13
GA-6QPCV-RH Motherboard
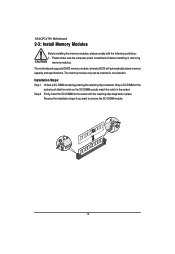
2-3: Install Memory Modules
Before installing the memory modules, please comply with the following conditions: 1. Please make sure the computer power is switched off before installing or removing
memory modules. The motherboard supports DDR2 memory module, whereby BIOS will automatically detect memory capacity and specifications. The memory module only can be inserted in ...
Manual - Page 14
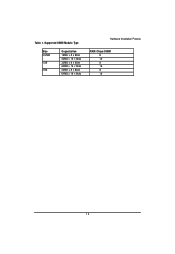
Table 1. Supported DIMM Module Type
Size 512MB
1GB
2GB
Organization 16MB x 8 x 8bks 32MB x 16 x 8bks 32MB x 8 x 8bks 64MB x 16 x 8bks 32MB x 8 x 8bks 64MB x 16 x 8bks
Hardware Installation Process
RAM Chips/DIMM 8 16 8 16 8 16
14
Manual - Page 16
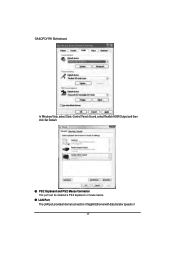
... for details.), and enter BIOS Setup, then set Onboard VGA output connect to D-SUB/ HDMI under Advanced BIOS Features. Please note the HDMI audio output only supports AC3, DTS and 2-channel-LPCM formats. (AC3 and DTS require the use of an external decoder for decoding.) In Windows XP, select Start>Control Panel>Sounds and Audio Devices>Audio, set the Default device for sound playback to Realtek...
Manual - Page 17
GA-6QPCV-RH Motherboard
In Windows Vista, select Start>Control Panel>Sound, select Realtek HDMI Output and then click Set Default.
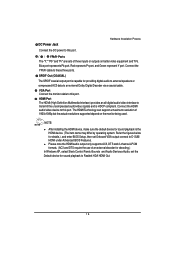
PS/2 Keyboard and PS/2 Mouse Connector This port can be installed a PS/2 keyboard or mouse device. LAN Port The LAN port provides Internet connection of Gigabit Ethernet with data transfer speeds of
17
Manual - Page 18
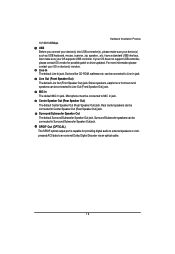
10/100/1000Mbps.
Hardware Installation Process
USB Before you connect your device(s) into USB connector(s), please make sure your device(s) such as USB keyboard, mouse, scanner, zip, speaker...etc. have a standard USB interface. Also make sure your OS supports USB controller. If your OS does not support USB controller, please contact OS vendor for possible patch or driver updated. For more ...
Manual - Page 21
GA-6QPCV-RH Motherboard
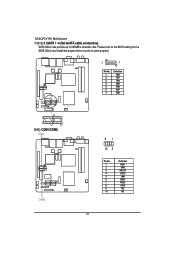
1/ 2/ 3/ 4 ) SATA 1~4 (Serial ATA cable connectors) SATA 3Gb/s can provide up to 300MB/s stransfer rate. Please refer to the BIOS setting for the SATA 3Gb/s and install the proper driver in order to work properly.
7
1
Pin No. 1 2 3 4 5 6 7
Definition GND TXP TXN GND RXN RXP GND
SATA3 SATA2 SATA4 SATA1
5/ 6 ) COM1/COM2
COM1
COM2
91 10 2
...
Manual - Page 27
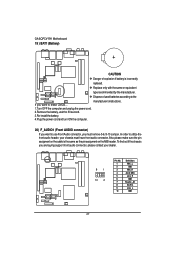
GA-6QPCV-RH Motherboard 19 ) BAT1 (Battery)
CAUTION Danger of explosion if battery is incorrectly replaced. Replace only with the same or equivalent type recommended by the manufacturer. Dispose of used batteries according to the manufacturer's instructions. If you want to erase CMOS... 1.Turn OFF the computer and unplug the power cord. 2.Remove the battery, wait for 30...
Manual - Page 35
GA-6QPCV-RH Motherboard
GETTINGHELP Main Menu The on-line description of the highlighted setup function is displayed at the bottom of the screen. Status Page Setup Menu / Option Page Setup Menu Press F1 to pop up a small help window that describes the appropriate keys to use and the possible selections for the highlighted item. To exit the Help Window press...
Manual - Page 37

GA-6QPCV-RH Motherboard
IDE Channel 0 Master/Slave/SATA Port 1/2/3/4
The category identifies the types of Serial SATA hard disk from drive 1 to 6 that has been installed in the computer. System will automatically detect HDD type. Note that the specifications of your drive must match with the drive table. The hard disk will not work properly if you enter improper information for this category. ...
Manual - Page 38
... all other errors. (Default setting)
All Errors
Whenever the BIOS detects a non-fatal error the system will be stopped.
System Memory The POST of the BIOS will determine the amount of system memory installed in the system.
Extended Memory The BIOS determines how much extended memory is present during the POST. This is the amount of memory located above 1 MB in the CPU's memory address map...
Manual - Page 41
GA-6QPCV-RH Motherboard
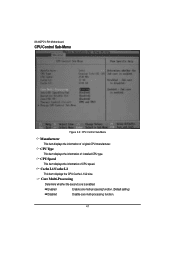
CPU Control Sub-Menu
Figure 2-2: CPU Control Sub-Menu
Manufacturer
This item displays the information of original CPU manufacturer.
CPU Type
This item displays the information of installed CPU type.
CPU Speed
This item displays the information of CPU speed.
Cache L1/Cache L2
This item displays the CPU Cache L1/L2 size.
Core Multi-Processing
Determine whether the ...
Manual - Page 42
Intel (R) SpeedStep (tm)
BIOS Setup
Intel SpeedStep technology allows the system to dynamically adjust processor voltage and core frequency, which can result in decreased average power consumption and decreased average heat production.
Enabled
Enable Intel SpeedStep function. (Default setting)
Disabled
Disable Intel SpeedStep function.
Execution Disable Bit
Enabled Disabled
Enable ...