Gigabyte GA-E350N WIN8 driver and firmware
Drivers and firmware downloads for this Gigabyte item

Related Gigabyte GA-E350N WIN8 Manual Pages
Download the free PDF manual for Gigabyte GA-E350N WIN8 and other Gigabyte manuals at ManualOwl.com
Manual - Page 2
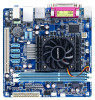
Motherboard GA-E350N WIN8
Motherboard GA-E350N WIN8
Nov. 30, 2012
Nov. 30, 2012
Copyright © 2012 GIGA-BYTE TECHNOLOGY CO., LTD. All rights reserved. The trademarks mentioned in this manual are legally registered to their respective owners. Disclaimer Information in this manual is protected by copyright laws and is the property of GIGABYTE. Changes to the specifications and features in ...
Manual - Page 3
... 4 GA-E350N WIN8 Motherboard Block Diagram 5
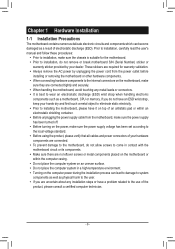
Chapter 1 Hardware Installation 6 1-1 Installation Precautions 6 1-2 Product Specifications 7 1-3 Installing the Memory 9 1-4 Installing an Expansion Card 9 1-5 Back Panel Connectors 9 1-6 Internal Connectors 11
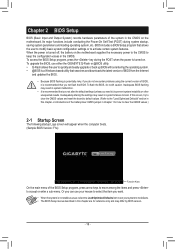
Chapter 2 BIOS Setup 16 2-1 Startup Screen 16 2-2 M.I.T...17 2-3 System...20 2-4 BIOS Features 21 2-5 Peripherals...23 2-6 Power...
Manual - Page 4
...
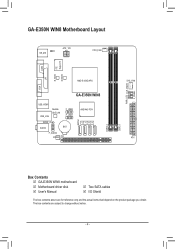
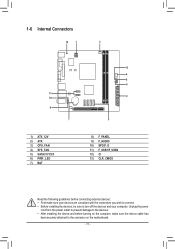
CPU_FAN
iTE Super I/O
B_BIOS M_BIOS
VGA COM
LPT
AMD E-350D APU
GA-E350N WIN8
USB_HDMI
USB_LAN
Realtek GbE LAN
F_USB2 F_USB1
SPDIF_O
AUDIO
BAT
F_AUDIO CODEC PCI
AMD A45 FCH
SATA2 0 1 2 3
DDR3_0 DDR3_1
SYS_FAN ATX
PWR_LED CLR_CMOS F_PANEL
Box Contents 55 GA-E350N WIN8 motherboard 55 Motherboard driver disk 55 User's Manual
55 Two SATA cables 55 I/O Shield
The box contents...
Manual - Page 6
... a motherboard, CPU or memory. If you do not have an ESD wrist strap, keep your hands dry and first touch a metal object to eliminate static electricity. •• Prior to installing the motherboard, please have it on top of an antistatic pad or within an electrostatic shielding container. •• Before unplugging the power supply cable from...
Manual - Page 7
... actual memory size displayed will be less than the size of the physical memory installed.
ŠŠ Single channel memory architecture ŠŠ Support for DDR3 1333 (O.C.)/1066 MHz memory modules
(Go to GIGABYTE's website for the latest supported memory speeds and memory modules.) ŠŠ Integrated Graphics Processor: - 1 x D-Sub port - 1 x HDMI port, supporting a maximum resolution...
Manual - Page 8

... Support for Q-Flash Support for Xpress Install Support for EasyTune
* Available functions in EasyTune may differ by motherboard model. Support for Smart Recovery 2 Support for Auto Green Support for ON/OFF Charge Support for Q-Share
Norton Internet Security (OEM version)
Support for Microsoft® Windows 8/7/Vista/XP
Form Factor ŠŠ Mini-ITX Form Factor; 17.0cm x 17.0cm
* GIGABYTE...
Manual - Page 9
... memory, switch the direction.
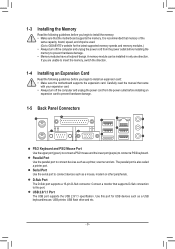
1-4 Installing an Expansion Card
Read the following guidelines before you begin to install an expansion card: •• Make sure the motherboard supports the expansion card. Carefully read the manual that came
with your expansion card. •• Always turn off the computer and unplug the power cord from the power outlet before installing an
expansion card...
Manual - Page 10

...to connect your HDMI-supported monitor. The maximum supported resolution is 1920x1200, but the actual resolutions supported are dependent on the monitor being used.
After installing the HDMI device, make sure to set the default sound playback device to HDMI. (The item name may differ depending on your operating system.)
RJ-45 LAN Port
The Gigabit Ethernet LAN port provides Internet connection at...
Manual - Page 11
... connectors you wish to connect. •• Before installing the devices, be sure to turn off the devices and your computer. Unplug the power
cord from the power outlet to prevent damage to the devices. •• After installing the device and before turning on the computer, make sure the device cable has
been securely attached to the connector on the motherboard.
- 11 -
Manual - Page 12
... on the motherboard. Before connecting the power connector, first make sure the power supply is turned off and all devices are properly installed. The power connector possesses a foolproof design. Connect the power supply cable to the power connector in the correct orientation. The 12V power connector mainly supplies power to the CPU. If the 12V power connector is not connected, the computer will...
Manual - Page 13
DEBUG PORT DEBUG PORT
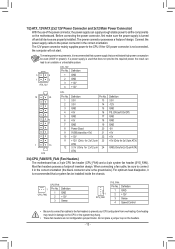
5) SATA2 0/1/2/3 (SATA 3Gb/s Connectors) The SATA connectors conform to SATA 3Gb/s standard and are compatible with SATA 1.5Gb/s standard. Each SATA connector supports a single SATA device.
11 77
7 71 1 SATA2 0 1 2 3
Pin No. 1 2 3 4 5 6 7
Definition GND TXP TXN GND RXN RXP GND
DEBUG PORT
DEBUG PORT
6) PWR_LED (System Power LED Header) This header can be used to connect ...
Manual - Page 15
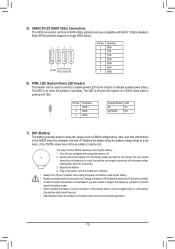
...S/PDIF digital audio cable for digital audio output from your motherboard to your graphics card if you wish to connect an HDMI display to the graphics card and have digital audio output from the HDMI display at the same time. For information about connecting the S/PDIF digital audio cable, carefully read the manual for your expansion card.
1
Pin No. Definition
1 SPDIFO
2 GND
11) F_USB1/2 (USB...
Manual - Page 16
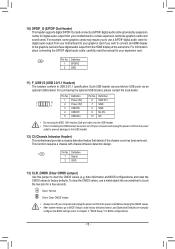
... the power is turned on. To upgrade the BIOS, use either the GIGABYTE Q-Flash or @BIOS utility. •• Q-Flash allows the user to quickly and easily upgrade or back up BIOS without entering the operating system. •• @BIOS is a Windows-based utility that searches and downloads the latest version of BIOS from the Internet
and updates the BIOS. •• Because BIOS flashing...
Manual - Page 18
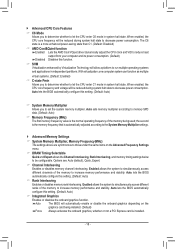
... enabled, the CPU core frequency and voltage will be reduced during system halt state to decrease power consumption. Auto lets the BIOS automatically configure this setting. (Default: Auto)
&& System Memory Multiplier Allows you to set the system memory multiplier. Auto sets memory multiplier according to memory SPD data. (Default: Auto)
&& Memory Frequency (MHz) The first memory frequency value...
Manual - Page 21
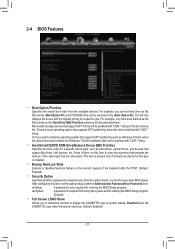
...operating system that supports GPT partitioning such as Windows 7 64-bit, select the optical drive that contains the Windows 7 64-bit installation disk and is prefixed with "UEFI:" string.
&& Hard Drive/CD/DVD ROM Drive/Network Device BBS Priorities Specifies the boot order for a specific device type, such as hard drives, optical drives, and devices that support Boot from LAN function, etc. Press...
Manual - Page 22
... item is configurable only when CSM Support is set to Always.
&& Other PCI Device ROM Priority Allows you to select whether to enable the UEFI or Legacy option ROM for the PCI device controller other than the LAN, storage device, and graphics controllers. Legacy OpROM Enables legacy option ROM only. UEFI OpROM Enables UEFI option ROM only. (Default)
&& Network stack Disables or enables booting...
Manual - Page 23
...allows the storage driver to enable advanced Serial ATA features such as Native Command Queuing and hot plug.
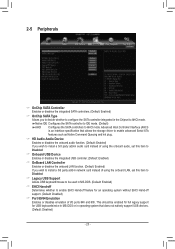
&& HD Audio Azalia Device Enables or disables the onboard audio function. (Default: Enabled) If you wish to install a 3rd party add-in audio card instead of using the onboard audio, set this item to Disabled.
&& Onboard USB Device Enables or disables the integrated USB controller. (Default...
Manual - Page 24
...Storage Devices Displays a list of connected USB mass storage devices. This item appears only when a USB storage device is installed.
`` SB SATA Configuration && SATA Hot Plug on PORT0~SATA Hot Plug on PORT3
Enables or disable the hot plug capability for each SATA port. (Default: Disabled) && SATA Power on PORT0~SATA Power on PORT3
Enables or disables each SATA port. (Default: Enabled) `` Super IO...
Manual - Page 25
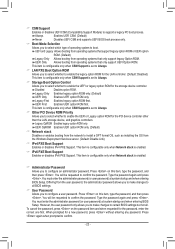
... this function. (Default) Password Set a password with 1~5 characters to turn on the system. Keyboard 98 Press POWER button on the Windows 98 keyboard to turn on the system. Any Key Press any key to turn on the system.
&& Power On Password Set the password when Power On By Keyboard is set to Password. Press on this item and set a password with up to 5 characters...
Manual - Page 27

... to My Computer, double-click the optical drive and execute the Run.exe program.) After inserting the driver disk, "Xpress Install" will automatically scan your system and then list all the drivers that are recommended to install. You can click the Install All button and "Xpress Install" will install all the recommended drivers. Or click Install Single Items to manually select the drivers you wish...