Gigabyte GV-NX76G256D-RH driver and firmware
Drivers and firmware downloads for this Gigabyte item


Related Gigabyte GV-NX76G256D-RH Manual Pages
Download the free PDF manual for Gigabyte GV-NX76G256D-RH and other Gigabyte manuals at ManualOwl.com
Manual - Page 8
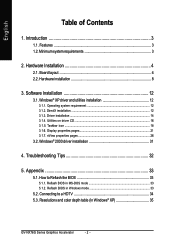

... icon ...18 3.1.6. Display properties pages 21 3.1.7. nView properties pages 26
3.2. Windows® 2000 driver installation 31
4. Troubleshooting Tips 32
5. Appendix 33
5.1. How to Reflash the BIOS 33
5.1.1. Reflash BIOS in MS-DOS mode 33 5.1.2. Reflash BIOS in Windows mode 33
5.2. Connecting to a HDTV 34 5.3. Resolutions and color depth table (In Windows® XP 35
GV-NX76G Series...
Manual - Page 15


....
3. Plug the display cable into your card; then turn on the computer and monitor. If your graphics card came with a Dual-Link DVI-I connector, you can connect a flat panel display to the appropriate connector, as shown below...
To VGA Monitor
To Flat Panel Display
To TV/VCR
You are now ready to proceed with the installation of the graphics card driver. Please refer...
Manual - Page 18

English
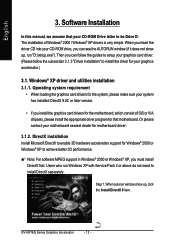
3. Software Installation
In this manual, we assume that your CD-ROM Drive letter to be Drive D: The installation of Windows® 2000 / Windows® XP drivers is very simple. When you insert the driver CD into your CD-ROM drive, you can see the AUTORUN window (if it does not show up, run "D:\setup.exe"). Then you can follow the guides to setup your graphics card driver. (Please follow...
Manual - Page 19

English
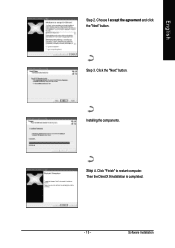
Step 2. Choose I accept the agreement and click the "Next" button.
Step 3. Click the "Next" button.
Installing the components.
Step 4. Click "Finish" to restart computer. Then the DirectX 9 installation is completed.
- 13 -
Software Installation
Manual - Page 20
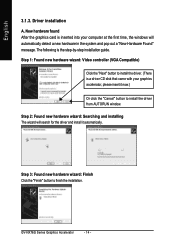

... inserted into your computer at the first time, the windows will automatically detect a new hardware in the system and pop out a "New Hardware Found" message. The following is the step-by-step installation guide.
Step 1: Found new hardware wizard: Video controller (VGA Compatible)
Click the "Next" button to install the driver. (There is a driver CD disk that came with your...
Manual - Page 21
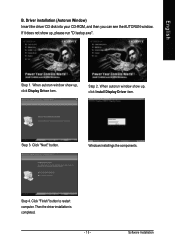

... Window) Insert the driver CD disk into your CD-ROM, and then you can see the AUTORUN window. If it does not show up, please run "D:\setup.exe".
Step 1. When autorun window show up, click Display Driver item.
Step 2. When autorun window show up, click Install Display Driver item.
Step 3. Click "Next" button.
Windows installings the components.
Step 4. Click "Finish" button to restart computer...
Manual - Page 22

English
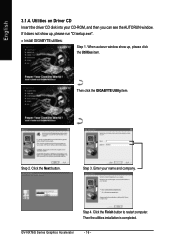
3.1.4. Utilities on Driver CD
Insert the driver CD disk into your CD-ROM, and then you can see the AUTORUN window.
If it does not show up, please run "D:\setup.exe".
• Install GIGABYTE utilities:
Step 1. When autorun window show up, please click the Utilities item.
Then click the GIGABYTE Utility item.
Step 2. Click the Next button.
Step 3. Enter your...
Manual - Page 23
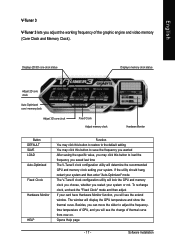

... If your card have Hardware Monitor function, you will see the extend window. The window will display the GPU temperature and show the thermal curve. Besides, you can move the slider to adjust the frequencytime temperature of GPU, and you will see the change of thermal curve from now on. Opens Help page
- 17 -
Software Installation
Manual - Page 24
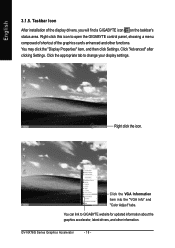

... Taskbar Icon
After installation of the display drivers, you will find a GIGABYTE icon on the taskbar's status area. Right-click this icon to open the GIGABYTE control panel, showing a menu composed of shortcut of the graphics card's enhanced and other functions. You may click the "Display Properties" item, and then click Settings. Click "Advanced" after clicking Settings. Click the appropriate...
Manual - Page 25

English
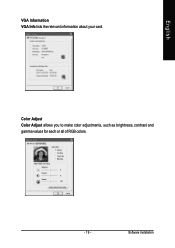
VGA Information VGA Info lists the relevant information about your card.
Color Adjust Color Adjust allows you to make color adjustments, such as brightness, contrast and gamma values for each or all of RGB colors.
- 19 -
Software Installation
Manual - Page 26

English
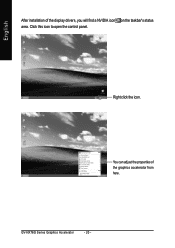
After installation of the display drivers, you will find a NVIDIA icon on the taskbar's status area. Click this icon to open the control panel.
Right click the icon.
You can adjust the properties of the graphics accelerator from here.
GV-NX76G Series Graphics Accelerator
- 20 -
Manual - Page 27
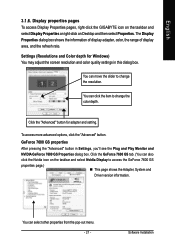

..., right-click the GIGABYTE icon on the taskbar and select Display Properties or right-click on Desktop and then select Properties. The Display Properties dialog box shows the information of display adapter, color, the range of display area, and the refresh rate.
Settings (Resolutions and Color depth for Windows) You may adjust the screen resolution and color quality settings in this dialog...
Manual - Page 29
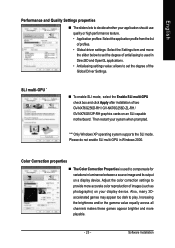

... of the Global Driver Settings.
SLI multi-GPU *
„ To enable SLI mode, select the Enable SLI multi-GPU check box and click Apply after installation of two GV-NX76G256D-RH / GV-NX76G256D-ZL-RH / GV-NX76G512P-RH graphics cards on an SLI-capable motherboard. Then restart your system when prompted.
"*" Only Windows XP operating system supports the SLI mode. Please do not enable SLI multi-GPU in...
Manual - Page 31
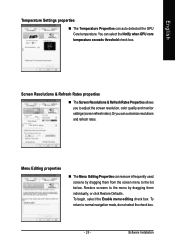

... exceeds threshold check box.
Screen Resolutions & Refresh Rates properties
„ The Screen Resolutions & Refresh Rates Properties allows you to adjust the screen resolution, color quality and monitor settings (screen refresh rates). Or you can customize resolutions and refresh rates.
Menu Editing ... return to normal navigation mode, do not select the check box.
- 25 -
Software Installation
Manual - Page 33

English
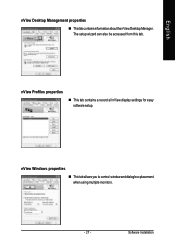
nView Desktop Management properties
„ ThistabcontainsinformationaboutthenViewDesktopManager. The setup wizard can also be accessed from this tab.
nView Profiles properties
„ This tab contains a record all nView display settings for easy software setup.
nView Windows properties
„ This tab allows you to control window and dialog box placement when using multiple monitors....
Manual - Page 35


... windows effects that you can apply to your applications.
nView Zoom properties
„ This tab provides dynamic zoom functionality on the desktop. Also enables full screen video playback via the video mirroring control button.
nView Hot Keys properties
„ This tab lets you perform various actions with shortcut keys or key combinations.
- 29 -
Software Installation
Manual - Page 37
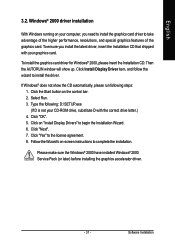

... the CD automatically, please run following steps: 1. Click the Start button on the control bar. 2. Select Run. 3. Type the following: D:\SETUP.exe (If D is not your CD-ROM drive, substitute D with the correct drive letter.) 4. Click "OK". 5. Click on "Install Display Drivers" to begin the Installation Wizard. 6. Click "Next". 7. Click "Yes" to the license agreement. 8. Follow the Wizard's on...
Manual - Page 38
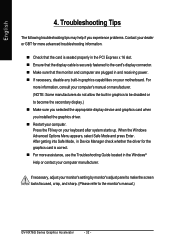

... power. „ If necessary, disable any built-in graphics capabilities on your motherboard. For
more information, consult your computer's manual or manufacturer. (NOTE: Some manufacturers do not allow the built-in graphics to be disabled or to become the secondary display.) „ Make sure you selected the appropriate display device and graphics card when you installed the graphics driver...
Manual - Page 39
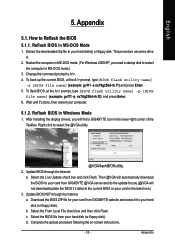

...nx76g256d-rh.f2) and press Enter. 6. Wait until it's done, then restart your computer.
5.1.2. Reflash BIOS in Windows Mode
1. After installing the display drivers, you will find a GIGABYTE icon in the lower-right corner of the Taskbar. Right-click to select the @VGA utility.
@VGA flash BIOS utility. 2. Update BIOS through the Internet
a. Select the Live Update check box and click Flash. Then @VGA...
Manual - Page 40
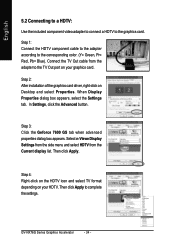

... the corresponding color. (Y= Green, Pr= Red, Pb= Blue). Connect the TV Out cable from the adapter to the TV Out port on your graphics card.
Step 2: After installation of the graphics card driver, right-click on Desktop and select Properties. When Display Properties dialog box appears, select the Settings tab. In Settings, click the Advanced button.
Step 3: Click the Geforce 7600 GS tab...
