Gigabyte GV-R929XWF3-4GD driver and firmware
Drivers and firmware downloads for this Gigabyte item

Related Gigabyte GV-R929XWF3-4GD Manual Pages
Download the free PDF manual for Gigabyte GV-R929XWF3-4GD and other Gigabyte manuals at ManualOwl.com
Manual - Page 2
Table of Contents
1. Introduction...3 1.1. Minimum System Requirements 3
2. Hardware Installation 4 2.1. Hardware Installation...4
2.1.1. AMD Crossfire...5
3. Software Installation...7 3.1. Driver and Utility Installation 7
3.1.1. Driver Installation...7 3.1.2. GIGABYTE OC Guru II...9 3.2. Taskbar Icon...19 3.3. Display Properties Pages 21
4. AMD Eyefinity...36 5. Appendix...37
- 2 -
Manual - Page 3
...Hardware
- Intel®Pentium®4 / CoreTM 2 or AMD AthlonTM / PhenomTM - 1 GB or more of system memory for best performance - Optical drive for software installation (CD-ROM or DVD-ROM drive)
•
Operating System
- Windows ® 8 - Windows ® 7 - Windows ® Vista - Windows®XP with Service Pack 2 (SP2) - Windows®XP Professional x64 Edition
- 3 -
Introduction
Manual - Page 4
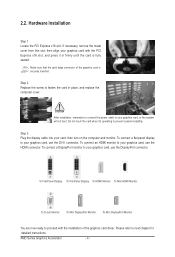
... computer cover.
After installation, remember to connect the power cable to your graphics card, or the system will not boot. Do not touch the card when it's operating to prevent system instability.
Step 3. Plug the display cable into your card; then turn on the computer and monitor. To connect a flat panel display to your graphics card, use the DVI-I connector. To connect an HDMI...
Manual - Page 5
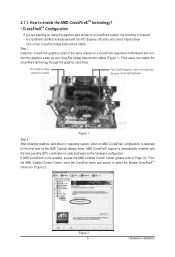
... same chipset on a CrossFireX-supported motherboard and connect the graphics cards via two CrossFire bridge interconnect cables (Figure 1). Then users can enable the CrossFireX technology through the graphics card driver.
Two CrossFire bridge interconnect cables.
Two CrossFire graphics cards of the same type. (Example: GV-RX195P256D-RH)
Figure 1
Step 2: After installing graphics card driver in...
Manual - Page 7
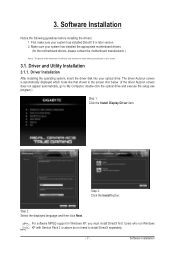
... does not appear automatically, go to My Computer, double-click the optical drive and execute the setup.exe program.)
Step 1: Click the Install Display Driver item.
Step 3: Click the Install button.
Step 2: Select the displayed language and then click Next.
For software MPEG support in Windows XP, you must install DirectX first. Users who run Windows XP with Service Pack 2 or above do not need...
Manual - Page 8
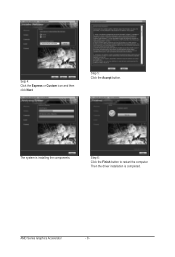
Setp 4: Click the Express or Custom icon and then click Next.
Step 5: Click the Accept button.
The system is installing the components.
Step 6: Click the Finish button to restart the computer. Then the driver installation is completed.
AMD Series Graphics Accelerator
- 8 -
Manual - Page 9
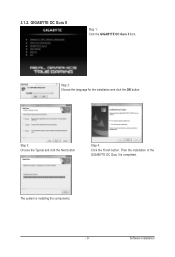
3.1.2. GIGABYTE OC Guru II
Step 1: Click the GIGABYTE OC Guru II item.
Step 2: Choose the language for the installation and click the OK button.
Step 3: Choose the Typical and click the Next button
Step 4: Click the Finish button. Then the installation of the GIGABYTE OC Guru II is completed.
The system is installing the components. - 9 -
Software Installation
Manual - Page 11
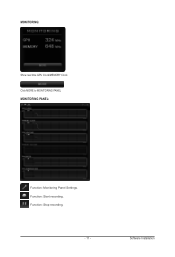
MONITORING:
Show real time GPU Clock/MEMORY Clock Click MORE to MONITORING PANEL MONITORING PANEL:
Function: Monitoring Panel Settings. Function: Start recording. Function: Stop recording.
- 11 -
Software Installation
Manual - Page 13
...:
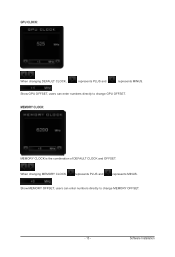
When changing DEFAULT CLOCK,
represents PLUS and
represents MINUS.
Show GPU OFFSET, users can enter numbers directly to change GPU OFFSET.
MEMORY CLOCK:
MEMORY CLOCK is the combination of DEFAULT CLOCK and OFFSET.
When changing MEMORY CLOCK,
represents PLUS and
represents MINUS.
Show MEMORY OFFSET, users can enter numbers directly to change MEMORY OFFSET.
- 13 -
Software Installation
Manual - Page 15
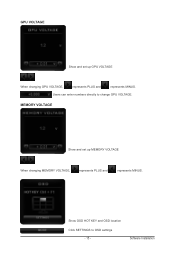
GPU VOLTAGE
Show and set up GPU VOLTAGE
When changing GPU VOLTAGE,
represents PLUS and
represents MINUS.
Users can enter numbers directly to change GPU VOLTAGE.
MEMORY VOLTAGE
Show and set up MEMORY VOLTAGE
When changing MEMORY VOLTAGE,
represents PLUS and
represents MINUS.
Show OSD HOT KEY and OSD location Click SETTINGS to OSD settings
- 15 -
Software Installation
Manual - Page 17
ONLINE SUPPORT
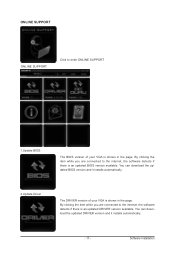
ONLINE SUPPORT:
Click to enter ONLINE SUPPORT
1.Update BIOS:
The BIOS version of your VGA is shown in the page. By clicking the item while you are connected to the internet, the software detects if there is an updated BIOS version available. You can download the updated BIOS version and it installs automatically.
2.Update Driver
The DRIVER version of your VGA is shown in the ...
Manual - Page 18
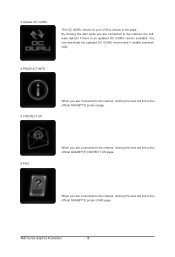
... VGA is shown in the page. By clicking the item while you are connected to the internet, the software detects if there is an updated OC GURU version available. You can download the updated OC GURU version and it installs automatically.
4.PRODUCT INFO
5.CONTECT US
When you are connected to the internet, clicking the item will link to the official GIGABYTE...
Manual - Page 19
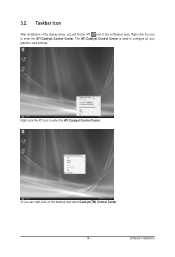
... icon in the notification area. Right-click the icon to enter the ATI Catalyst Control Center. The ATI Catalyst Control Center is used to configure all your graphics card settings.
Right-click the ATI icon to enter the ATI Catalyst Control Center.
Or you can right-click on the desktop and select Catalyst(TM) Control Center.
- 19 -
Software Installation
Manual - Page 21
...)
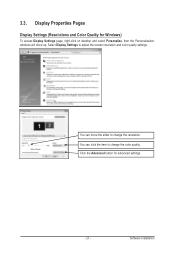
To access Display Settings page, right-click on desktop and select Personalize, then the Personalization windows will show up. Select Display Settings to adjust the screen resolution and color quality settings.
You can move the slider to change the resolution. You can click the item to change the color quality. Click the Advanced button for advanced settings.
- 21 -
Software Installation
Manual - Page 23

... Output File area. Finally, click Next to start file conversion.
The video file has been successfully converted.
Setup my display configuration
This wizard allows you to configure display setting for desktop viewing.
HydraVision Configuration Settings
This wizard will take you to set up the HydraVision Configuration based on your own preference.
- 23 -
Software Installation
Manual - Page 24
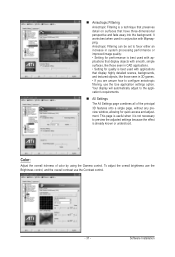
... desktop resolution and desktop mode, setting up extended desktop (requires more than one display), and rotating desktop image to match new display orientation.
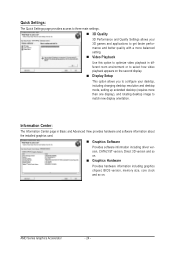
Information Center:
The Information Center page in Basic and Advanced View provides hardware and software information about the installed graphics card.
Graphics Software Provides software information including driver version...
Manual - Page 25
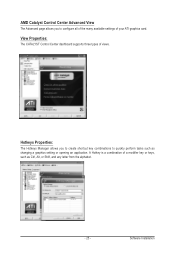
... you to configure all of the many available settings of your ATI graphics card.
View Properties:
The CATALYST Control Center dashboard supports three types of views.
Hotkeys Properties:
The Hotkeys Manager allows you to create shortcut key combinations to quickly perform tasks such as changing a graphics setting or opening an application. A Hotkey is a combination of...
Manual - Page 31
... and adjustment. This page is useful when it is not necessary to preview the adjusted settings because the effect is already known or understood.
Color:
Adjust the overall richness of color by using the Gamma control. To adjust the overall brightness use the Brightness control, and the overall contrast use the Contrast control.
- 31 -
Software Installation
Manual - Page 33
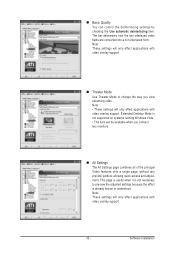
... Settings page combines all of the principal Video features onto a single page, without any preview window, allowing quick access and adjustment. This page is useful when it is not necessary to preview the adjusted settings because the effect is already known or understood. Note: These settings will only affect applications with video overlay support.
- 33 -
Software Installation
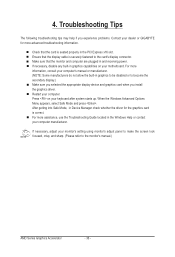
Manual - Page 36
... motherboard. For more information, consult your computer's manual or manufacturer. (NOTE: Some manufacturers do not allow the built-in graphics to be disabled or to become the secondary display.) Make sure you selected the appropriate display device and graphics card when you install the graphics driver. Restart your computer. Press on your keyboard after system starts up. When the Windows...