HP Indigo ws4500 - Digital Press driver and firmware
Drivers and firmware downloads for this Hewlett-Packard item

Related HP Indigo ws4500 Manual Pages
Download the free PDF manual for HP Indigo ws4500 and other HP manuals at ManualOwl.com
Packer Arm Installation - Page 1
...
Document details
Purpose
To describe how to install a new packer arm in the rewinder
Scope
HP Indigo WS6000 Digital Press, HP Indigo WS6600 Digital Press, HP Indigo WS6800 Digital Press, HP Indigo 6900 Digital Press, HP Indigo 6r Digital Press, HP Indigo 8000 Digital Press, HP Indigo press ws4500, HP Indigo WS4600 Digital Press.
Document number CA393-00540
Revision number Rev03
Kit...
Packer Arm Installation - Page 2

... arm assembly...11 Installing the external packer arm assembly...13 Preparing the tubes ...16 Installing the main tube ...16 Installing the clamp tube...17 Installing the short tube...23 Installing the engagement and disengagement tubes 23 Completing the installation...27
3 Revision history and confidentiality notice ...30 Revision History...30 Printing instructions ...30 Confidentiality notice...
Packer Arm Installation - Page 3
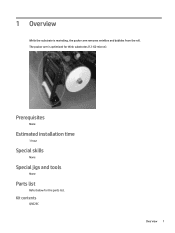
1 Overview
While the substrate is rewinding, the packer arm removes wrinkles and bubbles from the roll. The packer arm is optimized for think substrates (12-60 micron).
Prerequisites
None
Estimated installation time
1 hour
Special skills
None
Special jigs and tools
None
Parts list
Refer below for the parts list.
Kit contents
Q5025C
Overview 1
Packer Arm Installation - Page 6
... packer arm in the rewinder
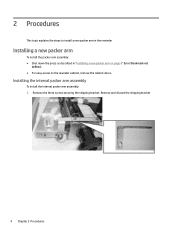
Installing a new packer arm
To install the packer arm assembly: ● Shut down the press as described in "Installing a new packer arm on page 4" Error! Bookmark not
defined.. ● For easy access to the rewinder cabinet, remove the cabinet doors.
Installing the internal packer arm assembly
To install the internal packer arm...
Packer Arm Installation - Page 7
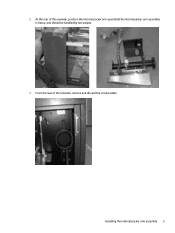
2. At the rear of the rewinder, position the internal packer arm assemblyThe internal packer arm assembly is heavy, and should be handled by two people.
3. From the rear of the rewinder, remove and discard the circular plate.
Installing the internal packer arm assembly 5
Packer Arm Installation - Page 9

6. From the front of the rewinder, install the two Hex M6 screws to secure the internal packer arm assembly wall bracket.
7. From the rear of the rewinder, move the connecting plate towards the moving shelf assemblyMake sure that the holes in the connecting plate align with the holes in the moving shelf assembly.
Installing the internal packer arm assembly 7
Packer Arm Installation - Page 10
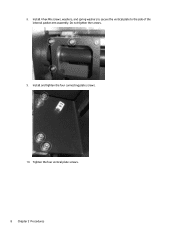
8. Install 4 hex M6 screws, washers, and spring washers to secure the vertical plate to the side of the internal packer arm assembly. Do not tighten the screws.
9. Install and tighten the four connecting plate screws.
10. Tighten the four vertical plate screws. 8 Chapter 2 Procedures
Packer Arm Installation - Page 11

11. From the bottom of the cylinder plate, tighten the four cylinder plate screws. 12. Install the electro-pneumatic regulator in the base using 4 hex M6 screws.
Installing the internal packer arm assembly 9
Packer Arm Installation - Page 12
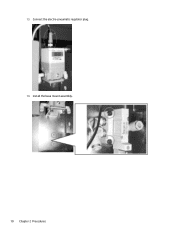
13. Connect the electro-pneumatic regulator plug. 14. Install the base mount assembly. 10 Chapter 2 Procedures
Packer Arm Installation - Page 13
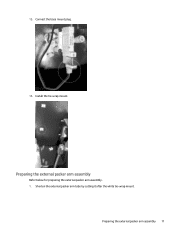
15. Connect the base mount plug.
16. Install the tie-wrap mount.
Preparing the external packer arm assembly
Refer below for preparing the external packer arm assembly. 1. Shorten the external packer arm tube by cutting it after the white tie-wrap mount.
Preparing the external packer arm assembly 11
Packer Arm Installation - Page 15
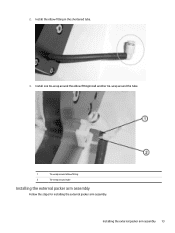
2. Install the elbow fitting in the shortened tube. 3. Install one tie-wrap around the elbow fittingInstall another tie-wrap around the tube.
1
Tie-wrap around elbow fitting
2
Tie-wrap around tube
Installing the external packer arm assembly
Follow the steps for installing the external packer arm assembly.
Installing the external packer arm assembly 13
Packer Arm Installation - Page 16
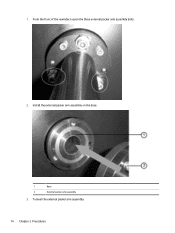
1. From the front of the rewinder, loosen the three external packer arm assembly bolts.
2. Install the external packer arm assembly on the base.
1
Base
2
External packer arm assembly
3. To level the external packer arm assembly:
14 Chapter 2 Procedures
Packer Arm Installation - Page 17
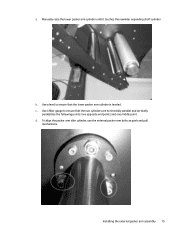
a. Manually raise the lower packer arm cylinder until it touches the rewinder expanding shaft cylinder.
b. Use a level to ensure that the lower packer arm cylinder is ... opposite end points and one middle point. d. To align the packer arm idler cylinder, use the external packer arm bolts as push and pull
mechanisms.
Installing the external packer arm assembly 15
Packer Arm Installation - Page 18
... tubes, as follows:
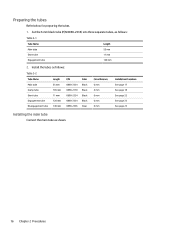
Table 2-1
Tube Name
Length
Main tube Short tube
55 mm 11 mm
Engagement tube
120 mm
2. Install the tubes as follows:
Table 2-2
Tube Name
Length
P/N
Main tube
55 mm
0890-2334
Clamp tube
185 mm 0890-2170...
Color Black Black Black Black Clear
Circumference 6 mm 4 mm 6 mm 6 mm 6 mm
Installation Procedure See page 17 See page 18 See page 22 See page 23 See page 23...
Packer Arm Installation - Page 19
Installing the clamp tube
Connect the clamp tube as shown. NOTE: During the installation, make sure that the pressure gauge screws are not over-tightened. This may damage the unit. Do not use more than 0.16 Nm force to tighten the screws.
Installing the clamp tube 17
Packer Arm Installation - Page 21
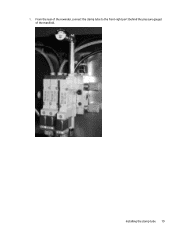
1. From the rear of the rewinder, connect the clamp tube to the front-right port (behind the pressure gauge) of the manifold.
Installing the clamp tube 19
Packer Arm Installation - Page 29
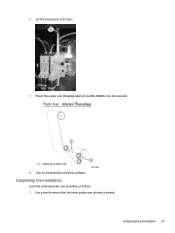
6. Set the air pressure to 0.2 bars.
7. Mount the packer arm threading label (p/n CA396-00880) onto the rewinder.
8. Turn on the pressStart the press software.
Completing the installation
Level the external packer arm assembly, as follows: 1. Use a level to ensure that the lower packer arm cylinder is leveled.
Completing the installation 27
Packer Arm Installation - Page 31
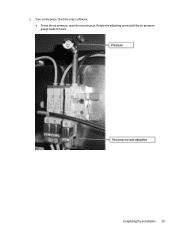
5. Turn on the press. Start the press software. ● To set the air pressure, open the securing nut. Rotate the adjusting screw until the air pressure gauge reads 0.2 bars.
Completing the installation 29
Rewinder Service - Page 12
....
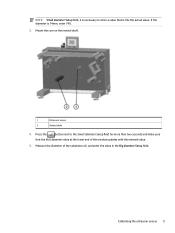
3. Mount the core on the rewind shaft.
1
Ultrasonic sensor
2
Rewind shaft
4. Press the
button next to the Small diameter Setup field for more than two seconds and make sure
that the Roll diameter value at the lower end of the window updates with the entered value.
5. Measure the diameter of the substrate roll, and...
Rewinder Service - Page 13
6. Mount the substrate roll on the unwind shaft.
1
Unwind shaft
7. Press the
button next to the Big diameter Setup field for more than two seconds and make sure
that the Roll diameter value at the lower end of the window updates with a new calculated value.
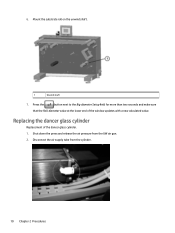
Replacing the dancer glass cylinder
Replacement of the dancer glass...