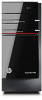
HP Pavilion HPE h8-1300 driver and firmware
Drivers and firmware downloads for this Hewlett-Packard item
Related HP Pavilion HPE h8-1300 Manual Pages
Download the free PDF manual for HP Pavilion HPE h8-1300 and other HP manuals at ManualOwl.com
Upgrading and Servicing Guide - Page 3
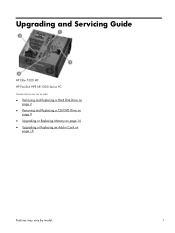
Upgrading and Servicing Guide
HP Elite 7300 MT HP Pavilion HPE h8-1000 Series PC
Computer features may vary by model.
● Removing and Replacing a Hard Disk Drive on page 2
● Removing and Replacing a CD/DVD Drive on page 9
● Upgrading or Replacing Memory on page 14 ● Upgrading or Replacing an Add-in Card on
page 18
Features may vary by model.
1
Upgrading and Servicing Guide - Page 4
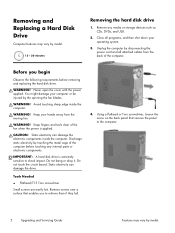
Removing and Replacing a Hard Disk Drive
Computer features may vary by model.
15 - 20 minutes
Removing the hard disk drive
1. Remove any media or storage devices such as CDs, DVDs, and USB.
2. Close all programs, and then shut down your operating system.
3. Unplug the computer by disconnecting the power cord and all attached cables from the back of the computer.
Before you begin...
Upgrading and Servicing Guide - Page 6
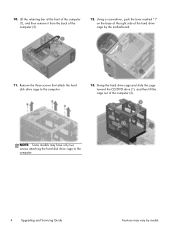
... three screws that attach the hard disk drive cage to the computer.
13. Grasp the hard drive cage and slide the cage toward the CD/DVD drive (1), and then lift the cage out of the computer (2).
NOTE: Some models may have only two screws attaching the hard disk drive cage to the computer.
4
Upgrading and Servicing Guide
Features may vary by model.
Upgrading and Servicing Guide - Page 10
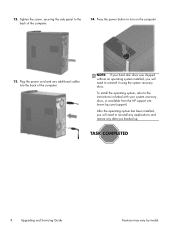
... the power cord and any additional cables into the back of the computer.
NOTE: If your hard disk drive was shipped without an operating system installed, you will need to reinstall it using the system recovery discs.
To install the operating system, refer to the instructions included with your system recovery discs, or available from the HP support site (www.hp.com/support).
After...
Upgrading and Servicing Guide - Page 14
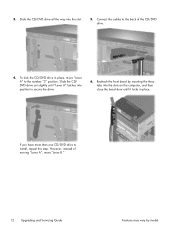
... the front bezel by inserting the three tabs into the slots on the computer, and then close the bezel door until it locks in place.
If you have more than one CD/DVD drive to install, repeat this step. However, instead of moving "Lever A", move "Lever B."
12 Upgrading and Servicing Guide
Features may vary by model.
Upgrading and Servicing Guide - Page 16
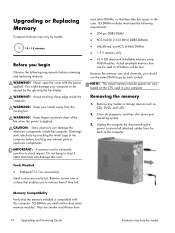
... vary based on the CPU used in your computer.
Removing the memory
1. Remove any media or storage devices such as CDs, DVDs, and USB.
2. Close all programs, and then shut down your operating system.
3. Unplug the computer by disconnecting the power cord and all attached cables from the back of the computer.
Memory Compatibility
Verify that the memory installed is compatible with this...
Upgrading and Servicing Guide - Page 18
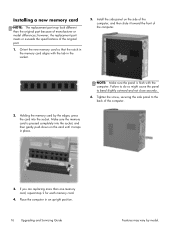
... computer.
2. Holding the memory card by the edges, press the card into the socket. Make sure the memory card is pressed completely into the socket, and then gently push down on the card until it snaps in place.
3. If you are replacing more than one memory card, repeat step 2 for each memory card.
4. Place the computer in an upright position.
16 Upgrading and Servicing Guide...
Upgrading and Servicing Guide - Page 19
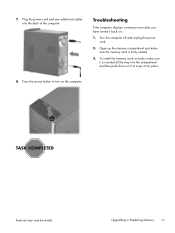
7. Plug the power cord and any additional cables into the back of the computer.
Troubleshooting
If the computer displays a memory error after you have turned it back on:
1. Turn the computer off and unplug the power cord.
2. Open up the memory compartment and make sure the memory card is firmly seated.
3. To install the memory card correctly, make sure it is inserted all the way into...
Upgrading and Servicing Guide - Page 23
... the specifications of the original part.
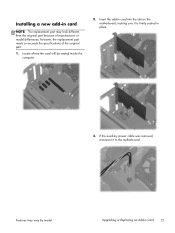
1. Locate where the card will be seated inside the computer.
2. Insert the add-in card into the slot on the motherboard, making sure it is firmly seated in place.
3. If the auxiliary power cable was removed, reconnect it to the motherboard.
Features may vary by model.
Upgrading or Replacing an Add-in...
Upgrading and Servicing Guide - Page 24
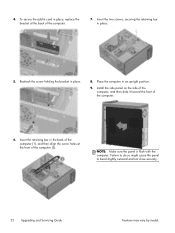
... retaining bar in the back of the computer (1), and then align the screw holes at the front of the computer (2).
NOTE: Make sure the panel is flush with the computer. Failure to do so might cause the panel to bend slightly outward and not close securely.
22 Upgrading and Servicing Guide
Features may vary by model.
Quick Setup Guide - Page 5
... Hewlett-Packard products and services are set forth in the express statements accompanying such products and services. Nothing herein should be construed as constituting an additional warranty. HP shall not be liable for technical or editorial errors or omissions contained herein.
HP assumes no responsibility for the use or reliability of its software on equipment that is...
Quick Setup Guide - Page 7
... features of your computer.
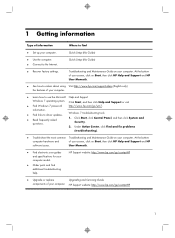
● Learn how to use the Microsoft Help and Support
Windows 7 operating system. Click Start, and then click Help and Support or visit
● Find Windows 7 password
http://www.hp.com/go/win7.
information.
● Find links to driver updates. ● Read frequently asked
questions.
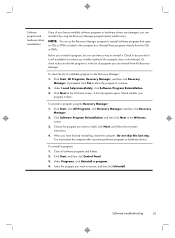
Windows 7 troubleshooting tools 1. Click Start, click Control Panel, and then...
Quick Setup Guide - Page 8
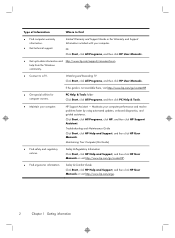
... Support Guide or the Warranty and Support Information included with your computer.
Or Click Start, click All Programs, and then click HP User Manuals.
● Get up-to-date information and http://www.hp.com/support/consumer-forum help from the Windows community.
● Connect to a TV.
Watching and Recording TV Click Start, click All Programs, and then click HP User Manuals.
If the guide...
Quick Setup Guide - Page 9
... the television cable or the telephone line cord to the surge protection device, and then connect the device to the computer.
3. Download and install operating system updates. a. Find out what operating system and version your computer is currently running. (Click Start > Control Panel and double-click System. The operating system and version are shown under Windows edition.) b. Open your internet...
Quick Setup Guide - Page 10
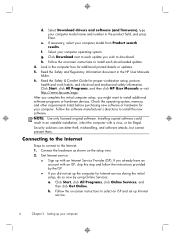
...Select your computer operating system. g. Click Download next to each update you wish to download. h. Follow the on-screen instructions to install each downloaded update. 4. Look in the computer box for additional printed details or updates. 5. Read the Safety and Regulatory Information document in the HP User Manuals folder. 6. Read the Safety & Comfort Guide for proper workstation setup, posture...
Quick Setup Guide - Page 14

NVIDIA graphics cards
1. Right-click an empty area of the desktop, and then click NVIDIA Control Panel. The View Selection window opens.
2. In the Selecting a Task area on the left, under Display, click Change resolution. The Change resolution window opens.
3. If your HP computer is connected to an HP monitor, make sure that the Show only TV resolutions check box does not contain a check...
Quick Setup Guide - Page 17
... back up all important data to a backup hard disk drive. 4. Contact Support, whether it was possible or not to start up Windows. Either the hard disk drive or the system board may need to be replaced.
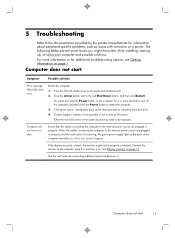
Computer will not turn on or start.
Ensure that the cables connecting the computer to the external power source are plugged in properly. When the...
Quick Setup Guide - Page 23
... network (LAN). Do not connect a telephone cable to the network adapter, and do not plug a network cable into a telephone service line; doing so might damage the network adapter.
Run the wireless setup wizard:
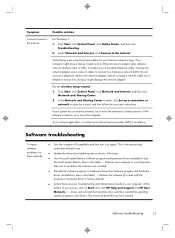
1. Click Start, click Control Panel, click Network and Internet, and then click Network and Sharing Center.
2. In the Network and Sharing Center window, click Set up a connection or network...
Quick Setup Guide - Page 24
... Device Manager window.
3. Click the plus sign (+) to expand the type of device you want to update or rollback. (For example, DVD/CD-ROM drives).
4. Double-click the specific item (for example, HP DVD Writer 640b).
5. Click the Driver tab.
6. To update a driver, click Update Driver, and then follow the on-screen instructions.
Or, to revert to an earlier version of a driver, click Rollback Driver...
Quick Setup Guide - Page 25
... the program you want to install, click Next, and follow the on-screen instructions.
4. When you have finished reinstalling, restart the computer. Do not skip this last step. You must restart the computer after recovering software programs or hardware drivers.
To uninstall a program: 1. Close all software programs and folders. 2. Click Start, and then click Control Panel. 3. Under Programs, click...