HP mp2210 driver and firmware

Related HP mp2210 Manual Pages
Download the free PDF manual for HP mp2210 and other HP manuals at ManualOwl.com
User's Guide - Page 4
... menu 38 Setup menu 39 Help menu 39
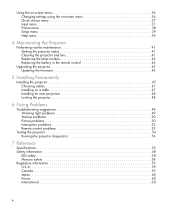
4 Maintaining the Projector
Performing routine maintenance 41 Getting the projector status 41 Cleaning the projector and lens 41 Replacing the lamp module 42 Replacing the battery in the remote control 44
Upgrading the projector 45 Updating the firmware 45
5 Installing Permanently
Installing the projector 47 Choosing cables 47 Installing on a table...
User's Guide - Page 14
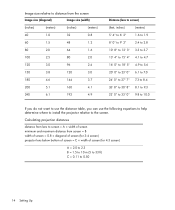
... the distance table, you can use the following equations to help determine where to install the projector relative to the screen.
Calculating projection distances
distance from lens to screen = A ...maximum distance from screen = B width of screen = 0.8 × diagonal of screen (for 3:4 screen) projector lens below bottom of screen = C × width of screen (for 4:3 screen)
A = 2.0 to 2.3 B = 1.5...
User's Guide - Page 15
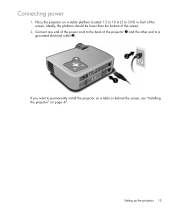
..., the platform should be lower than the bottom of the screen.
2. Connect one end of the power cord to the back of the projector 1 and the other end to a grounded electrical outlet 2.
If you want to permanently install the projector on a table or behind the screen, see "Installing the projector" on page 47.
Setting up the projector 15
User's Guide - Page 17

Connecting a handheld organizer
Not all handhelds come with VGA-out ports. For example, an iPAQ Pocket PC may require a VGA-out PC Card with 15-pin connector. If necessary, install a VGA-out accessory card into the organizer. Requires:
• VGA cable 1 • VGA-out accessory card 2 (in some cases)
Setting up the projector 17
User's Guide - Page 42
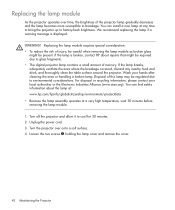
... message is displayed.
WARNING! Replacing the lamp module requires special consideration: • To reduce the risk of injury, be careful when removing the lamp module as broken glass
might be present. If the lamp is broken, contact HP about repairs that might be required due to glass fragments. • This digital projector lamp contains...
User's Guide - Page 43
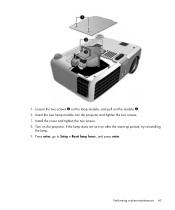
... screws 2 on the lamp module, and pull out the module 3.
6. Insert the new lamp module into the projector and tighten the two screws. 7. Install the cover and tighten the two screws. 8. Turn on the projector. If the lamp does not turn on after the warm-up period, try reinstalling
the lamp. 9. Press enter...
User's Guide - Page 45
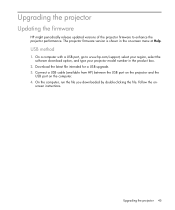
Upgrading the projector
Updating the firmware
HP might periodically release updated versions of the projector firmware to enhance the projector performance. The projector firmware version is shown in the on-screen menu at Help.
USB method
1. On a computer with a USB port, go to www.hp.com/support, select your region, select the software download option, and type your projector model number in the ...
User's Guide - Page 47
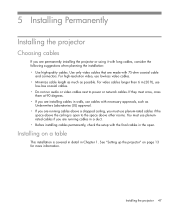
... above the ceiling is open to the space above other rooms. You must use plenumrated cables if you are running cables in a duct. • Before installing cables permanently, check the setup with the final cables in the open.
Installing on a table
This installation is covered in detail in Chapter 1. See "Setting up the projector" on page 13 for more information...
User's Guide - Page 48
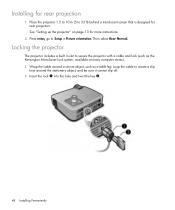
... for rear projection. See "Setting up the projector" on page 13 for more instructions.
2. Press enter, go to Setup > Picture orientation. Then select Rear Normal.
Locking the projector
The projector includes a built in slot to secure the projector with a cable and lock (such as the Kensington MicroSaver lock system, available at many computer stores). 1. Wrap the cable around a secure object...
User's Guide - Page 49
..." on page 50 • "Interruption problems" on page 53 • "Remote control problems" on page 53
TIP: If these suggestions do not solve your problem, go to http://www.hp.com/support for additional information. To contact HP, refer to the support guide included with the projector.
Warning light problems
If both red warning lights are blinking: •...
User's Guide - Page 50
... power button again.
Picture problems
If a "scanning" or "waiting" message is displayed on a blank screen: • Press the source button on the projector or remote control one or more times until the correct source name is selected.
• Be sure the external source is turned on and connected.
• For a computer connection, ensure your notebook computer's external video port...
User's Guide - Page 59
... with respect to the receiver. • Connecting the digital projector's power cord to another power outlet. Connections to peripheral devices To maintain compliance with FCC Rules and Regulations, use properly shielded cables with this device. For more information, consult your dealer, an experienced radio/television technician, or the following booklet prepared by the Federal Communications...
User's Guide - Page 62

...-video connecting source 20 port 10 computer screen, showing 29 computer, connecting 16
connecting component-video source 19 composite-video source 20 computer 16 handheld organizer 17 power 15 SCART source 18 S-video source 20
D
diagnostics 54
F
firmware, updating 45 focus 25
H
handheld organizer, connecting 17
hiding picture 29
I
image. See picture installing projector 13, 47
L
lamp, replacing...
User's Guide - Page 63

...setting up 13 shape, adjusting 32 showing picture 29 showing presentations 29 slanted picture, adjusting
33 specifications 55 S-video
connecting source 20 port 10
T
table installation 13, 47 troubleshooting
interruptions 53 picture 50 remote control 53 start-up 50 warning lights 49 turning on and off 21
U
updating firmware 45 upgrading projector 45 USB, connecting 16 using remote control 26
V
VGA...