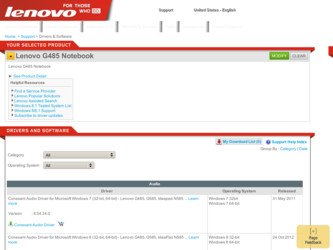
Lenovo G485 driver and firmware
Related Lenovo G485 Manual Pages
Download the free PDF manual for Lenovo G485 and other Lenovo manuals at ManualOwl.com
User Guide - Page 2
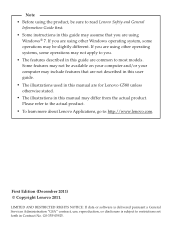
... actual product. • To learn more about Lenovo Applications, go to: http://www.lenovo.com.
First Edition (December 2011) © Copyright Lenovo 2011.
LIMITED AND RESTRICTED RIGHTS NOTICE: If data or software is delivered pursuant a General Services Administration "GSA" contract, use, reproduction, or disclosure is subject to restrictions set forth in Contract No. GS-35F-05925.
User Guide - Page 20
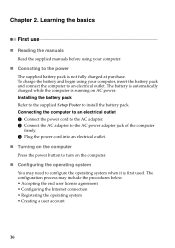
... is automatically charged while the computer is running on AC power. Installing the battery pack Refer to the supplied Setup Poster to install the battery pack. Connecting the computer to an electrical outlet 1 Connect the power cord to the AC adapter. 2 Connect the AC adapter to the AC power adapter jack of the computer
firmly. 3 Plug the power cord into an electrical outlet...
User Guide - Page 27
....
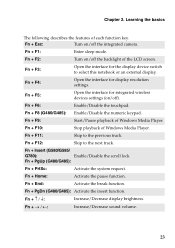
Fn + F4:
Open the interface for display resolution settings.
Fn + F5:
Open the interface for integrated wireless devices settings (on/off).
Fn + F6:
Enable/Disable the touchpad.
Fn + F8 (G480/G485): Enable/Disable the numeric keypad.
Fn + F9:
Start/Pause playback of Windows Media Player.
Fn + F10:
Stop playback of Windows Media Player.
Fn + F11:
Skip to the previous track.
Fn...
User Guide - Page 28
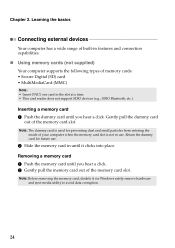
... connection capabilities.
„ Using memory cards (not supplied)
Your computer supports the following types of memory cards: • Secure Digital (SD) card • MultiMediaCard (MMC)
Note: • Insert ONLY one card in the slot at a time. • This card reader does not support SDIO devices (e.g., SDIO Bluetooth, etc.).
Inserting a memory card 1 Push the dummy card until you hear a click...
User Guide - Page 30
Chapter 2. Learning the basics
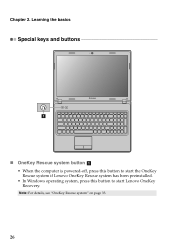
Special keys and buttons
1
„ OneKey Rescue system button a
• When the computer is powered-off, press this button to start the OneKey Rescue system if Lenovo OneKey Rescue system has been preinstalled.
• In Windows operating system, press this button to start Lenovo OneKey Recovery.
Note: For details, see "OneKey Rescue system" on page 33.
26
User Guide - Page 33
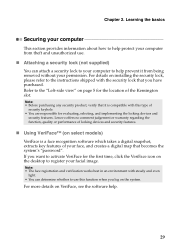
... of locking devices and security features.
„ Using VeriFace™ (on select models)
VeriFace is a face recognition software which takes a digital snapshot, extracts key features of your face, and creates a digital map that becomes the system's "password". If you want to activate VeriFace for the first time, click the VeriFace icon on the desktop to register...
User Guide - Page 35
... in the following ways: Wired connection: use physical wiring to connect. Wireless network technology: connect without wiring.
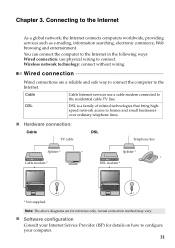
Wired connection
Wired connections are a reliable and safe way to connect the computer to the Internet.
Cable
Cable Internet services use a cable modem connected to the residential cable TV line.
DSL
DSL is a family of related technologies that bring high-
speed...
User Guide - Page 36
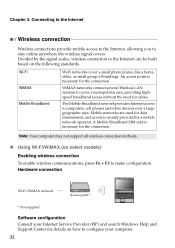
...connect several Wireless LAN systems to cover a metropolitan area, providing highspeed broadband access without the need for cables.
The Mobile Broadband network provides Internet access to computers, cell phones and other devices over a large geographic area. Mobile networks are used for data transmission, and access is usually provided by a mobile network operator. A Mobile Broadband SIM card is...
User Guide - Page 37
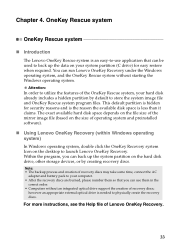
... Windows operating system)
In Windows operating system, double click the OneKey Recovery system Icon on the desktop to launch Lenovo OneKey Recovery. Within the program, you can back up the system partition on the hard disk drive, other storage devices, or by creating recovery discs.
Note: • The backup process and creation of recovery discs may take some time, connect the AC
adapter...
User Guide - Page 38
Chapter 4. OneKey Rescue system
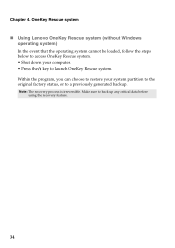
„ Using Lenovo OneKey Rescue system (without Windows operating system)
In the event that the operating system cannot be loaded, follow the steps below to access OneKey Rescue system. • Shut down your computer. • Press the key to launch OneKey Rescue system. Within the program, you can choose to restore...
User Guide - Page 40
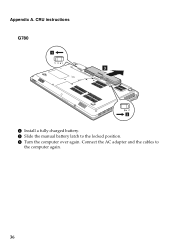
Appendix A. CRU instructions G780
1
3
2
4 Install a fully charged battery. 5 Slide the manual battery latch to the locked position. 6 Turn the computer over again. Connect the AC adapter and the cables to
the computer again.
36
User Guide - Page 41

... instructions
Replacing the hard disk drive
You can increase the storage capacity of your computer by replacing the hard disk drive with one of greater capacity. You can purchase a new hard disk drive from your reseller or Lenovo marketing representative.
Note: • Replace the hard disk drive only if you upgrade it or have it repaired. The connectors and
bay of the hard disk drive...
User Guide - Page 48
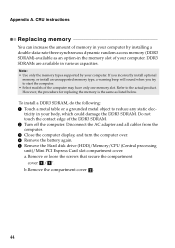
... not touch the contact edge of the DDR3 SDRAM. 2 Turn off the computer. Disconnect the AC adapter and all cables from the computer. 3 Close the computer display, and turn the computer over. 4 Remove the battery again. 5 Remove the Hard disk drive (HDD)/Memory/CPU (Central processing unit)/Mini PCI Express Card slot compartment cover. a.Remove or loose the screws that secure the compartment...
User Guide - Page 50

Appendix A. CRU instructions
G780
1
1 '
1 '
1
1 '
1 '
2
6 If two DDR3 SDRAMs are already installed in the memory slot, remove one of them to make room for the new one by pressing out on the latches on both edges of the socket at ...
Hardware Maintenance Manual - Page 20
... sure that all software fixes, drivers, and BIOS downloads are installed before replacing any FRUs listed in this manual. After a system board is replaced, ensure that the latest BIOS is loaded to the system board before completing the service action. To download software fixes, drivers, and BIOS, follow the steps below: 1. Go to http://consumersupport.lenovo.com/. 2. Enter the serial number or...
Hardware Maintenance Manual - Page 26
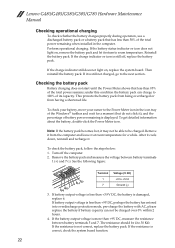
Lenovo G480/G485/G580/G585/G780 Hardware Maintenance Manual
Checking operational charging
To check whether the battery charges properly during operation, use a discharged battery pack or a battery pack that has less than 50% of the total power remaining when installed in the computer. Perform operational charging. If the battery status indicator or icon does not light on...
Hardware Maintenance Manual - Page 27
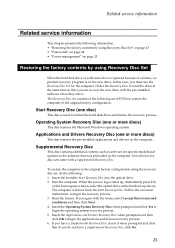
... Windows operating system.
Applications and Drivers Recovery Disc (one or more discs)
This disc restores the pre-installed applications and drivers on the computer.
Supplemental Recovery Disc
This disc contains additional content, such as software for specific models and updates to the software that was preloaded on the computer. Not all recovery disc sets come with a Supplemental Recovery...
Hardware Maintenance Manual - Page 28
... normal.
8. When the recovery process is complete, the Welcome to the Microsoft Windows screen is displayed. Follow the instructions on the screen to complete the Windows setup.
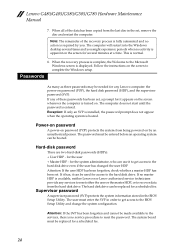
Passwords
As many as three passwords may be needed for any Lenovo computer: the power-on password (POP), the hard disk password (HDP), and the supervisor password (SVP). If any of these passwords has been set, a prompt for...
Lenovo G480, G485, G580, G585, G780 Lenovo Limited Warranty & Product Specific Notices V1.0 (English) - Page 3
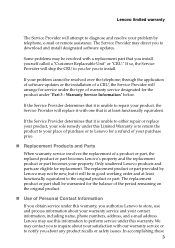
Lenovo limited warranty
The Service Provider will attempt to diagnose and resolve your problem by telephone, e-mail or remote assistance. The Service Provider may direct you to download and install designated software updates.
Some problems may be resolved with a replacement part that you install yourself called a "Customer Replaceable Unit" or "CRU." If so, the Service Provider will ship the CRU ...
Lenovo G480, G485, G580, G585, G780 Lenovo Limited Warranty & Product Specific Notices V1.0 (English) - Page 4
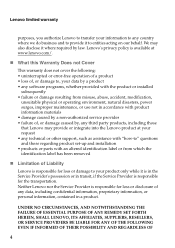
... caused by a non-authorized service provider • failure of, or damage caused by, any third party products, including those that Lenovo may provide or integrate into the Lenovo product at your request • any technical or other support, such as assistance with "how-to" questions and those regarding product set-up and installation • products or parts...