Lexmark X1240 - Color All-in-One Inkjet Printer driver and firmware
Drivers and firmware downloads for this Lexmark item

Related Lexmark X1240 Manual Pages
Download the free PDF manual for Lexmark X1240 and other Lexmark manuals at ManualOwl.com
User's Guide - Page 2

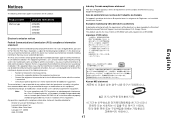
... near the product and easily accessible.
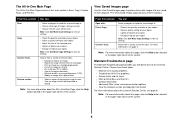
CAUTION: Do not set up this product or make any electrical or cabling connections, such as the power supply cord or telephone, during a lightning storm.
• Refer service or repairs, other than those described in the operating instructions, to a professional service person. • This product is designed, tested, and approved...
User's Guide - Page 3
...4
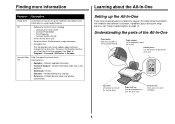
Learning about the All-In-One 4
Setting up the All-In-One 4 Understanding the parts of the All-In-One 4 Using the control panel 5
Understanding the software 5
Using the Lexmark All-In-One Center 5 Using Print Properties 7 Using the Lexmark Solution Center 8 Using the Lexmark Photo Editor 9
Using the All-In-One 9
Printing 9 Scanning 11 Copying 12 Faxing 12 Creating fun projects 13...
User's Guide - Page 4
... last-minute updates about technical changes to the All-In-One. To access the Readme file after you install the All-In-One software, click Start Æ Programs Æ Lexmark 1200 Series Æ Readme.
http://support.lexmark.com Information on:
• Upgrades-Software upgrade information • Customer Support-Contact information, order status, and
warranty • Downloads-Drivers •...
User's Guide - Page 5
...1
2
3
USB cable Power cord
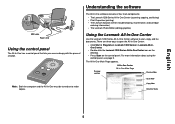
Using the control panel
The All-In-One has a control panel that lets you scan and copy with the press of a button.
Note: Both the computer and the All-In-One must be turned on to make copies.
Understanding the software
The All-In-One software consists of four main components:
• The Lexmark 1200 Series All-In-One Center (scanning, copying, and faxing) •...
User's Guide - Page 6
...; Fax using your PC's modem. • Save an image or document. • Edit text found in a scanned document (OCR). • Modify an image with a photo editor.
Preview section
• Select a region of the preview image to scan. • View an image of what will be printed or
copied.
Note: For more information about the All-In-One...
User's Guide - Page 7
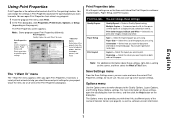
... three main tabs of the Print Properties software: Quality/Copies, Paper Setup, and Print Layout.
From this tab:
Quality/Copies
Paper Setup
Print Layout
You can change these settings:
Quality/Speed - Select a Quality/Speed setting. Multiple Copies - Customize how the All-In-One prints several copies of a single print job, collated or normal. Print Color Images in Black and White - Select...
User's Guide - Page 8

...; Remove Japanese postcard residue.
• Learn how to contact Lexmark by phone, e-mail, or on the World Wide Web.
• Change the appearance of the Printing Status window and turn printing voice notification on or off.
• Change the network settings for the printer. • Obtain software version information.
Note: For more information, click the Help button located...
User's Guide - Page 9
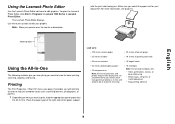
...the Lexmark Photo Editor
Use the Lexmark Photo Editor software to edit graphics. To open the Lexmark Photo Editor, click Start Programs Lexmark 1200 Series Lexmark Photo Editor.
The Lexmark Photo Editor displays. ...Touch-up tools
Using the All-In-One
The following sections give you everything you need to know for basic printing, scanning, copying, and faxing.
Printing
The Print Properties "I Want ...
User's Guide - Page 11
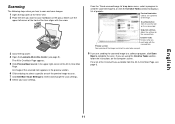
... image, and select an area to be scanned.
9 If you are sending the scanned image to a software program, click Scan
Now to complete the scan. If you are using the Creative Tasks section, follow the instructions on the computer screen.
For a list of the Creative Tasks available from the All-In-One Main Page, see page 6.
English
11
User's Guide - Page 13
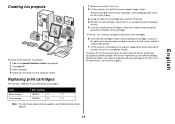
.... 3 Select a project. 4 Follow the instructions on the computer screen.
Replacing print cartridges
The Lexmark 1200 Series uses the following cartridges:
Item:
Part number:
Black cartridge
10N0016
16
17
Color cartridge
10N0026
26
27
Note: For information about ordering supplies, see the Maintenance tab on page 8.
1 Make sure the All-In-One is on. 2 Lift the...
User's Guide - Page 14
... color cartridge secure in the left carrier?
Is the paper loaded correctly? Make sure you do not force the paper into the printer.
Did you install the printer software correctly? For help, refer to the setup documentation.
Is the Lexmark 1200 Series set as the default printer? To check, click Start Settings Printers. If the Lexmark 1200 Series is not set as the default printer...
User's Guide - Page 15
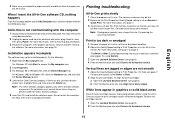
...
the All-In-One.
When I insert the All-In-One software CD, nothing happens
From the Desktop, double-click the My Computer icon, and then double-click the CD-ROM drive icon.
All-In-One is not communicating with the computer
1 Disconnect and reconnect both ends of the USB cable. For help, refer to the
setup documentation.
2 Unplug the power cord from the...
User's Guide - Page 16
... inkjet printer. For a list of
recommended papers, see page 9.
3 Make sure you are loading the paper correctly. For more information, see
page 10.
4 Make sure the paper guide is against the left edge of the paper. For more
information, see page 10.
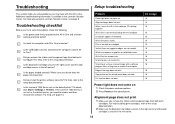
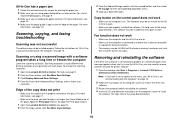
Scanning, copying, and faxing troubleshooting
Scanning was not successful
The software may not be installed properly. Follow the instructions...
User's Guide - Page 17
... interference for a Class B computing device, use a properly shielded and grounded cable such as Lexmark part number 1021294. Use of a substitute cable not properly shielded and grounded may result in a violation of FCC regulations.
Any questions regarding this compliance information statement should be directed to:
Director of Lexmark Technology & Services Lexmark International, Inc. 740 West...
User's Guide - Page 19
...in 7 both sides, printing on, see duplexing
C
card stock 9 cartridges
part numbers 13 viewing ink levels of 8 Contact Information tab 8 control panel 5 copies 7 copy settings 6 copying 12
D
duplexing 7
E
electronic emission statement 17 emission statement 17 envelopes
printing 7
F
faxing 12 FCC statement 17
G
glossy paper 9
H
hardware setup software setup 4
How To tab 8
I
I Want To change quality...
User's Guide - Page 20
... 7 envelopes 7 photos 7 posters 7 Printing Status window changing appearance of 8
Q
Quality/Copies tab 7
R
reinstalling software 16 removing software 16
replacing print cartridges 13
S
Save Settings menu 7 saved images
viewing 6 scan settings 6 scanner unit 4 scanning 11
placing an item on the glass 11 settings, saving for future use 7 setup 4 software
reinstalling 16 removing 16 sound, see voice...