Lexmark X125 - Multifunction : 12 Ppm driver and firmware
Drivers and firmware downloads for this Lexmark item
Related Lexmark X125 Manual Pages
Download the free PDF manual for Lexmark X125 and other Lexmark manuals at ManualOwl.com
Setup Sheet - Page 3
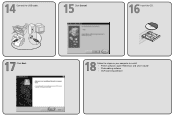
14 Connect the USB cable.
15 Click Cancel.
16 Insert the CD.
Click Next.
Follow the steps on your computer to install: • Printer software, Quick Reference, and User's Guide • Photo editing software • OCR scanning software
Setup Sheet - Page 4
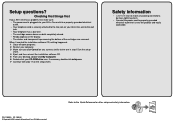
...sheet. 4 Eject, and then reinsert the installation software CD. 5 From your desktop, double-click My Computer. 6 Double-click your CD-ROM drive icon. If necessary, double-click setup.exe. 7 Continue with step 17 on the setup sheet.
Safety information
• CAUTION: Do not make any cabling connections during a lightning storm.
• Connect the power cord to properly grounded electrical outlet...
Quick Reference - Page 3
...1
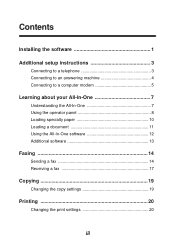
Additional setup instructions 3
Connecting to a telephone 3 Connecting to an answering machine 4 Connecting to a computer modem 5
Learning about your All-In-One 7
Understanding the All-In-One 7 Using the operator panel 8 Loading specialty paper 10 Loading a document 11 Using the All-In-One software 12 Additional software 13
Faxing 14
Sending a fax 14 Receiving a fax 17
Copying 19...
Quick Reference - Page 5
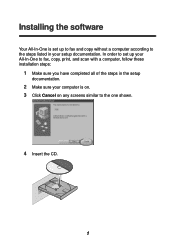
Installing the software
Your All-In-One is set up to fax and copy without a computer according to the steps listed in your setup documentation. In order to set up your All-In-One to fax, copy, print, and scan with a computer, follow these installation steps:
1 Make sure you have completed all of the steps in the setup
documentation.
2 Make sure your computer is on. 3 Click...
Quick Reference - Page 6
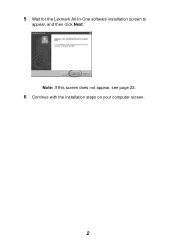
5 Wait for the Lexmark All-In-One software installation screen to
appear, and then click Next. Note: If this screen does not appear, see page 23.
6 Continue with the installation steps on your computer screen.
2
Quick Reference - Page 19
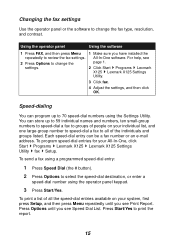
... or the software to change the fax type, resolution, and contrast.
Using the operator panel
Using the software
1 Press FAX, and then press Menu repeatedly to review the fax settings.
2 Press Options to change the settings.
1 Make sure you have installed the All-In-One software. For help, see page 1.
2 Click Start Programs Lexmark X125 Lexmark X125 Settings Utility.
3 Click fax.
4 Adjust the...
Quick Reference - Page 23
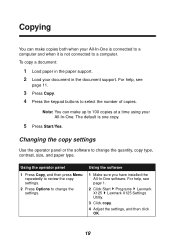
..., contrast, size, and paper type.
Using the operator panel
1 Press Copy, and then press Menu repeatedly to review the copy settings.
2 Press Options to change the settings.
Using the software
1 Make sure you have installed the All-In-One software. For help, see page 1.
2 Click Start Programs Lexmark X125 Lexmark X125 Settings Utility.
3 Click copy.
4 Adjust the settings, and then click OK.
19
Quick Reference - Page 24
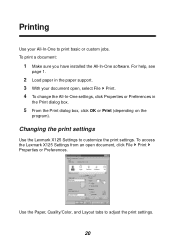
...-One software. For help, see
page 1.
2 Load paper in the paper support. 3 With your document open, select File Print. 4 To change the All-In-One settings, click Properties or Preferences in
the Print dialog box.
5 From the Print dialog box, click OK or Print (depending on the
program).
Changing the print settings
Use the Lexmark X125 Settings to...
Quick Reference - Page 25
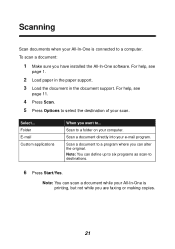
... your All-In-One is connected to a computer. To scan a document:
1 Make sure you have installed the All-In-One software. For help, see
page 1.
2 Load paper in the paper support. 3 Load the document in the document support. For help, see
page 11.
4 Press Scan. 5 Press Options to select the destination of your scan.
Select... Folder E-mail Custom applications
When...
Quick Reference - Page 26
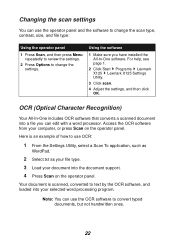
... you have installed the All-In-One software. For help, see page 1.
2 Click Start Programs Lexmark X125 Lexmark X125 Settings Utility.
3 Click scan.
4 Adjust the settings, and then click OK.
OCR (Optical Character Recognition)
Your All-In-One includes OCR software that converts a scanned document into a file you can edit with a word processor. Access the OCR software from your computer, or press...
Quick Reference - Page 27
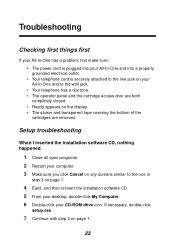
... All-In-One has a problem, first make sure: • The power cord is plugged into your All-In-One and into a properly grounded ...computer. 3 Make sure you click Cancel on any screens similar to the one in
step 3 on page 1.
4 Eject, and then reinsert the installation software CD. 5 From your desktop, double-click My Computer. 6 Double-click your CD-ROM drive icon. If necessary, double-click
setup....
Quick Reference - Page 28
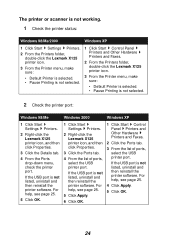
... Settings Printers.
2 Right-click the Lexmark X125 printer icon, and then click Properties.
3 Click the Ports tab.
4 From the list of ports, select the USB printer port.
If the USB port is not listed, uninstall and then reinstall the printer software. For help, see page 25.
5 Click Apply.
6 Click OK.
1 Click Start Control Panel Printers and Other Hardware Printers and Faxes.
2 Click the Ports...
Quick Reference - Page 29
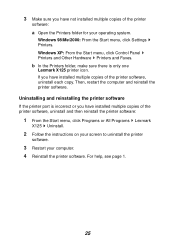
... Settings Printers. Windows XP: From the Start menu, click Control Panel Printers and Other Hardware Printers and Faxes. b In the Printers folder, make sure there is only one Lexmark X125 printer icon. If you have installed multiple copies of the printer software, uninstall each copy. Then, restart the computer and reinstall the printer software. Uninstalling and reinstalling the printer software...
Quick Reference - Page 31
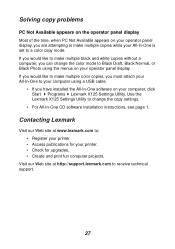
... the Lexmark X125 Settings Utility to change the copy settings.
• For All-In-One CD software installation instructions, see page 1.
Contacting Lexmark
Visit our Web site at www.lexmark.com to: • Register your printer. • Access publications for your printer. • Check for upgrades. • Create and print fun computer projects.
Visit our Web site at http://support.lexmark.com...
User's Guide - Page 2
Basics Copying Printing Scanning Faxing Troubleshooting Index
Notices ii
Computer Software clause at DFARS 252.227-7013 and in applicable FAR provisions: Lexmark International, Inc., Lexington, KY 40550.
Safety information
• Connect the power cord to a properly grounded electrical outlet that is near the product and easily accessible.
• Refer service or repairs, other than those ...
User's Guide - Page 17
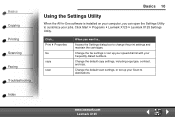
... Utility
When the All-In-One software is installed on your computer, you can open the Settings Utility to customize your jobs. Click Start Programs Lexmark X125 Lexmark X125 Settings Utility.
Click... Print Properties fax copy scan
When you want to...
Access the Settings dialog box to change the print settings and maintain the cartridges.
Change the fax settings or set up your speed-dial list...
User's Guide - Page 31
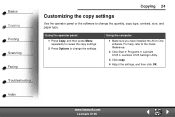
... operator panel:
1 Press Copy, and then press Menu repeatedly to review the copy settings.
2 Press Options to change the settings.
Using the computer:
1 Make sure you have installed the All-In-One software. For help, refer to the Quick Reference.
2 Click Start Programs Lexmark X125 Lexmark X125 Settings Utility.
3 Click copy.
4 Adjust the settings, and then click OK.
www.lexmark.com Lexmark X125
User's Guide - Page 37
Basics Copying Printing Scanning Faxing Troubleshooting Index
Printing 30
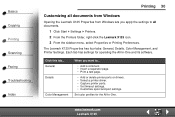
Customizing all documents from Windows
Opening the Lexmark X125 Properties from Windows lets you apply the settings to all documents.
1 Click Start Settings Printers. 2 From the Printers folder, right-click the Lexmark X125 icon. 3 From the sidebar menu, select Properties or Printing Preferences.
The Lexmark X125 ...
User's Guide - Page 38
Basics Copying Printing Scanning Faxing Troubleshooting Index
Printing 31
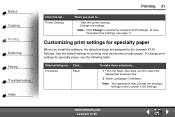
Click this tab... Printer Settings
When you want to...
• View the current settings. • Change the settings.
Note: Click Change to access the Lexmark X125 Settings. To learn more about the Settings, see page 11.
Customizing print settings for specialty paper
When you install the software, the default settings ...
User's Guide - Page 52
Basics Copying Printing Scanning Faxing Troubleshooting Index
Scanning 45
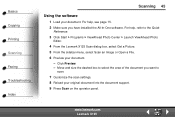
Using the software
1 Load your document. For help, see page 15. 2 Make sure you have installed the All-In-One software. For help, refer to the Quick
Reference.
3 Click Start Programs ViewAhead Photo Center Launch ViewAhead Photo
Editor.
4 From the Lexmark X125 Scan dialog box, select Get a Picture. 5 From the sidebar menu, ...