Samsung S19B220B driver and firmware

Related Samsung S19B220B Manual Pages
Download the free PDF manual for Samsung S19B220B and other Samsung manuals at ManualOwl.com
User Manual Ver.1.0 (English) - Page 2
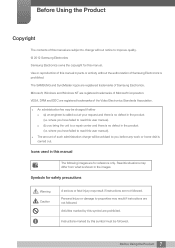
...manual Symbols for safety precautions
Cleaning
Cleaning Securing the Installation Space Precautions for storage
Safety Precautions
Electricity and Safety Installation...Installation
Attaching the Stand Adjusting the Product Tilt Installing a Wall-mount Kit or Desktop Stand Anti-theft Lock
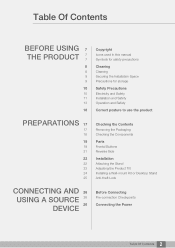
CONNECTING AND 26 USING A SOURCE 26
26
DEVICE
Before Connecting
Pre-connection Checkpoints
Connecting the Power...
User Manual Ver.1.0 (English) - Page 3
...
Connecting to a PC
28
Driver Installation
29
Setting Optimum Resolution
30
Changing the Resolution Using a PC
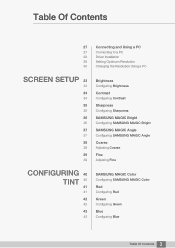
SCREEN SETUP 33
33
34
34
35
35
36
36
37
37
38
38
39
39
Brightness
Configuring Brightness
Contrast
Configuring Contrast
Sharpness
Configuring Sharpness
SAMSUNG MAGIC Bright
Configuring SAMSUNG MAGIC Bright
SAMSUNG MAGIC Angle
Configuring SAMSUNG MAGIC Angle
Coarse
Adjusting Coarse...
User Manual Ver.1.0 (English) - Page 5
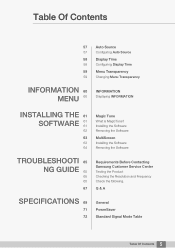
... 60 MENU 60
INFORMATION
Displaying INFORMATION
INSTALLING THE 61
SOFTWARE
61 61
62
63
63 64
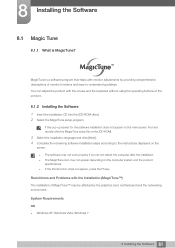
Magic Tune
What is MagicTune? Installing the Software Removing the Software
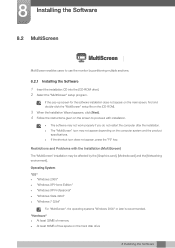
MultiScreen
Installing the Software Removing the Software
TROUBLESHOOTI 65 NG GUIDE 65
65 65
67
Requirements Before Contacting Samsung Customer Service Center
Testing the Product Checking the Resolution and Frequency Check...
User Manual Ver.1.0 (English) - Page 7
... without notice to improve quality. © 2012 Samsung Electronics Samsung Electronics owns the copyright for this manual. Use or reproduction of this manual in parts or entirety without the authorization of Samsung Electronics is prohibited. The SAMSUNG and SyncMaster logos are registered trademarks of Samsung Electronics. Microsoft, Windows and Windows NT are registered trademarks of Microsoft...
User Manual Ver.1.0 (English) - Page 9

... space as shown below or greater when installing the product.
The exterior may differ depending on the product.
10 cm (3.93 inches)
10 cm(3.93 inches)
10 cm (3.93 inches)
10 cm(3.93 inches)
10 cm(3.93 inches)
Precautions for storage
Be sure to contact Samsung Customer Service Center (page 75) if the inside...
User Manual Ver.1.0 (English) - Page 11
... problem occurs in the product, unplug the power cable to completely
!
cut the power to the product.
Power to the product cannot be completely cut off with the power button.
Hold the plug when disconnecting the power cord from the power socket.
z An electric shock or fire may result.
!
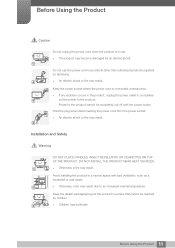
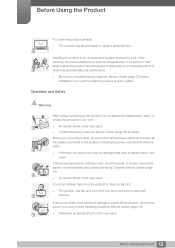
Installation and Safety
Warning
DO NOT PLACE CANDLES, INSECT...
User Manual Ver.1.0 (English) - Page 12
...and injure children.
Edible oil, such as soybean oil, can damage or deform the product. Do not install the product in a kitchen or near a kitchen counter.
Caution
Take care not to drop the product ..., product failure or personal injury may result.
!
Do not set down the product on its front. z The screen may become damaged.
When installing the product on a cabinet or shelf, make sure that the...
User Manual Ver.1.0 (English) - Page 13
... performance.
z Be sure to consult Samsung Customer Service Center (page 75) before installation if you want to install the product at such a place.
...Samsung Customer Service Center (page 75) for repair.
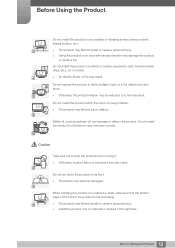
Before you move the product, be sure to turn off the power switch and remove all the cables connected to the product, including the power cord and the antenna cable.
!
z Otherwise, the power...
User Manual Ver.1.0 (English) - Page 22
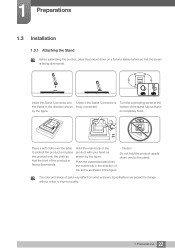
1 Preparations
1.3 Installation
1.3.1 Attaching the Stand
Before assembling the product, place the product down on a flat and stable surface so that...firmly connected.
Turn the connecting screw at the bottom of the stand fully so that it is completely fixed.
DVI IN
RGB IN
POWER
POWER
RGB IN DVI IN
Place a soft cloth over the table to protect the product and place the product onto the cloth so...
User Manual Ver.1.0 (English) - Page 24
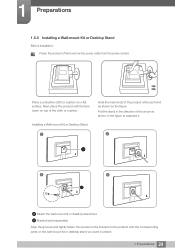
...Desktop Stand
Before Installation Power the product off and remove the power cable from the power socket.
Place a protective cloth or cushion on a flat surface. Next, place the product with the face down on top of the cloth or cushion.
Installing a Wall-mount Kit or Desktop...
2
A A
3
4
B
Attach the wall-mount kit or desktop stand here B Bracket (sold separately) Align the grooves and tightly ...
User Manual Ver.1.0 (English) - Page 25
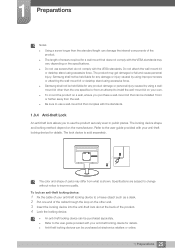
...the wall-mount kit or desktop stand using excessive force. z Samsung shall not be held ...guide provided with your anti-theft locking device for details. The lock device is sold separately.
DVI IN
RGB IN
POWER
The color and shape of parts may differ from what is shown. Specifications are subject to change without notice to improve quality.
To lock an anti-theft locking device:
1 Fix the cable...
User Manual Ver.1.0 (English) - Page 28
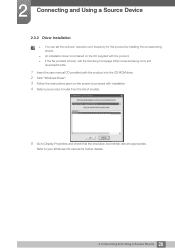
... can set the optimum resolution and frequency for this product by installing the corresponding drivers.
z An installation driver is contained on the CD supplied with the product. z If the file provided is faulty, visit the Samsung homepage (http://www.samsung.com) and
download the file.
1 Insert the user manual CD provided with the product into the CD-ROM drive. 2 Click "Windows Driver". 3 Follow...
User Manual Ver.1.0 (English) - Page 30
... and Using a Source Device
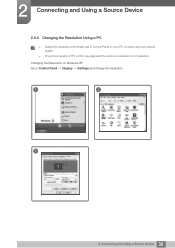
2.3.4 Changing the Resolution Using a PC
z Adjust the resolution and refresh rate in Control Panel on your PC to obtain optimum picture quality.
z The picture quality of TFT-LCDs may degrade if the optimum resolution is not selected.
Changing the Resolution on Windows XP Go to Control Panel Display Settings and change the resolution.
1
2
3
**********
**** ****
30...
User Manual Ver.1.0 (English) - Page 31
2 Connecting and Using a Source Device
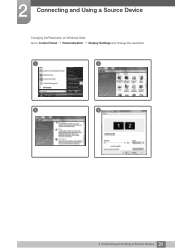
Changing the Resolution on Windows Vista Go to Control Panel Personalization Display Settings and change the resolution.
1
2
3
4
31 2 Connecting and Using a Source Device
User Manual Ver.1.0 (English) - Page 32

2 Connecting and Using a Source Device
Changing the Resolution on Windows 7 Go to Control Panel Display Screen Resolution and change the resolution.
1
2
3
4
32 2 Connecting and Using a Source Device
User Manual Ver.1.0 (English) - Page 61
... depending on the computer system and the product specifications. z If the shortcut icon does not appear, press the F5 key.
Restrictions and Problems with the Installation (MagicTune™)
The installation of MagicTune™ may be affected by the graphics card, motherboard and the networking environment.
System Requirements
OS z Windows XP, Windows Vista, Windows 7
61 8 Installing the Software
User Manual Ver.1.0 (English) - Page 62
...] to start removing MagicTune™. 6 Wait until a message box appears informing you that the software has been removed completely.
For technical support, the FAQ (frequently asked questions) or information about the software upgrade for MagicTune™, please visit our website(http://www.samsung.com/us/consumer/ learningresources/monitor/magetune/pop_intro.html).
62 8 Installing the Software
User Manual Ver.1.0 (English) - Page 63
...Graphics card], [Motherboard] and the [Networking environment].
Operating System "OS" z "Windows 2000" z "Windows XP Home Edition" z "Windows XP Professional" z "Windows Vista 32bit" z "Windows 7 32bit"
For "MultiScreen", the operating systems "Windows 2000" or later is recommended.
"Hardware" z At least 32MB of memory z At least 60MB of free space on the hard disk drive
8 Installing the Software...
User Manual Ver.1.0 (English) - Page 64

8 Installing the Software
8.2.2 Removing the Software
Click [Start], select [Settings]/[Control Panel], and then double-click [Add or Remove Programs]. Select "MultiScreen" from the program list and click the [Add/Delete] button.
64 8 Installing the Software
User Manual Ver.1.0 (English) - Page 80
...the product, Adjustment, Explanation, Re-installation and etc. z If a service technician gives instructions on how to use TV or simply adjusts options without
disassembling productU z If a defect is caused by external environmental factors (Internet, Antenna, Wired Signal, etc.) z If a product is reinstalled or devices are connected additionally after installing the purchased product
for the first...