Sony DCR-IP210 - Micromv Digital Camcorder driver and firmware
Related Sony DCR-IP210 Manual Pages
Download the free PDF manual for Sony DCR-IP210 and other Sony manuals at ManualOwl.com
Operating Instructions - Page 151
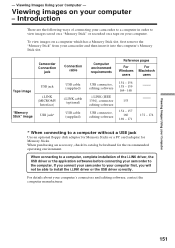
...to a computer without a USB jack
Use an optional floppy disk adaptor for Memory Sticks or a PC card adaptor for Memory Sticks. When purchasing an accessory, check its catalog beforehand for the recommended operating environment.
When connecting to a computer, complete installation of the i.LINK driver, the USB driver or the application softwares before connecting your camcorder to the computer. If...
Operating Instructions - Page 153
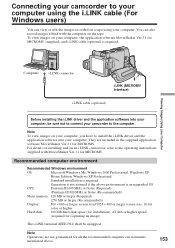
Connecting your camcorder to your computer using the i.LINK cable (For Windows users)
You can view or edit the images recorded on a tape using your computer. You can also record images edited with the computer on the tape. To view images on your computer, the application software MovieShaker Ver.3.1 for MICROMV (supplied) and i.LINK cable (optional) is required.
Computer
i.LINK connector
i.LINK...
Operating Instructions - Page 154

... must install a USB driver onto your computer in order to connect your camcorder to the computer's USB connector. The USB driver can be found on the CD-ROM supplied, along with the application software required for viewing images. If you connect your camcorder and your computer using the USB cable, you can view pictures live from your camcorder and pictures recorded on a tape on your computer (USB...
Operating Instructions - Page 155
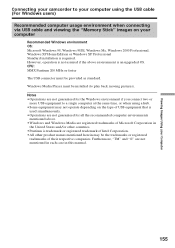
... environment when connecting via USB cable and viewing the "Memory Stick" images on your computer
Recommended Windows environment OS: Microsoft Windows 98, Windows 98SE, Windows Me, Windows 2000 Professional, Windows XP Home Edition or Windows XP Professional Standard installation is required. However, operation is not assured if the above environment is an upgraded OS. CPU: MMX Pentium 200 MHz...
Operating Instructions - Page 156
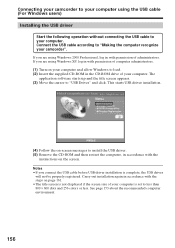
... and allow Windows to load. (2) Insert the supplied CD-ROM in the CD-ROM drive of your computer. The
application software starts up and the title screen appears. (3) Move the cursor to "USB Driver" and click. This starts USB driver installation.
(4) Follow the on-screen messages to install the USB driver. (5) Remove the CD-ROM and then restart the computer, in accordance with the
instructions on...
Operating Instructions - Page 157
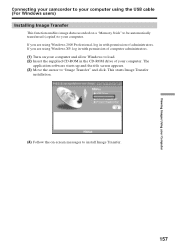
...recorded on a "Memory Stick" to be automatically transferred (copied) to your computer. If you are using Windows 2000 Professional, log in with permission of administrators. If you are using Windows XP, log in with permission of computer administrators. (1) Turn on your computer and allow Windows to load. (2) Insert the supplied CD-ROM in the CD-ROM drive of your computer. The
application software...
Operating Instructions - Page 158
...to your computer using the USB cable (For Windows users)
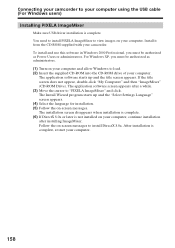
Installing PIXELA ImageMixer
Make sure USB driver installation is complete. You need to install PIXELA ImageMixer to view images on your computer. Install it from the CD-ROM supplied with your camcorder. To install and use this software in Windows 2000 Professional, you must be authorized as Power Users or administrators. For Windows XP, you...
Operating Instructions - Page 159
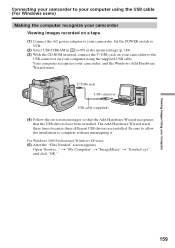
... the USB cable (For Windows users)
Making the computer recognize your camcorder Viewing images recorded on a tape
(1) Connect the AC power adaptor to your camcorder. Set the POWER switch to VCR.
(2) Select USB STREAM in to ON in the menu settings (p. 184). (3) With the CD-ROM inserted, connect the (USB) jack on your camcorder to the
USB connector on your computer using the supplied USB cable. Your...
Operating Instructions - Page 160
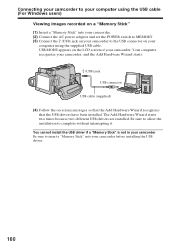
... your camcorder to your computer using the USB cable (For Windows users)
Viewing images recorded on a "Memory Stick" (1) Insert a "Memory Stick" into your camcorder. (2) Connect the AC power adaptor and set the POWER switch to MEMORY. (3) Connect the (USB) jack on your camcorder to the USB connector on your
computer using the supplied USB cable. USB MODE appears on the LCD screen of your camcorder...
Operating Instructions - Page 161

... install the USB driver.
Viewing images recorded on a tape
Step 1: Uninstall the incorrect USB driver 1 Turn on your computer and allow Windows to load. 2 Connect the AC power adaptor, and set the POWER switch to VCR. 3 Connect the USB connector on your computer to the (USB) jack on your
camcorder using the USB cable supplied with your camcorder. 4 Open your computer's "Device Manager".
Windows...
Operating Instructions - Page 162
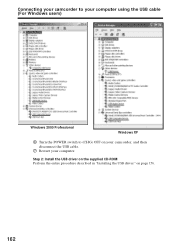
Connecting your camcorder to your computer using the USB cable (For Windows users)
Windows 2000 Professional
Windows XP
6 Turn the POWER switch to (CHG) OFF on your camcorder, and then disconnect the USB cable.
7 Restart your computer.
Step 2: Install the USB driver on the supplied CD-ROM Perform the entire procedure described in "Installing the USB driver" on page 156.
162
Operating Instructions - Page 163

... recorded on a "Memory Stick"
Step1: Uninstall the incorrect USB driver 1 Turn on your computer and allow Windows to load. 2 Insert a "Memory Stick" into your camcorder. 3 Connect the AC power adaptor, and set the POWER switch to MEMORY. 4 Connect the USB connector on your computer to the (USB) jack on your
camcorder using the USB cable supplied with your camcorder. 5 Open your computer's "Device...
Operating Instructions - Page 164
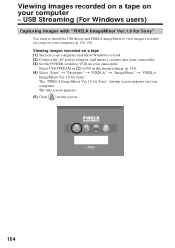
... ImageMixer Ver.1.0 for Sony"
You need to install the USB driver and PIXELA ImageMixer to view images recorded on a tape on your computer (p. 156, 158).
Viewing images recorded on a tape (1) Turn on your computer and allow Windows to load. (2) Connect the AC power adaptor, and insert a cassette into your camcorder. (3) Set the POWER switch to VCR on your camcorder.
Select USB STREAM in to ON...
Operating Instructions - Page 167
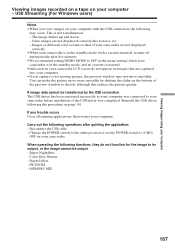
... connected to your camcorder before installation of the USB driver was completed. Reinstall the USB driver following the procedure on page 161.
If any trouble occurs Close all running applications, then restart your computer.
Carry out the following operations after quitting the application: - Disconnect the USB cable. - Change the POWER switch to the other position or set the POWER switch to (CHG...
Operating Instructions - Page 170
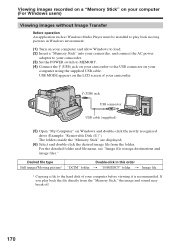
... Windows Media Player must be installed to play back moving pictures in Windows environment.
(1) Turn on your computer and allow Windows to load. (2) Insert a "Memory Stick" into your camcorder, and connect the AC power
adaptor to your camcorder. (3) Set the POWER switch to MEMORY. (4) Connect the (USB) jack on your camcorder to the USB connector on your
computer using the supplied USB cable. USB...
Operating Instructions - Page 172
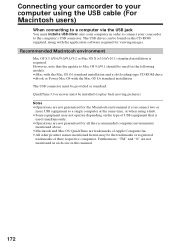
... your camcorder to your computer using the USB cable (For Macintosh users)
When connecting to a computer via the USB jack
You must install a USB driver onto your computer in order to connect your camcorder to the computer's USB connector. The USB driver can be found on the CD-ROM supplied, along with the application software required for viewing images.
Recommended Macintosh environment
Mac OS...
Operating Instructions - Page 173
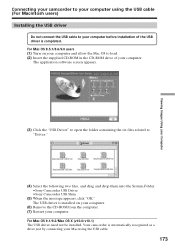
... Computer
Connecting your camcorder to your computer using the USB cable (For Macintosh users)
Installing the USB driver
Do not connect the USB cable to your computer before installation of the USB driver is completed. For Mac OS 8.5.1/8.6/9.0 users (1) Turn on your computer and allow the Mac OS to load. (2) Insert the supplied CD-ROM in the CD-ROM drive of your computer.
The application software...
Operating Instructions - Page 174
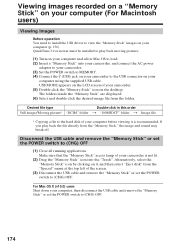
...QuickTime 3.0 or newer must be installed to play back moving pictures.
(1) Turn on your computer and allow Mac OS to load. (2) Insert a "Memory Stick" into your camcorder, and connect the AC power
adaptor to your camcorder. (3) Set the POWER switch to MEMORY. (4) Connect the (USB) jack on your camcorder to the USB connector on your
computer using the supplied USB cable. USB MODE appears on the LCD...
Operating Instructions - Page 191
... TV screen are reversed.
• It occurs if you set DISPLAY to V-OUT/LCD in the menu settings when using mirror mode. This is not a malfunction.
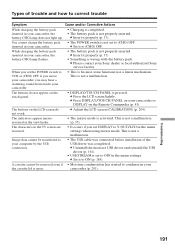
Image data cannot be transferred to your computer by the USB connection.
• The USB cable was connected before installation of the USB driver was completed. c Uninstall the incorrect USB driver and reinstall the USB driver (p. 161).
• USB...
Operating Instructions - Page 199
.... Before connecting this unit to your computer, make sure that application software supported by this unit is already installed on your computer. For details on precautions when connecting this unit, also refer to the operating instructions for the equipment to be connected.
Required i.LINK cable
Use the Sony i.LINK 4-pin-to-4-pin cable (during MPEG2 dubbing). i.LINK and are...