Sony DCR-SR300 - 40gb Hard Disk Drive Handycam Camcorder driver and firmware
Related Sony DCR-SR300 Manual Pages
Download the free PDF manual for Sony DCR-SR300 and other Sony manuals at ManualOwl.com
Operating Guide - Page 2
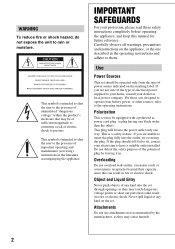
... SAFEGUARDS
For your protection, please read these safety instructions completely before operating the appliance, and keep this manual for future reference. Carefully observe all warnings, precautions and instructions on the appliance, or the one described in the operating instructions and adhere to them.
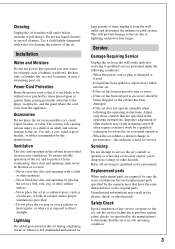
Use
Power Sources
This set should be operated only from the type of...
Operating Guide - Page 3
... the set.
Installation
Water and Moisture
Do not use power-line operated sets near ...instructions. Improper adjustment of other controls may result in damage and will often require extensive work by a qualified technician to restore the set to normal operation. - When the set exhibits a distinct change in performance - this indicates a need for service.
Servicing
Do not attempt to service the set...
Operating Guide - Page 9
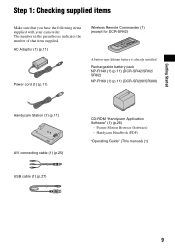
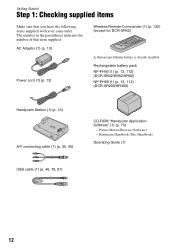
.... AC Adaptor (1) (p.11)
Power cord (1) (p.11)
Wireless Remote Commander (1) (except for DCR-SR42)
A button-type lithium battery is already installed. Rechargeable battery pack NP-FH40 (1) (p.11) (DCR-SR42/SR62/ SR82) NP-FH60 (1) (p.11) (DCR-SR200/SR300)
Handycam Station (1) (p.11)
A/V connecting cable (1) (p.25) USB cable (1) (p.27)
CD-ROM "Handycam Application Software" (1) (p.26)
- Picture...
Operating Guide - Page 26
...Creating a DVD Install the above on a computer by following the steps below.
Viewing "Handycam Handbook" (PDF)
To view "Handycam Handbook," you need to install Adobe Reader on your computer.
x For Windows user
1 Turn on the computer. 2 Place the CD-ROM (supplied) in the disc
drive of your computer. The select screen for installation appears.
3 Click [Handycam Handbook]. The installation screen for...
Operating Guide - Page 27
Recording/Playback
Hard disk: Available free hard disk space for installation required: Approximately 600 MB (for creating a DVD, 5 GB or more may be required)
Display: DirectX 7 or later-compatible video card, Minimum 1024 × 768 dots, High Color (16 bit color)
Others: USB port (this must be provided as standard), Disc drive that can burn DVDs (CD-ROM drive required for software installation...
Operating Guide - Page 28
... on the desktop.
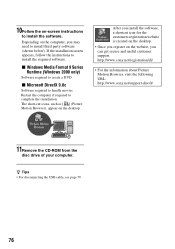
qa Remove the CD-ROM from the disc drive of your computer. • For disconnecting the USB cable, see "Handycam Handbook" (PDF).
After you install the software, a shortcut icon for the customers registration website is created on the desktop. • Once you register on the website, you can get secure and useful customer support. http://www.sony.net/registration...
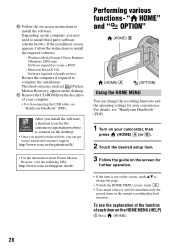
Handycam® Handbook - Page 6
... set in the OPTION MENU 67
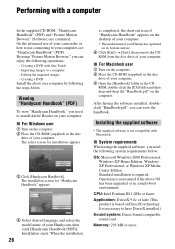
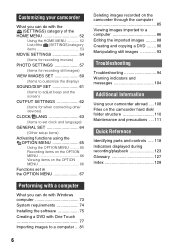
Performing with a computer
What you can do with Windows computer 73 System requirements 74 Installing the software 75 Creating a DVD with One Touch 77 Importing images to a computer ... 81
Deleting images recorded on the camcorder through the computer 85 Viewing images imported to a computer 86 Editing the imported images ......... 88 Creating and copying...
Handycam® Handbook - Page 12
...Adaptor (1) (p. 13)
Power cord (1) (p. 13)
Wireless Remote Commander (1) (p. 122) (except for DCR-SR42)
A button-type lithium battery is already installed. Rechargeable battery pack NP-FH40 (1) (p. 13, 112) (DCR-SR42/SR62/SR82) NP-FH60 (1) (p. 13, 112) (DCR-SR200/SR300)
Handycam Station (1) (p. 13) A/V connecting cable (1) (p. 35, 45)
CD-ROM "Handycam Application Software" (1) (p. 73)
- Picture...
Handycam® Handbook - Page 73
... Windows computer
Performing with a computer
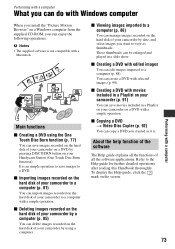
When you install the "Picture Motion Browser" on a Windows computer from the supplied CD-ROM, you can enjoy the following operations. b Notes • The supplied software is not compatible with a
Macintosh.
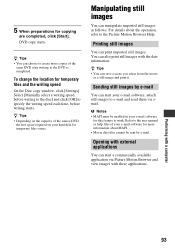
Main functions x Creating a DVD using the One
Touch Disc Burn function (p. 77)
You can save images recorded on the hard disk of your camcorder...
Handycam® Handbook - Page 74
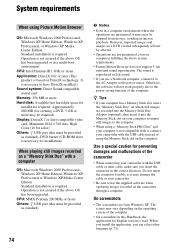
...disk: Available free hard disk space for installation required: Approximately 600 MB (for creating a DVD, 5 GB or more may be required) Display: DirectX 7 or later-compatible video card, Minimum 1024 × 768 dots, High Color (16 bit color) Others: USB port (this must be provided as standard), DVD burner (CD-ROM drive is necessary for installation)
When playing still images recorded on a "Memory...
Handycam® Handbook - Page 75
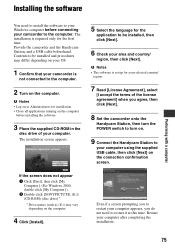
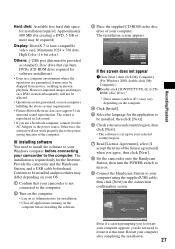
Installing the software
You need to install the software to your Windows computer before connecting your camcorder to the computer. The installation is required only for the first time. Provide the camcorder and the Handycam Station, and a USB cable beforehand. Contents to be installed and procedures may differ depending on your OS.
1 Confirm that your camcorder is
not connected to the computer.
...
Handycam® Handbook - Page 76
... the desktop.
• Once you register on the website, you can get secure and useful customer support. http://www.sony.net/registration/di/
• For the information about Picture Motion Browser, visit the following URL: http://www.sony.net/support-disoft/
11Remove the CD-ROM from the
disc drive of your computer.
z Tips • For disconnecting the USB cable, see...
Handycam® Handbook - Page 78

....
5 Set the camcorder onto the
Handycam Station, then turn the POWER switch to turn on.
z Tips • You can perform this operation, whichever
position of the (Movie)/ (Still) lamp is lit.
6 Press DISC BURN button on the
Handycam Station.
7 Connect the (USB) jack of the
Handycam Station to a computer using the supplied USB cable.
The DVD recognition window is displayed on the computer...
Handycam® Handbook - Page 80

... the computer.
2 Place the recordable DVD to be saved in the DVD drive of your computer.
3 Connect the Handycam Station to the wall outlet using the supplied AC Adaptor.
4 Set the camcorder onto the Handycam Station, then turn the POWER switch to turn on.
5 Connect the (USB) jack of the Handycam Station to a computer using the supplied USB cable. The [USB SELECT] screen is displayed on...
Handycam® Handbook - Page 93
... the writing speed
On the Disc copy window, click [Settings]. Select [Manually select a writing speed before writing to the disc] and click [OK] to specify the writing speed each time, before writing starts.
z Tips • Depending on the capacity of the source DVD,
the free space required on your hard disk for temporary files varies.
Manipulating...
Handycam® Handbook - Page 101
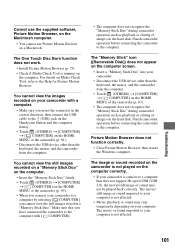
... on the hard disk. Finish camcorder operation before connecting the camcorder to the computer.
Picture Motion Browser does not function correctly.
• Close Picture Motion Browser, then restart the Windows computer.
The image or sound recorded on the camcorder is not played on the computer correctly.
• If your camcorder is connect to a computer that does not support Hi-speed USB (USB...
Handycam® Handbook - Page 116
... as long as you are not recording the date.
x Procedures Connect your camcorder to a wall outlet using the supplied AC Adaptor, and leave it with the POWER switch set to OFF (CHG) for more than 24 hours.
On trademarks
• "Handycam" and
are registered trademarks of Sony Corporation.
• "Memory Stick," "
," "Memory Stick
Duo," "
," "Memory Stick
PRO Duo," "
,"
"MagicGate...
Handycam® Handbook - Page 117
... source code.
Read "license2.pdf" in the "License" folder on the CD-ROM. You will find licenses (in English) of "GPL," and "LGPL" software.
To view the PDF, Adobe Reader is needed. If it is not installed on your computer, you can download it from the Adobe Systems web page:
http://www.adobe.com/
Additional Information...
Handycam® Handbook - Page 130
... SMTH SLW REC 29 SNOW 69 Software 75 SOUND/DISP SET 61 SP 54 SPORTS 69 SPOT FOCUS 67 SPOT METER (Flexible spot meter 68...121 TV 35 TV color system 108 TV TYPE 36, 62 TWILIGHT 68 TWILIGHT PORT 68
U
USB cable 46, 78, 81 USB SELECT.....46, 80, 81, 91 Using abroad 108
V
VBR 127 VCR or DVD/HDD recorders 45 Video Disc Copier 92 VIEW IMAGES SET........... 60 Viewing images on a TV ..... ...
Marketing Specifications - Page 2
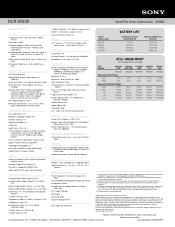
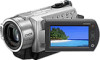
DCR-SR300
Hard Disk Drive Camcorder - 40GB2
Specifications
S-Video Output(s): Yes (optional accessory)
General
HDMI™ Connection Output(s): N/A Active Interface Shoe: Yes
Imaging Device: 1/2.9" ClearVid™ CMOS Sensor
Display
Pixel Gross: 3200K
Recording Media: 40GB2 Hard Disk Drive, Memory Stick PRO Duo™ Media (sold separately)
Recording and Playback Times: HQ: up to 9 ...