Sony DCR TRV480 - Digital8 Handycam Camcorder driver and firmware
Drivers and firmware downloads for this Sony item
Related Sony DCR TRV480 Manual Pages
Download the free PDF manual for Sony DCR TRV480 and other Sony manuals at ManualOwl.com
Camera Operations Guide - Page 3
... any questions about this product, you may call: Sony Customer Information Center 1-800-222-SONY (7669). The number below is for the FCC related matters only. Regulatory Information
Declaration of Conformity Trade Name: SONY Model No.: DCR-TRV480 Responsible Party: Sony Electronics Inc. Address: 16450 W. Bernardo Dr, San Diego, CA 92127 U.S.A. Telephone Number: 858-942-2230 This device complies...
Camera Operations Guide - Page 4
... may be damaged, or this may cause a malfunction of your camcorder.
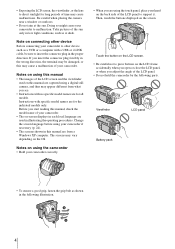
Notes on using this manual • The images of the LCD screen and the viewfinder
used on this manual are captured using a digital still camera, and thus may appear different from what you see. • Instructions with no specific model names are for all models...
Camera Operations Guide - Page 7
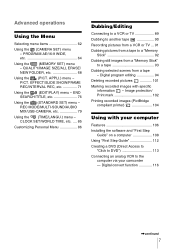
... images from a "Memory Stick"
to a tape 93 Dubbing selected scenes from a tape
- Digital program editing 94 Deleting recorded pictures 101 Marking recorded images with specific
information - Image protection/ Print mark 102 Printing recorded images (PictBridge compliant printer 104
Using with your computer
Features 106 Installing the software and "First Step
Guide" on a computer 108 Using...
Camera Operations Guide - Page 10
... Start Guide
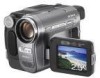
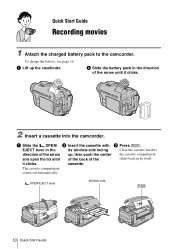
Recording movies
1 Attach the charged battery pack to the camcorder.
To charge the battery, see page 16.
a Lift up the viewfinder.
b Slide the battery pack in the direction of the arrow until it clicks.
2 Insert a cassette into the camcorder.
a Slide the OPEN/ b Insert the cassette with c Press
.
EJECT lever in the
its window...
Camera Operations Guide - Page 15
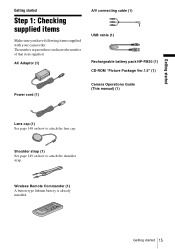
...Checking supplied items
Make sure you have following items supplied with your camcorder. The number in parentheses indicates the number of that item supplied.
AC Adaptor (1)
A/V connecting cable (1)
USB cable (1)
Rechargeable battery pack NP-FM30 (1) CD-ROM "Picture Package Ver.1.5" (1)
Power cord (1)
Camera Operations Guide (This manual) (1)
Lens cap (1) See page 148 on how to attach the lens...
Camera Operations Guide - Page 16
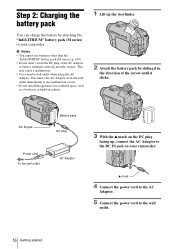
... by attaching the "InfoLITHIUM" battery pack (M series) to your camcorder.
b Notes • You cannot use batteries other than the
... from the wall outlet immediately if any malfunction occurs. • Do not install the appliance in a confined space, such as a bookcase or build-in ... arrow until it clicks.
DC IN jack
Battery pack DC plug
Power cord To the wall outlet
AC Adaptor
3 With the v mark...
Camera Operations Guide - Page 106
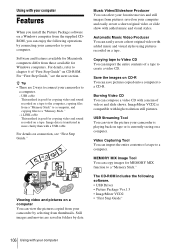
... available for Windows computers. For details, refer to chapter 6 of "First Step Guide" on CD-ROM. For "First Step Guide," see the next section. z Tip • There are 2 ways to connect your camcorder to
a computer. - USB cable
This method is good for copying video and sound recorded on a tape to the computer, copying files from a "Memory Stick" to a computer, and copying files to a "Memory Stick...
Camera Operations Guide - Page 107
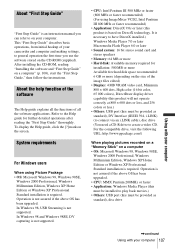
... Edition or Windows XP Professional Standard installation is required. Operation is not assured if the above OS has been upgraded. • CPU: MMX Pentium 200MHz or faster • Application: Windows Media Player (this must be installed to play back movies.) • Others: USB port (this must be provided as standard), disc drive
Using with your computer
,continued
Using with your computer 107
Camera Operations Guide - Page 108
...: Disc drive
When only copying pictures recorded on a "Memory Stick" on a computer • OS: Mac OS 9.1/9.2 or Mac OS X (v 10.0/v
10.1/v 10.2/v 10.3) • Application: QuickTime 3.0 or later (this
must be installed to play back movies.) • Other: USB port (this must be provided as
standard)
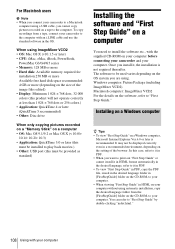
Installing the software and "First Step Guide" on a computer
You need to install the software etc...
Camera Operations Guide - Page 109
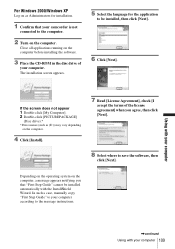
... [Next].
8 Select where to save the software, then
click [Next].
Depending on the operating system on the computer, a message appears notifying you that "First Step Guide" cannot be installed automatically with the InstallShield Wizard. In such a case, manually copy "First Step Guide" to your computer according to the message instructions.
Using with your computer
,continued
Using with your...
Camera Operations Guide - Page 111

... the desktop.
15Remove the CD-ROM from the disc
drive of your computer.
If you have any questions about Picture Package
Contact information is listed on page 112.
Installing on a Macintosh computer
7 Double-click [IMXINST.SIT] in the
folder it was copied to.
8 Double-click the unzipped
[ImageMixerVCD2_Install].
9 When the user acceptance screen is
displayed, enter your name and password...
Camera Operations Guide - Page 112
... [First Step Guide].
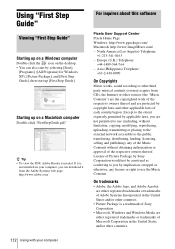
Starting up on a Macintosh computer
Double-click "FirstStepGuide.pdf."
z Tip • To view the PDF, Adobe Reader is needed. If it is
not installed on your computer, you can download it from the Adobe Systems web page: http://www.adobe.com/
For inquires about this software
Pixela User Support Center Pixela Home Page Windows: http://www...
Camera Operations Guide - Page 113

... connect your camcorder to a Sony VAIO series computer* that supports "Click to DVD" via an i.LINK cable (optional). The picture is automatically copied and written to a DVD.
* Note that you need a Sony VAIO computer equipped with a DVD drive that can be used to write DVDs. You also need the computer with "Click to DVD Ver.1.2" (Sony original software) or later installed.
The following...
Camera Operations Guide - Page 116
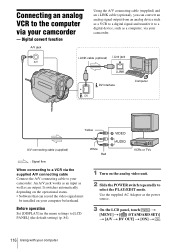
... switches automatically depending on the operational status. • Software that can record the video signal must
be installed on your computer beforehand.
Before operation
Set [DISPLAY] in the menu settings to [LCD PANEL] (the default setting) (p. 84).
White Red
VCRs or TVs
1 Turn on the analog video unit.
2 Slide the POWER switch repeatedly to
select the PLAY/EDIT mode.
Use...
Camera Operations Guide - Page 125
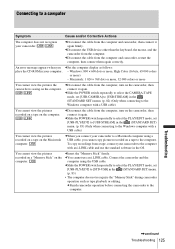
...cable from the computer, turn on the camcorder, then connect it again.
cSlide the POWER switch repeatedly to select the CAMERA-TAPE mode, set [USB-CAMERA] to [USB STREAM] in the (STANDARD SET) menu. (p. 82) (Only when connecting to the Windows computer with a USB cable)
You cannot view the pictures recorded on a tape on the computer.
cDisconnect the cable from the computer, turn on the camcorder...
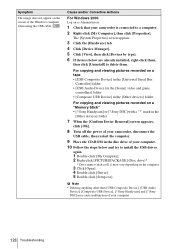
Camera Operations Guide - Page 127
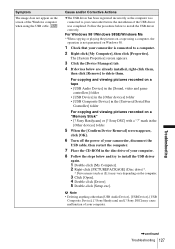
... Device] in the [Universal Serial Bus
Controller] folder
For copying and viewing pictures recorded on a "Memory Stick" • [? Sony Handycam] or [? Sony DSC] with a "?" mark in the
[Other devices] folder
5 When the [Confirm Device Removal] screen appears,
click [OK].
6 Turn off the power of your camcorder, disconnect the
USB cable, then restart the computer.
7 Place the CD-ROM in the disc drive...
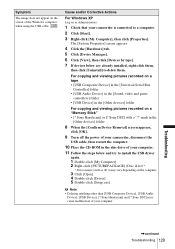
Camera Operations Guide - Page 128
... pictures recorded on a "Memory Stick" • [? Sony Handycam] or [? Sony DSC] with a "?" mark in the
[Other devices] folder
7 When the [Confirm Device Removal] screen appears,
click [OK].
8 Turn off the power of your camcorder, disconnect the
USB cable, then restart the computer.
9 Place the CD-ROM in the disc drive of your computer. 10 Follow the steps below and try to install the USB driver...
Camera Operations Guide - Page 129
... pictures recorded on a "Memory Stick" • [? Sony Handycam] or [? Sony DSC] with a "?" mark in the
[Other devices] folder
8 When the [Confirm Device Removal] screen appears,
click [OK].
9 Turn off the power of your camcorder, disconnect the
USB cable, then restart the computer.
10 Place the CD-ROM in the disc drive of your computer. 11 Follow the steps below and try to install the USB driver...
Camera Operations Guide - Page 130
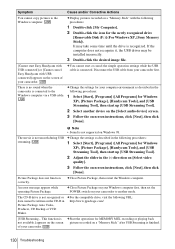
... copy pictures to the Windows computer.
cDisplay pictures recorded on a "Memory Stick" with the following procedures:
1 Double-click [My Computer].
2 Double-click the icon for the newly recognized drive
[Removable Disk (F:)] (For Windows XP, [Sony Memory Stick]). It may take some time until the drive is recognized. If the computer does not recognize it, the USB driver may be installed incorrectly...
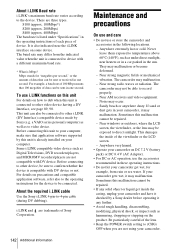
Camera Operations Guide - Page 142
... (DV Interface) compatible device made by Sony (e.g. a VAIO series personal computer) as well as to video device. Before connecting this unit to your computer, make sure that application software supported by this unit is already installed on your computer. Some i.LINK compatible video device such as Digital Televisions, DVD recorders/players, and MICROMV recorders/players are not compatible with...