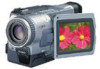
Sony DCR-TRV530 - Digital Video Camera Recorder driver and firmware
Related Sony DCR-TRV530 Manual Pages
Download the free PDF manual for Sony DCR-TRV530 and other Sony manuals at ManualOwl.com
Operating Instructions - Page 3
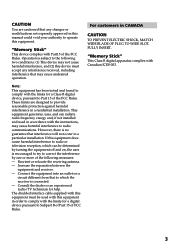
... to which the receiver is connected. - Consult the dealer or an experienced radio/TV technician for help. The shielded interface cable supplied with this equipment must be used with this equipment in order to comply with the limits for a digital device pursuant to Subpart B of Part 15 of FCC Rules.
For customers in CANADA...
Operating Instructions - Page 5
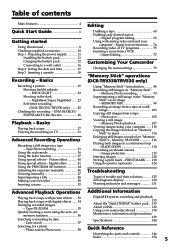
... only desired scenes
- Digital program editing 63 Using with analog video unit and your
computer - Signal convert function ..... 74 Recording video or TV programs 75 Inserting a scene from a VCR
- Insert Editing 77
Customizing Your Camcorder
Changing the menu settings 79
"Memory Stick" operations (DCR-TRV330/TRV530 only)
Using "Memory Stick"-introduction .......... 88 Recording still images on...
Operating Instructions - Page 6
....
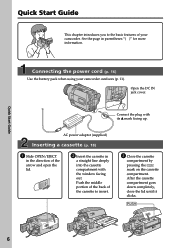
Connect the plug with its v mark facing up.
AC power adaptor (supplied)
Inserting a cassette (p. 18)
1 Slide OPEN/EJECT
in the direction of the arrow and open the lid.
2 Insert the cassette in
a straight line deeply into the cassette compartment with the window facing out. Push the middle portion of the back of...
Operating Instructions - Page 9
... started
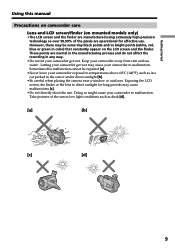
Using this manual
Precautions on camcorder ... finder. These points are normal in the manufacturing process and do not affect the recording in any way.
•Do not let your camcorder get wet. Keep your... parked in the sun or under direct sunlight [b].
•Be careful when placing the camera near a window or outdoors. Exposing the LCD screen, the finder or the lens to direct sunlight for...
Operating Instructions - Page 10
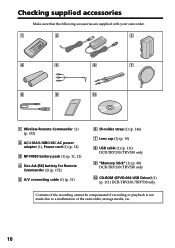
...Size AA (R6) battery for Remote Commander (2) (p. 152)
5 A/V connecting cable (1) (p. 31)
6 Shoulder strap (1) (p. 146)
7 Lens cap (1) (p. 19)
8 USB cable (1) (p. 111) DCR-TRV330/TRV530 only
9 "Memory Stick" (1) (p. 88) DCR-TRV330/TRV530 only
0 CD-ROM (SPVD-004 USB Driver) (1) (p. 111) DCR-TRV330/TRV530 only
Contents of the recording cannot be compensated if recording or playback is not made due...
Operating Instructions - Page 11
Getting started
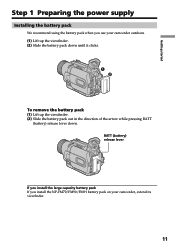
Step 1 Preparing the power supply
Installing the battery pack
We recommend using the battery pack when you use your camcorder outdoors. (1) Lift up... of the arrow while pressing BATT
(battery) release lever down. BATT (battery) release lever
If you install the large capacity battery pack If you install the NP-FM70/FM90/FM91 battery pack on your camcorder, extend its viewfinder.
11
Operating Instructions - Page 12
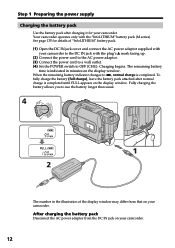
... DC IN jack with the plug's v mark facing up. (2) Connect the power cord to the AC power adaptor. (3) Connect the power cord to a wall outlet. (4) Set the POWER switch to OFF (CHG). Charging begins. The remaining battery
time is indicated in minutes on the display window. When the remaining battery indicator changes to u, normal charge is completed...
Operating Instructions - Page 13
... the recording time with the viewfinder.
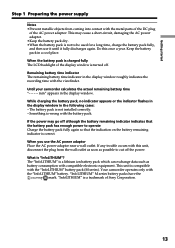
Until your camcorder calculates the actual remaining battery time "- - - - min" appears in the display window.
While charging the battery pack, no indicator appears or the indicator flashes in the display window in the following cases: - The battery pack is not installed correctly. - Something is wrong with the battery pack.
If the power...
Operating Instructions - Page 17
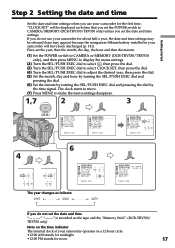
... first time. "CLOCK SET" will be displayed each time that you set the POWER switch to CAMERA/MEMORY (DCR-TRV330/TRV530 only) unless you set the date and time settings. If you do not use your camcorder for about half a year, the date and time settings may be released (bars may appear) because the manganese-lithium battery installed in your camcorder will...
Operating Instructions - Page 18
...
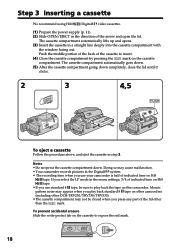
We recommend using Hi8 /Digital8 video cassettes.
(1) Prepare the power supply (p. 11).
(2) Slide OPEN/EJECT in the direction of the arrow and open the lid.
The cassette compartment automatically lifts up and opens.
(3) Insert the cassette in a straight line deeply into the cassette compartment with
the window facing out.
Push the middle portion...
Operating Instructions - Page 19
Recording - Basics
- Recording - Basics -
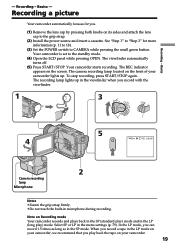
Recording a picture
Your camcorder automatically focuses for you.
(1) Remove the lens cap by pressing both knobs on its sides and attach the lens cap to the grip strap.
(2) Install the power source and insert a cassette. See "Step 1" to "Step 3" for more information (p. 11 to 18).
(3) Set the POWER switch to CAMERA while pressing the small...
Operating Instructions - Page 27
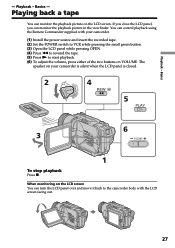
...picture in the viewfinder. You can control playback using the Remote Commander supplied with your camcorder.
(1) Install the power source and insert the recorded tape. (2) Set the POWER switch to VCR while pressing the small...speaker on your camcorder is silent when the LCD panel is closed.
2
V
4
OFCFR(CHG)
POWER
REW
E ERMAORY
CAM
M
5
PLAY
6 3
VOLUME
1
To stop playback
Press x. When ...
Operating Instructions - Page 44
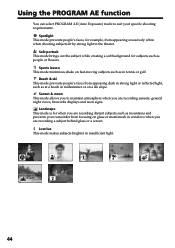
... you to maintain atmosphere when you are recording sunsets, general night views, fireworks displays and neon signs.
Landscape This mode is for when you are recording distant subjects such as mountains and prevents your camcorder from focusing on glass or metal mesh in windows when you are recording a subject behind glass or a screen.
Low lux...
Operating Instructions - Page 74
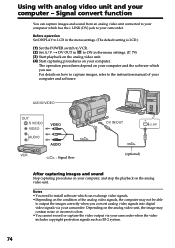
...(1) Set the POWER switch to VCR. (2) Set A/V t DV OUT in to ON in the menu settings. (P. 79) (3) Start playback on the analog video unit. (4) Start capturing procedures on your computer.
The operation procedures depend on your computer and the software which you use. For details on how to capture images, refer to the instruction manual of your computer and software.
AUDIO/VIDEO
OUT S VIDEO VIDEO...
Operating Instructions - Page 110
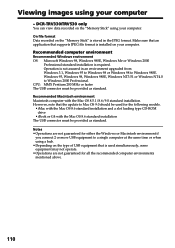
... Windows 2000 Professional. CPU: MMX Pentium 200 MHz or faster The USB connector must be provided as standard. Recommended Macintosh environment Macintosh computer with the Mac OS 8.5.1/8.6/9.0 standard installation. However, note that the update to Mac OS 9.0 should be used for the following models. •iMac with the Mac OS 8.6 standard installation and a slot loading type CD-ROM drive •...
Operating Instructions - Page 111
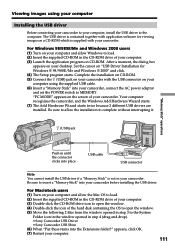
...your desktop. Set the cursor on "USB Driver Installation for Windows ® 98/98SE/Me and Windows ® 2000" and click. (4) The Setup program starts. Complete the installation on CD-ROM. (5) Connect the (USB) jack on your camcorder with the USB connector on your computer using the supplied USB cable. (6) Insert a "Memory Stick" into your camcorder, connect the AC power adaptor and set the POWER...
Operating Instructions - Page 113
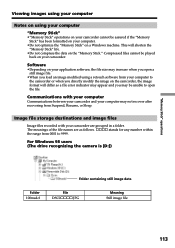
... computer may not recover after recovering from Suspend, Resume, or Sleep.
Image file storage destinations and image files
Image files recorded with your camcorder are grouped in a folder. The meanings of the file names are as follows. ssss stands for any number within the range from 0001 to 9999.
For Windows 98 users (The drive recognizing the camera...
Operating Instructions - Page 125
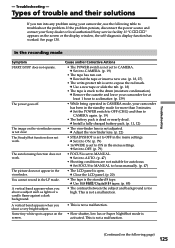
.... If the problem persists, disconnect the power source and contact your Sony dealer or local authorized Sony service facility. If "C:ss:ss" appears on the screen or the display window, the self-diagnosis display function has worked. See page 130.
In the recording mode
Symptom START/STOP does not operate.
The power goes off.
The image on the viewfinder...
Operating Instructions - Page 129
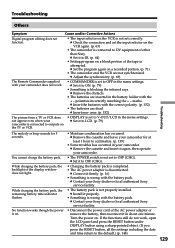
... is not set to OFF (CHG). c Set it to OFF (CHG).
• Charging the battery pack is completed. • The AC power adaptor is disconnected.
c Connect it firmly. (p. 16) • Something is wrong with the battery pack.
c Contact your Sony dealer or local authorized Sony service facility.
• The battery pack is not properly installed. c Install it properly...
Operating Instructions - Page 137
... i.LINK (DV) compatible equipment made by SONY (e.g. VAIO series personal computer) other than video equipment . Before connecting this unit to a personal computer, make sure that application software supported by this unit is already installed on the personal computer. For details on precautions when connecting this unit, also refer to the instruction manuals for the equipment to be connected...