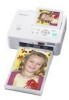
Sony DPP-FP75 driver and firmware
Drivers and firmware downloads for this Sony item
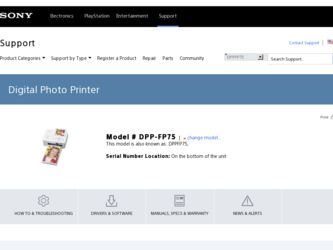
Related Sony DPP-FP75 Manual Pages
Download the free PDF manual for Sony DPP-FP75 and other Sony manuals at ManualOwl.com
Operating Instructions - Page 2
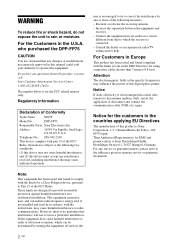
... in this manual could void your authority to operate this equipment.
If you have any questions about this product, you may call: Sony Customer Information Services Center 1-800-222-SONY (7669)
The number below is for the FCC related matters only.
Regulatory Information
Declaration of Conformity
Trade Name:
SONY
Model No.:
DPP-FP75
Responsible Party: Sony Electronics Inc.
Address:
16530...
Operating Instructions - Page 4
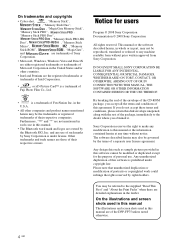
On trademarks and copyrights
• Cyber-shot,
, "Memory Stick",
, "Memory Stick Duo",
, "MagicGate Memory Stick",
"Memory Stick PRO",
,
"Memory Stick PRO Duo",
, "Memory Stick PRO-HG
Duo",
, "Memory Stick
Micro",
, , "Memory
Stick-ROM",
, "MagicGate",
and
are trademarks of Sony
Corporation.
• Microsoft, Windows, Windows Vista and DirectX are either registered trademarks ...
Operating Instructions - Page 6
...
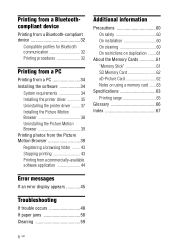
Precautions 60 On safety 60 On installation 60 On cleaning 60 On restrictions on duplication ........61
About the Memory Cards 61 "Memory Stick 61 SD Memory Card 62 xD-Picture Card 62 Notes on using a memory card .......63
Specifications 63 Printing range 65
Glossary 66 Index 67
Error messages
If an error display appears 45
Troubleshooting
If trouble occurs 48 If paper jams...
Operating Instructions - Page 9
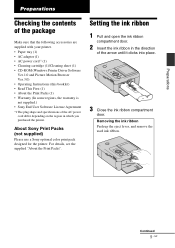
... sheet (1) • CD-ROM (Windows Printer Driver Software
Ver.1.0 and Picture Motion Browser Ver.3.0) • Operating Instructions (this booklet) • Read This First (1) • About the Print Packs (1) • Warranty (In some regions, the warranty is not supplied.) • Sony End User Software License Agreement *1 The plug shape and specifications of the AC power cord differ depending...
Operating Instructions - Page 14
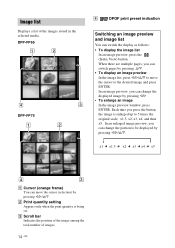
...stored in the selected media. DPP-FP65
DPP-FP75
D
DPOF print preset indication
Switching an image preview and image list
You can switch the display as follows: • To display the image list
In an image...press ENTER. In an image preview, you can change the displayed image by pressing g/G . • To enlarge an image In the image preview window, press ENTER. Each time you press the button, the...
Operating Instructions - Page 22
... will be closed.
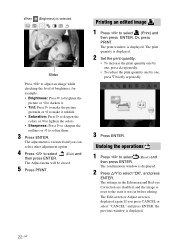
5 Press PRINT.
Printing an edited image
1 Press g/G to select (Print) and
then press ENTER. Or, press PRINT. The print window is displayed. The print quantity is displayed.
2 Set the print quantity.
• To increase the print quantity one by one, press f repeatedly.
• To reduce the print quantity one by one...
Operating Instructions - Page 23
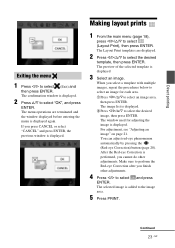
... f/F to select "OK", and press
ENTER. The menu operations are terminated and the window displayed before entering the menu is displayed again. If you press CANCEL or select "CANCEL" and press ENTER, the previous window is displayed.
Making layout prints
1 From the main menu (page 18),
press g/G/f/F to select (Layout Print), then press ENTER. The...
Operating Instructions - Page 24
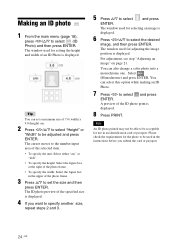
...18),
press g/G/f/F to select (ID Photo) and then press ENTER. The window used for setting the height and width of an ID Photo is displayed.
Tip You can set a maximum size of 7.0 (width) x 9.0 (height) cm.
2 Press... of the ID photo print is displayed.
8 Press PRINT.
Note
An ID photo printed may not be able to be acceptable for use in an identification card or passport. Please check the requirements...
Operating Instructions - Page 26
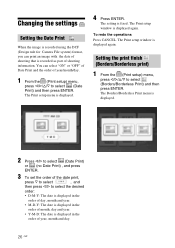
... that is recorded as part of shooting information. You can select "ON" or "OFF" of Date Print and the order of year/month/day.
1 From the (Print setup) menu,
press g/G/f/F to select (Date Print) and then press ENTER. The Print setup menu is displayed.
4 Press ENTER.
The setting is fixed. The Print setup window is displayed again.
To...
Operating Instructions - Page 34
....)
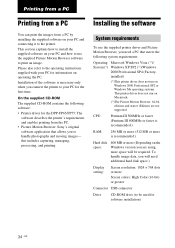
Hard disk space:
400 MB or more (Depending on the Windows version you are using, more space will be required. To handle image data, you will need additional hard disk space.)
Display setting:
Screen resolution: 1024 × 768 dots or more Screen colors: High Color (16-bit) or greater
Connector USB connector
Drive
CD-ROM drive (to be used for software installation)
34...
Operating Instructions - Page 35
... Motion Browser also offers more powerful editorial features. You can also use the software to write data onto an external memory card for it.
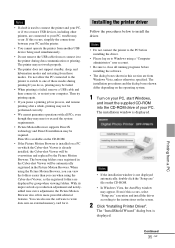
Installing the printer driver
Follow the procedures below to install the driver.
Notes • Do not connect the printer to the PC before
installing the driver. • Please log on to Windows using a "Computer
administrator" user account. • Be...
Operating Instructions - Page 36
...
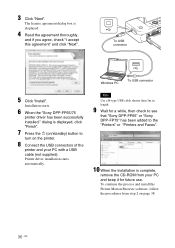
8 Connect the USB connectors of the
printer and your PC with a USB cable (not supplied). Printer driver installation starts automatically.
Note Use a B-type USB cable shorter than 3m in length.
9 Wait for a while, then check to see
that "Sony DPP-FP65" or "Sony DPP-FP75" has been added to the "Printers" or "Printers and Faxes".
10 When the installation is complete,
remove the CD-ROM from your PC...
Operating Instructions - Page 37

... PC, restart your PC, and then follow the installation procedures from step 2 again.
• After installation, the "Sony DPP-FP65" or "Sony DPP-FP75" is not yet set as the default printer. Set the printer you use for each application.
• The supplied CD-ROM will be required when you uninstall or re-install the printer driver. Keep it for possible future use.
• Before...
Operating Instructions - Page 38
... boxes shown differ depending on the operating system.
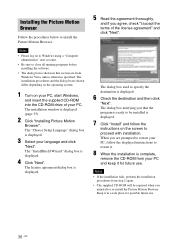
1 Turn on your PC, start Windows,
and insert the supplied CD-ROM into the CD-ROM drive of your PC. The installation window is displayed (page 35).
2 Click "Installing Picture Motion
Browser". The "Choose Setup Language" dialog box is displayed.
3 Select your language and click
"Next". The "InstallShield Wizard" dialog box is...
Operating Instructions - Page 39
...".
The Control Panel is displayed.
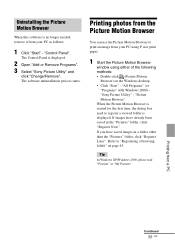
2 Open "Add or Remove Programs". 3 Select "Sony Picture Utility" and
click "Change/Remove". The software uninstallation process starts.
Printing photos from the Picture Motion Browser
You can use the Picture Motion Browser to print an image from your PC using P size print paper.
1 Start the Picture Motion Browser
window using...
Operating Instructions - Page 43
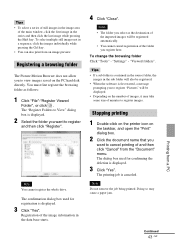
... the main window, click the...You cannot register the whole drive.
The confirmation dialog box used for registration is displayed.
3 Click "Yes".
...Settings" - "Viewed folders".
Tips • If a sub folder is contained in the source folder, the
images in the sub folder will also be registered. • When the software is first started, a message
prompting you to register "Pictures" will be displayed...
Operating Instructions - Page 44

... change portrait or landscape setting.
With the Borders/Borderless setting of the printer driver When the software application you use has Borders/Borderless setting, we suggest you select "ON" for "Borderless Print" in "Printer Features" of the "Sony DPP-FP65/75 Advanced Options" dialog box as the printer driver setting.
44 GB
Print quantity setting
Depending on the software application you are...
Operating Instructions - Page 56

... a function for
viewing the memory card or a USB memory images from the printer.
c Please download the printer driver from the Customer support home page (.page 65). Or contact your Sony dealer.
c Follow the procedures in the operating instructions to install the driver (.page 35). If an error occurs, restart your computer and perform the installation procedures again.
c Exit all applications...
Operating Instructions - Page 57

...
"Layout" tab of
the "Sony DPP-
FP65/FP75
-
Properties" dialog
box does not
match the actual
print quantity and
printed results.
Colors of the
printed image
from a PC are different from
-
those printed from
a memory card.
Cause/Solutions c If there is no trouble displayed on the
Windows desktop, check the printer's LCD screen. If the printer shows trouble, do the following: 1. Turn...
Operating Instructions - Page 67
..., 21 Error messages 45 Exiting the menu 23 External device 31, 32
F Front panel 7
H Handle 8
I Icons 15 ID photo 24 Image data display 13 Image preview 13 Index Print 25 Index View 14 Input indications 13 Inserting a memory card 16 Inserting an ink ribbon 9 Inserting the print paper 10 Installing
Picture Motion Browser 38 Printer driver 35
L Layout...