Sony DSC-P2 - Cyber-shot Digital Still Camera driver and firmware
Related Sony DSC-P2 Manual Pages
Download the free PDF manual for Sony DSC-P2 and other Sony manuals at ManualOwl.com
Operating Instructions (primary manual) - Page 2
... questions about this product, you may call:
Sony Customer Information Services Center 1-800-222-SONY (7669) The number below is for the FCC related matters only.
Regulatory Information
Declaration of Conformity
Trade Name: SONY
Model No.:
DSC-P2
Responsible Party:Sony Electronics Inc.
Address:
680 Kinderkamack
Road, Oradell, NJ
07649 USA
Telephone No.: 201-930-6972
This device complies...
Operating Instructions (primary manual) - Page 4
... examples of pictures in this manual are reproduced images, and are not actual images shot using this camera.
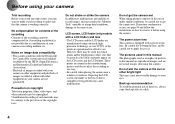
Do not aim the camera at the sun or other bright light This may cause irrecoverable damage to your eyes.
Back up recommendation To avoid the potential risk of data loss, always copy (back up) data to a disk.
4
Operating Instructions (primary manual) - Page 5
...; "InfoLITHIUM" is a trademark of Sony
Corporation.
• Microsoft and Windows are registered
trademarks of the U.S. Microsoft Corporation
in the United States and other countries.
• Macintosh, Mac OS, and QuickTime, are
trademarks or registered trademarks of Apple
Computer, Inc.
• In addition, system and product names used in
this manual are, in general, trademarks or...
Operating Instructions (primary manual) - Page 6
... a "Memory Stick 38
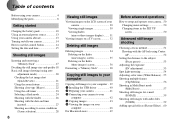
Copying still images to your computer
Copying still images to your computer .. 39 1 Installing the USB driver 40 2 Preparing your camera 41 3 Connecting your camera to your
computer 42 4 Copying images 43 5 Viewing the images on your
computer 46 For Macintosh users 49
Before advanced operations
How to setup and operate your camera...50 Changing menu settings 50...
Operating Instructions (primary manual) - Page 7

...Recording an enlarged image - Trimming 62
Playing back successive images (Slide show 62
Rotating still images 63
Editing movies 73 Cutting movies 73 Deleting unnecessary portions of movies 74
Copying movies to your computer ......... 75 For Windows 98, 98SE, 2000, Me users 75 For Windows...87
Menu items 88 SET UP items 92 Precautions... single screen 71
The "Memory Stick 95 The "InfoLITHIUM...
Operating Instructions (primary manual) - Page 8
...
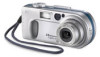
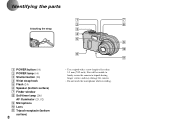
A POWER button (14) B POWER lamp (14) C Shutter button (20) D Wrist strap hook E Flash (24) F Speaker (bottom surface) G Finder window H Self-timer lamp (24)/
AF illuminator (25, 92) I Microphone J Lens K Tripod receptacle (bottom
surface)
8
1
7
2
8
3
4
5 9
0 6
qa
• Use a tripod with a screw length of less than 5.5 mm (7/32 inch). You will be unable to firmly secure the camera...
Operating Instructions (primary manual) - Page 21
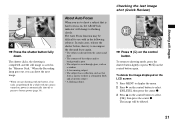
... clicks, the shooting is completed, and the still image is saved in the "Memory Stick." When the Recording lamp goes out, you can shoot the next image.
• When you are shooting with the battery, if no tasks are performed for a while with the camera turned on, power is automatically shut off to preserve battery...
Operating Instructions (primary manual) - Page 39
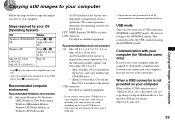
... the following models, update your OS to Mac OS 9.0 or 9.1. - iMac with Mac OS 8.6 installed at
the factory, and a slot loading type CD-ROM drive - iBook or Power Mac G4 with the Mac OS 8.6 installed at the factory USB connector: Provided as standard equipment
• If you connect two or more USB devices to your computer at one time, some devices, including your camera, may not work...
Operating Instructions (primary manual) - Page 40
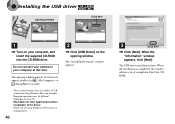
1 Installing the USB driver
Opening window
Click here
1
, Turn on your computer, and insert the supplied CD-ROM into the CD-ROM drive.
Do not connect your camera to your computer at this time.
The opening window appears. If it does not appear, double-click (My Computer) t
(ImageMixer) in order.
• This section describes how to establish a USB connection using Windows Me as an example...
Operating Instructions (primary manual) - Page 41
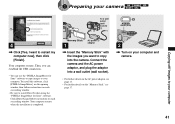
... DirectX when using the "PIXELA ImageMixer for Sony" software. Click [DirectX] and follow instructions on each succeeding window. Your computer restarts when the installation is completed.
"Memory Stick"
1
AC power 2 adaptor
, Insert the "Memory Stick" with the images you want to copy into the camera. Connect the camera and the AC power adaptor, and plug the adaptor into a wall outlet (wall...
Operating Instructions (primary manual) - Page 42
... your camera to your computer
USB MODE
NORMAL a a a a
1
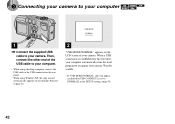
, Connect the supplied USB cable to your camera. Then, connect the other end of the USB cable to your computer.
• When using a desktop computer, connect the USB cable to the USB connector on the rear panel.
• When using Windows XP, the copy wizard automatically appears on the desktop. Proceed to page 44.
2
"USB MODE NORMAL...
Operating Instructions (primary manual) - Page 43
... computer
1
, Double-click [My Computer], then double-click [Removable Disk].
The contents of the "Memory Stick" inserted in your camera appear.
• This section describes an example of copying images to the "My Documents" folder.
• When the "Removable Disk" icon does not appear, see the next page.
• You can use the "PIXELA ImageMixer for Sony" software to copy...
Operating Instructions (primary manual) - Page 44
... below to delete them. 1 Click [ Sony DSC] or [ Sony Handycam]. 2 Click [Delete]. The "Device deletion confirmation" window appears. 3 Click [OK]. The device is deleted.
Try the USB driver installation again using the supplied CD-ROM (page 40).
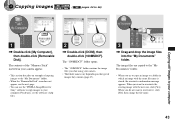
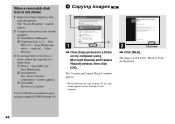
4 Copying images
1
2
1
, Click [Copy pictures to a folder on my computer using Microsoft Scanner and Camera Wizard] window, then click [OK].
The "Scanner...
Operating Instructions (primary manual) - Page 45
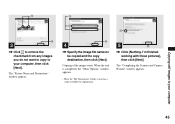
... be copied and the copy destination, then click [Next].
Copying of the images starts. When the task is completed, the "Other Options" window appears.
• Here the "My Documents" folder is used as a copy-to folder for explanation.
5
2
, Click [Nothing. I'm finished working with these pictures], then click [Next].
The "Completing the Scanner and Camera Wizard" window appears.
Copying still...
Operating Instructions (primary manual) - Page 46
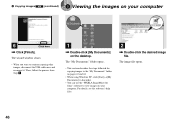
... the desktop.
The "My Documents" folder opens.
• This section describes the steps followed for copying images to the "My Documents" folder on pages 43 and 44.
• When using Windows XP, click [Start]t[My Documents] in that order.
• You can use the "PIXELA ImageMixer for Sony" software to view images on your computer. For...
Operating Instructions (primary manual) - Page 49
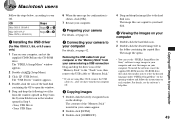
...your OS.
OS
Steps
Mac OS 8.5.1/8.6/9.0
Steps 1 to 5
Mac OS 9.1/9.2/ Mac OS X (v10.0/v10.1)
Steps 2 to 5
1 Installing the USB driver
(For Mac OS 8.5.1, 8.6, or 9.0 users only)
1 Turn on your computer, and set the supplied CD-ROM into the CD-ROM drive. The "PIXELA ImageMixer" window appears.
2 Double-click (Setup Menu).
3 Click (USB Driver). The "USB Driver" window appears.
4 Double-click the...
Operating Instructions (primary manual) - Page 76
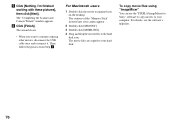
... the desktop. The contents of the "Memory Stick" inserted into your camera appear.
2 Double-click [MSSONY]. 3 Double-click [MOML0001]. 4 Drag and drop the movie files to the hard
disk icon. The movie files are copied to your hard disk.
To copy movie files using "ImageMixer" You can use the "PIXELA ImageMixer for Sony" software to copy movies to your computer. For...
Operating Instructions (primary manual) - Page 81

... cannot be resized.
You cannot display a print • Print marks cannot be attached to movie (MPEG -
mark.
movie)/Clip Motion files.
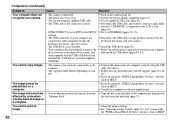
Computers
Symptom
You do not know whether or not your OS can be used with the camera.
You cannot install the USB driver.
Cause -
-
Solution p Check "Recommended computer environment" (page 39).
p In Windows 2000, log on as...
Operating Instructions (primary manual) - Page 82
...
device because you connected the camera and your computer with the USB cable before you installed the "USB Driver" from the supplied CD-ROM.
p Turn on the camera (page 14). p Use the AC power adaptor (supplied) (page 13). p Use the supplied USB cable (page 42). p Disconnect the USB cable, and securely connect it again. Make
sure that "USB MODE" is displayed on the LCD screen (page 42). p Set...
Operating Instructions (primary manual) - Page 101
...
Additional information
G
GIF 48
I
Image Copying images 43 File names 47 Image file storage destinations 47 Image quality 18 Image size 18, 19, 87
Index 30 Installation
USB driver 40 ISO 88
J
JPG 48
L
LCD screen display DSPL/LCD ON/OFF 26 LCD brightness 93
M
Memory Stick Formatting a "Memory Stick 38 Inserting a "Memory Stick 17 Number of shooting images...