Sony DSC-W560 driver and firmware
Drivers and firmware downloads for this Sony item
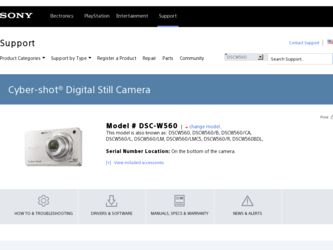
Related Sony DSC-W560 Manual Pages
Download the free PDF manual for Sony DSC-W560 and other Sony manuals at ManualOwl.com
Cyber-shot® Handbook - Page 3
...
Table of contents
Operation Search
MENU/Settings Search
Index
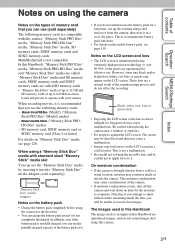
Notes on the types of memory card that you can use (sold separately)
The following memory cards are compatible with this camera: "Memory Stick PRO Duo" media, "Memory Stick PRO-HG Duo" media, "Memory Stick Duo" media, SD memory cards, SDHC memory cards and SDXC memory cards. MultiMediaCard is not compatible. In this Handbook...
Cyber-shot® Handbook - Page 5
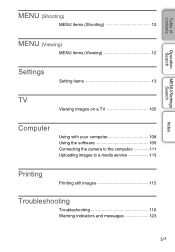
...MENU (Shooting)
MENU items (Shooting 10
MENU (Viewing)
MENU items (Viewing 12
Settings
Setting items 13
TV
Viewing images on a TV 105
Computer
Using with your computer 108 Using the software 109 Connecting the camera to the computer 111 Uploading images to a media service 113
Printing
Printing still images 115
Troubleshooting
Troubleshooting 116 Warning indicators and messages...
Cyber-shot® Handbook - Page 13
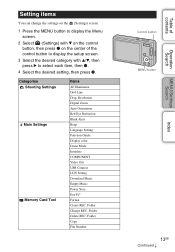
...Settings Main Settings
Memory Card Tool
Items AF Illuminator Grid Line Disp. Resolution Digital Zoom Auto Orientation Red Eye Reduction Blink Alert Beep Language Setting Function Guide Display color Demo Mode Initialize COMPONENT Video Out USB Connect LUN Setting Download Music Empty Music Power Save Eye-Fi* Format Create REC. Folder Change REC. Folder Delete REC. Folder Copy File Number
Control...
Cyber-shot® Handbook - Page 25
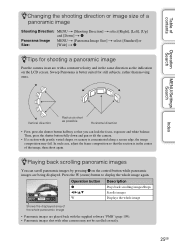
...image
Pan the camera in an arc ...Settings...control button while panoramic images are being displayed. Press the W (zoom) button to display the whole image again.
Operation button Description
z b/B/v/V
Plays back scrolling images/Stops Scrolls images
W
Displays the whole image
Shows the displayed area of the whole panoramic image
• Panoramic images are played back with the supplied software...
Cyber-shot® Handbook - Page 67
... as the [Effects].
1 sec
Sets the display interval of images for a [Simple] slideshow.
3 sec
5 sec
10 sec
Auto
The interval is set to suit the selected [Effects] item...camera to play back during slideshow. To transfer music, install the "Music Transfer" software (supplied) to your computer. For details, see pages 109 and 110. • You can record up to four pieces of music on the camera...
Cyber-shot® Handbook - Page 73
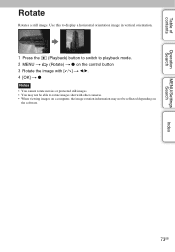
... mode. 2 MENU t (Rotate) t z on the control button 3 Rotate the image with [ / ] t b/B. 4 [OK] t z
Notes • You cannot rotate movies or protected still images. • You may not be able to rotate images shot with other cameras. • When viewing images on a computer, the image rotation information may not be reflected depending on
the software.
73GB
Cyber-shot® Handbook - Page 80
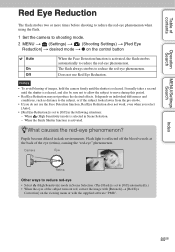
...flash.
1 Set the camera to shooting mode. 2 MENU t (Settings) t (Shooting Settings) t [Red Eye
Reduction] t desired mode t z on the control button
Auto
On Off
When the Face Detection function is activated, the flash strobes automatically to reduce the red-eye phenomenon. The flash...when you select [Auto].
• [Red Eye Reduction] is set to [Off] in the following situations: - When (High ...
Cyber-shot® Handbook - Page 90
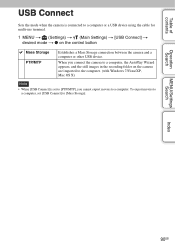
...camera and a computer or other USB device.
When you connect the camera to a computer, the AutoPlay Wizard appears, and the still images in the recording folder on the camera are imported to the computer. (with Windows 7/Vista/XP, Mac OS X)
Note
• When [USB Connect] is set to [PTP/MTP], you cannot export movies to a computer. To export movies to a computer, set [USB Connect] to [Mass Storage...
Cyber-shot® Handbook - Page 92
...
Operation Search
MENU/Settings Search
Index
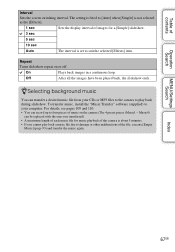
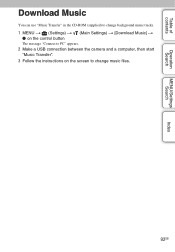
Download Music
You can use "Music Transfer" in the CD-ROM (supplied) to change background music tracks.
1 MENU t (Settings) t (Main Settings) t [Download Music] t z on the control button
The message "Connect to PC" appears.
2 Make a USB connection between the camera and a computer, then start "Music Transfer".
3 Follow the instructions on the screen...
Cyber-shot® Handbook - Page 93
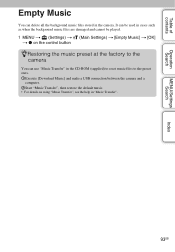
... cannot be played.
1 MENU t (Settings) t (Main Settings) t [Empty Music] t [OK] t z on the control button
zRestoring the music preset at the factory to the camera
You can use "Music Transfer" in the CD-ROM (supplied) to reset music files to the preset ones. 1Execute [Download Music] and make a USB connection between the camera and a
computer. 2Start "Music Transfer", then restore...
Cyber-shot® Handbook - Page 96
.... • If the (error) icon is displayed, eject and re-insert the Eye-Fi card, or turn the power of the camera
off and on again. If the (error) icon is still displayed, the Eye-Fi card may be corrupted. For details, contact Eye-Fi, Inc. • Wireless LAN communication may be interrupted by the other communication devices. If data reception...
Cyber-shot® Handbook - Page 108
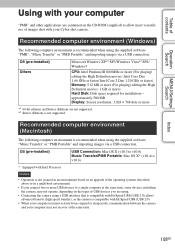
... CD-ROM (supplied) to allow more versatile use of images shot with your Cyber-shot camera.
Recommended computer environment (Windows)
The following computer environment is recommended when using the supplied software "PMB", "Music Transfer" or "PMB Portable" and importing images via a USB connection.
OS (pre-installed) Others
Microsoft Windows XP*1 SP3/Windows Vista*2 SP2/ Windows7
CPU: Intel...
Cyber-shot® Handbook - Page 109
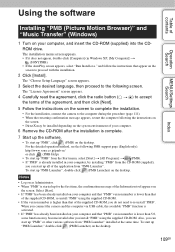
... the camera and the computer via USB cable, the available "PMB" function is activated. • If "PMB" has already been installed on your computer and that "PMB" version number is lower than 5.0, some functions may become invalid after you install "PMB" using the supplied CD-ROM. Also, you can start up "PMB" or other various software from "PMB Launcher" installed at...
Cyber-shot® Handbook - Page 110
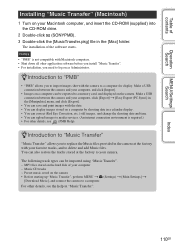
... software before you install "Music Transfer". • For installation, you need to log on as Administrator.
zIntroduction to "PMB"
• "PMB" allows you to import images shot with the camera to a computer for display. Make a USB connection between the camera and your computer, and click [Import].
• Images on a computer can be exported to a memory card, and displayed on the camera...
Cyber-shot® Handbook - Page 111

... Search
MENU/Settings Search
Connecting the camera to the computer
1 Insert a sufficiently charged battery pack into the camera, or connect the camera to a wall outlet (wall socket) using the AC-LS5 AC Adaptor (sold separately) and the USB/AV/DC IN Cable for multi-use terminal (sold separately).
• Use a Type3a-compliant USB/AV/DC IN Cable (sold separately...
Cyber-shot® Handbook - Page 114
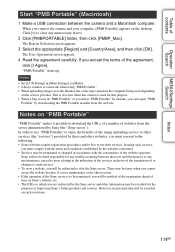
...].
"PMB Portable" starts up.
Notes • Set [LUN Setting] in [Main Settings] to [Multi]. • Always connect to a network when using "PMB Portable". • When uploading images over the Internet, the cache may remain in the computer being used depending
on the service provider. This is also true when this camera is used for this purpose. • When...
Cyber-shot® Handbook - Page 138
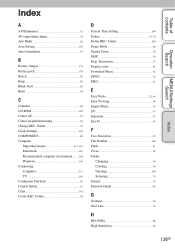
... images 111, 112 Macintosh 110 Recommended computer environment ..........108 Windows 109 Connecting Computer 111 TV 105 Continuous Playback 65 Control button 15 Copy 101 Create REC. Folder 98
D
Date & Time Setting 104 Delete 37, 70 Delete REC. Folder 100 Demo Mode 86 Digital Zoom 78 DISP 30 Disp. Resolution 77 Display color 85 Download Music 92 DPOF 72 DRO 61
E
Easy...
Cyber-shot® Handbook - Page 140
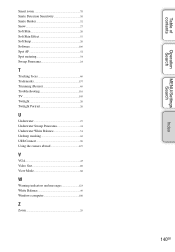
... 26 Twilight Portrait 26
U
Underwater 27 Underwater Sweep Panorama 41 Underwater White Balance 51 Unsharp masking 69 USB Connect 90 Using the camera abroad 127
V
VGA 43 Video Out 89 View Mode 68
W
Warning indicators and messages 123 White Balance 49 Windows computer 108
Z
Zoom 29
Index
MENU/Settings Search
Operation Search
Table of contents
140GB
Cyber-shot® Handbook - Page 141
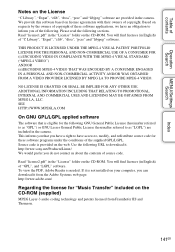
... English) of "GPL", and "LGPL" software. To view the PDF, Adobe Reader is needed. If it is not installed on your computer, you can download it from the Adobe Systems web page: http://www.adobe.com/
Regarding the license for "Music Transfer" included on the CD-ROM (supplied)
MPEG Layer-3 audio coding technology and patents licensed from...
Instruction Manual - Page 7
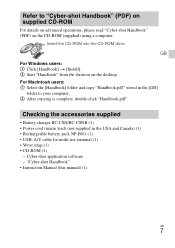
... CD-ROM drive. GB
For Windows users: 1 Click [Handbook] t [Install]. 2 Start "Handbook" from the shortcut on the desktop. For Macintosh users: 1 Select the [Handbook] folder and copy "Handbook.pdf" stored in the [GB]
folder to your computer. 2 After copying is complete, double-click "Handbook.pdf".
Checking the accessories supplied
• Battery charger BC-CSN/BC-CSNB (1) • Power cord...