eMachines W2247 driver and firmware

Related eMachines W2247 Manual Pages
Download the free PDF manual for eMachines W2247 and other eMachines manuals at ManualOwl.com
User Guide - Page 1
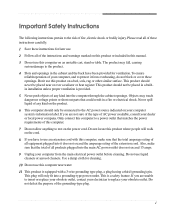
... instructions carefully.
1 Save these instructions for later use.
2 Follow all of the instructions and warnings marked on this product or included in this manual.
3 Do not use this computer on...power available, consult your dealer or local power company. Only connect this computer to a power outlet that matches the power requirements of this computer.
7 Do not allow anything to rest on the power...
User Guide - Page 8
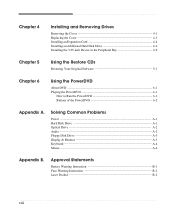
... Drive 4-6 Installing the 5.25-inch Device in the Peripheral Bay 4-9
Chapter 5
Using the Restore CDs
Restoring Your Original Software 5-1
Chapter 6
Using the PowerDVD
About DVD ...6-1 Playing the PowerDVD 6-1
How to Run the PowerDVD 6-1 Buttons of the PowerDVD 6-2
Appendix A.
Solving Common Problems
Power ...A-1 Hard Disk Drive ...A-1 Optical Drive ...A-2 Audio ...A-2 Floppy Disk Drive...
User Guide - Page 14
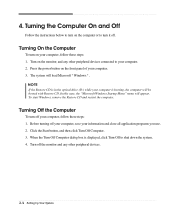
... steps: 1. Turn on the monitor, and any other peripheral devices connected to your computer. 2. Press the power button on the front panel of your computer. 3. The system will load Microsoft ® Windows ® .
NOTE If the Restore CD is in the optical drive (D:) while your computer is booting, the computer will be booted with Restore CD. In this case, the...
User Guide - Page 15
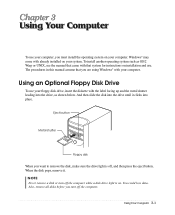
... operating system such as OS/2 Warp or UNIX, see the manual that came with that system for instructions on installation and use. The procedures in this manual assume that you are using Windows® with your computer.
Using an Optional Floppy Disk Drive
To use your floppy disk drive, insert the diskette with the label facing up and the metal...
User Guide - Page 19
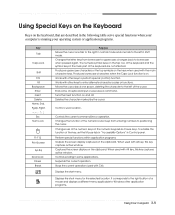
... described in the following table serve special functions when your computer is running your operating system or application programs.
Key Tab...set the Mouse tab in "Accessibility Options" in Control panel.
Perform special functions within application programs. Outputs the screen display captured on the clipboard. When used with alt key, this key captures active window. Captures the screen display...
User Guide - Page 20
...MouseKeys, first you should set the Mouse tab in "Accessibility Options" of the Control Panel.
NOTE Depending on the model, your keyboard may differ from the illustrations described in this user's guide.
Using a Mouse
...the mouse button.
When using Microsoft® Windows®, you can change mouse button configurations in the Mouse section of the Control Panel. If you are left-handed, you...
User Guide - Page 21
... the empty desktop area and click Properties. 2. When the Display Properties window appears, click the Settings tab. 3. Select the color depth from the Color quality area and the resolution from the Screen resolution
area. 4. Click the OK button.
Controlling the Audio Volume
You can control the audio volume level by using the volume control box or Master Volume window. To control the volume...
User Guide - Page 23

... chapter describes how to install or remove system cover, optional drives, and optional cards in your computer.
NOTE Turn off the computer. Then disconnect the computer from its power source and from any telecommunications links, networks, or modems before performing any of the procedures described in this chapter.
Removing the Cover
You need to remove the cover of your...
User Guide - Page 24

... panel of your computer.
4. Slide the cover toward the rear to free it from the system and lift it off until can be removed completely. Set the cover aside....
NOTE Be sure to ground yourself by touching your system every time you remove the cover. If you are not properly grounded, you could generate an electric shock when you touch a component. 4-2 Installing and Removing Drives
User Guide - Page 25
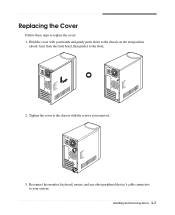
... push it to the front.
2. Tighten the cover to the chassis with the screws you removed.
3. Reconnect the monitor, keyboard, mouse, and any other peripheral device's cable connectors to your system. Installing and Removing Drives 4-3
User Guide - Page 26
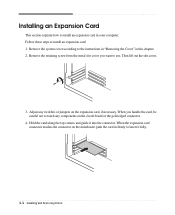
.... When you handle the card, be careful not to touch any components on the circuit board or the gold-edged connector.
4. Hold the card along the top corners and guide it into the connector. When the expansion card connector reaches the connector on the mainboard, push the card in firmly to insert it fully.
4-4 Installing and Removing Drives
User Guide - Page 27
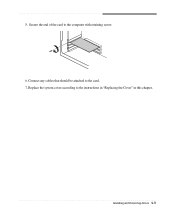
5. Secure the end of the card to the computer with retaining screw. 6. Connect any cables that should be attached to the card. 7. Replace the system cover according to the instructions in "Replacing the Cover" in this chapter.
Installing and Removing Drives 4-5
User Guide - Page 28
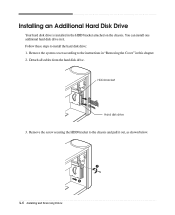
... Additional Hard Disk Drive
Your hard disk drive is installed in the HDD bracket attached on the chassis. You can install one additional hard disk drive in it. Follow these steps to install the hard disk drive: 1. Remove the system cover according to the instructions in "Removing the Cover" in this chapter. 2. Detach all cables from the hard disk drive.
HDD bracket
Hard disk drive
3. Remove the...
User Guide - Page 29
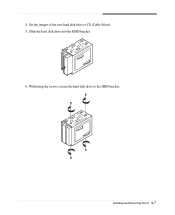
4. Set the jumper of the new hard disk drive to CS (Cable Select). 5. Slide the hard disk drive into the HDD bracket. 6. With using the screws, secure the hard disk drive to the HDD bracket.
Installing and Removing Drives 4-7
User Guide - Page 30
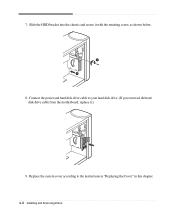
7. Slide the HDD bracket into the chassis and secure it with the retaining screw, as shown below.
8. Connect the power and hard disk drive cable to your hard disk drive. (If you removed the hard disk drive cable from the motherboard, replace it.)
9. Replace the system cover according to the instructions in "Replacing the Cover" in this chapter. 4-8 Installing and Removing Drives
User Guide - Page 31

... the system's 5.25-inch peripheral bay, you can add an optional device such as a CD/DVD-ROM drive, hard disk drive, LS-120 drive, or ZIP drive in the empty peripheral bay. To install an optional device in the bay, follow these steps: 1. Remove the cover according to the instructions in "Removing the Cover" in this chapter. 2. Remove the HDD...
User Guide - Page 37
... restoring, you must reinstall any software not originally installed on your hard disk. And you don't want to lose your personal data on your hard disk, copy it to diskettes before restoring. Follow these steps to restore your original preinstalled software: 1. Turn on the computer. 2. Insert the Restore CD #1 into the optical drive (D:) before your computer boots up. 3. Restoration procedures...
User Guide - Page 38
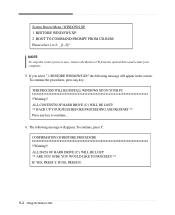
... COMMAND PROMPT FROM CD-ROM Please select 1 or 2: _ [1, 2]?
NOTE To stop this restore process now, remove the Restore CD from the optical drive and restart your computer.
5. If you select "1. RESTORE WINDOWS XP," the following message will appear in the screen. To continue the procedures, press any key.
THIS PROCESS WILL RE-INSTALL WINDOWS XP ON YOUR...
User Guide - Page 39
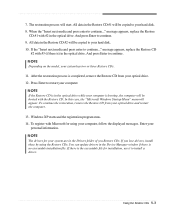
... optical drive and restart the computer.
13. Windows XP starts and the registration program runs. 14. To register with Microsoft for using your computer, follow the displayed messages. Enter your
personal information. NOTE The drivers for your system are in the Drivers folder of you Restore CDs. If you lose drivers, install these by using the Restore CDs. You can update drivers...
User Guide - Page 45
... your Windows Help in Windows. To open Windows Help, click the Start button, and then click Help and Support.)
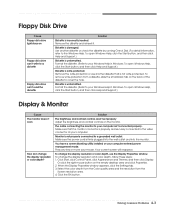
Display & Monitor
Cause The monitor doesn't work
How do I change the display resolution or color depth?
Solution
The brightness and contrast controls aren't set properly Adjust the brightness and contrast controls on the monitor.
The cable connecting the monitor to your computer isn...