Sony DSLR A500L - Alpha 12.3MP Digital SLR Camera driver and firmware
Drivers and firmware downloads for this Sony item
Related Sony DSLR A500L Manual Pages
Download the free PDF manual for Sony DSLR A500L and other Sony manuals at ManualOwl.com
Instruction Manual - Page 4
... any interference received, including interference that may cause undesired operation.
Declaration of Conformity Trade Name: SONY Model No.: DSLR-A550 Responsible Party: Sony Electronics Inc. Address:16530 Via Esprillo,
San Diego, CA 92127 U.S.A. Telephone No.: 858-942-2230
This device complies with Part 15 of the FCC Rules. Operation is subject to the following two...
Instruction Manual - Page 11
... setup
Setting image size and image quality 128 Setting the method for recording on a memory card ..... 130 Changing the noise reduction setting 132 Changing the function of the AEL button 133 Changing other settings 134 Setting the LCD monitor 135 Confirming the version of the camera 137 Resetting to the default 138
Viewing images Using your computer 140 on a computer Using the software...
Instruction Manual - Page 12
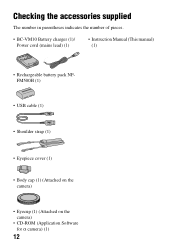
... of pieces.
• BC-VM10 Battery charger (1)/ Power cord (mains lead) (1)
• Instruction Manual (This manual) (1)
• Rechargeable battery pack NPFM500H (1)
• USB cable (1)
• Shoulder strap (1)
• Eyepiece cover (1)
• Body cap (1) (Attached on the camera)
• Eyecup (1) (Attached on the camera)
• CD-ROM (Application Software for α camera) (1)
12
Instruction Manual - Page 14
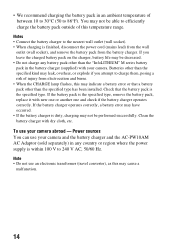
...and burns. • When the CHARGE lamp flashes, this may indicate a battery error or that a battery pack other than the specified type has been installed. Check that the battery pack is the specified ...
To use your camera abroad - Power sources You can use your camera and the battery charger and the AC-PW10AM AC Adaptor (sold separately) in any country or region where the power supply is within 100...
Instruction Manual - Page 92
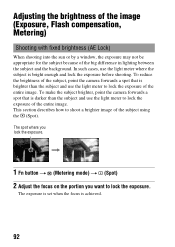
... of the image (Exposure, Flash compensation, Metering)
Shooting with fixed brightness (AE Lock)
When shooting into the sun or by a window, the exposure may not be... the exposure of the entire image. To make the subject brighter, point the camera forwards a spot that is darker than the subject and use the light meter ...want to lock the exposure.
The exposure is set when the focus is achieved.
92
Instruction Manual - Page 116
...,
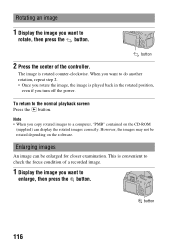
even if you turn off the power.
To return to the normal playback screen Press the button. Note
• When you copy rotated images to a computer, "PMB" contained on the CD-ROM (supplied) can display the rotated images correctly. However, the images may not be rotated depending on the software.
Enlarging images
An image can be...
Instruction Manual - Page 129
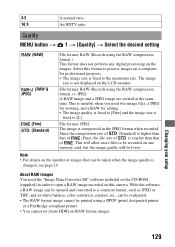
... image recorded on this camera. With this software, a RAW image can be opened and converted to a common format, such as JPEG or TIFF, and its white balance, color saturation, contrast, etc., can be readjusted. • The RAW format image cannot be printed using a DPOF (print) designated printer
or a PictBridge compliant printer. • You cannot set [Auto...
Instruction Manual - Page 137
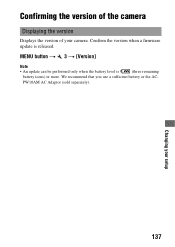
Confirming the version of the camera
Displaying the version
Displays the version of your camera. Confirm the version when a firmware update is released.
MENU button t 3 t [Version]
Note
• An update can be performed only when the battery level is
(three remaining
battery icons) or more. We recommend that you use a sufficient battery or the AC-
...
Instruction Manual - Page 140
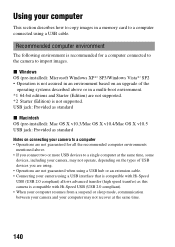
...section describes how to copy images in a memory card to a computer connected using a USB cable.
Recommended computer environment
The following environment is recommended for a computer connected to the camera to import images.
x Windows OS (pre-installed): Microsoft Windows XP*1 SP3/Windows Vista*2 SP2 • Operation is not assured in an environment based on an upgrade of the
operating systems...
Instruction Manual - Page 142

... appears automatically on the desktop.
• When the wizard screen does not appear, click [Computer] (For Windows XP: [My Computer]) t [Removable Disk].
2 Double-click [DCIM].
3 Double-click the folder where the
image files you want to copy are stored. Then, right-click an image file to display the menu and click [Copy].
• On the storage destination of the...
Instruction Manual - Page 143
... to the hard disk icon.
The image files are copied to the hard disk.
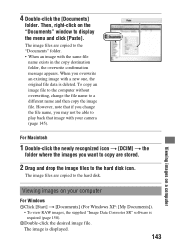
Viewing images on your computer
For Windows 1Click [Start] t [Documents] (For Windows XP: [My Documents]).
• To view RAW images, the supplied "Image Data Converter SR" software is required (page 150).
2Double-click the desired image file. The image is displayed.
143
Viewing images...
Instruction Manual - Page 144
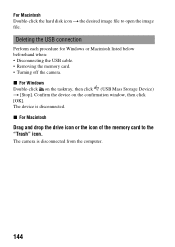
... cable. • Removing the memory card. • Turning off the camera. x For Windows Double-click on the tasktray, then click (USB Mass Storage Device) t [Stop]. Confirm the device on the confirmation window, then click [OK]. The device is disconnected. x For Macintosh
Drag and drop the drive icon or the icon of the memory card to the "Trash" icon.
The camera is disconnected from the computer...
Instruction Manual - Page 145
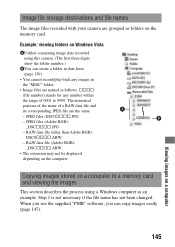
Image file storage destinations and file names
The image files recorded with your camera are grouped as folders on the memory card.
Example: viewing folders on Windows Vista
AFolders containing image data recorded using this camera. (The first three digits show the folder number.)
BYou can create a folder in date form (page 130).
• You cannot record/play back any images...
Instruction Manual - Page 146
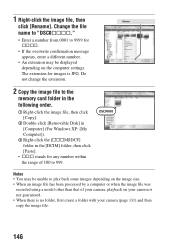
... number.
• An extension may be displayed depending on the computer settings. The extension for images is JPG. Do not change the extension.
2 Copy the image file to the
memory card folder in the following order.
1 Right-click the image file, then click [Copy].
2 Double-click [Removable Disk] in [Computer] (For Windows XP: [My Computer]).
3 Right-click the [sssMSDCF] folder in...
Instruction Manual - Page 147
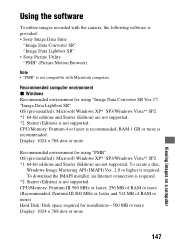
... higher is required. To download the IMAPI installer, an Internet connection is required. *2 Starter (Edition) is not supported. CPU/Memory: Pentium III 500 MHz or faster, 256 MB of RAM or more (Recommended: Pentium III 800 MHz or faster and 512 MB of RAM or more) Hard Disk: Disk space required for installation-500 MB or more Display: 1024 × 768 dots...
Instruction Manual - Page 148
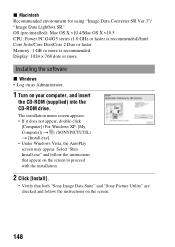
...-installed): Mac OS X v10.4/Mac OS X v10.5 CPU: Power PC G4/G5 series (1.0 GHz or faster is recommended)/Intel Core Solo/Core Duo/Core 2 Duo or faster Memory: 1 GB or more is recommended. Display: 1024 × 768 dots or more
Installing the software
x Windows • Log on as Administrator.
1 Turn on your computer, and insert
the CD-ROM (supplied) into the CD-ROM drive...
Instruction Manual - Page 149
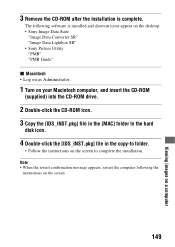
... CD-ROM after the installation is complete.
The following software is installed and shortcut icons appear on the desktop. • Sony Image Data Suite
"Image Data Converter SR" "Image Data Lightbox SR" • Sony Picture Utility "PMB" "PMB Guide"
x Macintosh • Log on as Administrator.
1 Turn on your Macintosh computer, and insert the CD-ROM
(supplied) into the CD-ROM drive.
2 Double...
Instruction Manual - Page 151
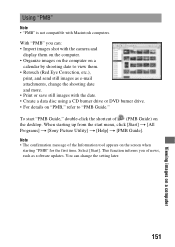
... the desktop. When starting up from the start menu, click [Start] t [All Programs] t [Sony Picture Utility] t [Help] t [PMB Guide]. Note
• The confirmation message of the Information tool appears on the screen when starting "PMB" for the first time. Select [Start]. This function informs you of news, such as software updates. You can change the setting...
Instruction Manual - Page 159
...8226; Playback of images recorded with your camera on other equipment and playback of images recorded or edited with other equipment on your camera are not guaranteed.
Trademarks
• is a trademark of Sony
Corporation.
• "Memory Stick," , "Memory
Stick PRO,"
,
"Memory Stick Duo,"
, "Memory Stick
PRO Duo,"
,
"Memory Stick PRO-HG Duo,"
, "Memory
Stick Micro," "MagicGate," and...
Instruction Manual - Page 165
... you shoot images with a memory card formatted by a computer, you may not be able to copy the images to a computer. Shoot using a memory card formatted by your camera (page 131).
The image cannot be played back on a computer. • If you are using "PMB," refer to the "PMB Guide." • Consult the computer or software manufacturer.
After making a USB connection, "PMB" does not...