Sony DSLRA850 - Alpha 24.6MP Digital SLR Camera driver and firmware
Drivers and firmware downloads for this Sony item


Related Sony DSLRA850 Manual Pages
Download the free PDF manual for Sony DSLRA850 and other Sony manuals at ManualOwl.com
Operating Instructions - Page 3

...manual for future reference.
Carefully observe all warnings, precautions and instructions on the appliance, or the one described in the operating instructions and adhere to them.
Use
Power Sources
This set should be operated only from the type of power... water for cleaning the exterior of the set.
Installation
Water and Moisture
Do not use power-line operated sets near water - for example, near a...
Operating Instructions - Page 6

... with the limits for a Class B digital device, pursuant to Part 15 of the FCC Rules. These limits are designed to provide reasonable protection against harmful interference in a residential installation. This equipment generates, uses, and can radiate radio frequency energy and, if not installed and used in accordance with the instructions, may cause harmful interference to...
Operating Instructions - Page 12

...118 Playback menu 1 120 Playback menu 2 123 Setup menu 1 124 Setup menu 2 126 Setup menu 3 129 Setup menu 4 132
Viewing images Copying images to your computer 135 on a computer Viewing images on your computer 139
Using the software 143
Printing images Printing images by connecting the camera to a PictBridge compliant printer 150
Others
Specifications 154 Troubleshooting 157 Warning...
Operating Instructions - Page 13

...cap (1) (Attached on the camera)
• Rechargeable battery pack NPFM500H (1)
• Remote Commander clip (1)
• Accessory shoe cap (1) (Attached on the camera)
• Eyecup (1) (Attached on the camera)
• CD-ROM (Application Software for α camera) (1)
• Instruction Manual (This manual) (1)
• USB cable (1)
• Video cable (1)
• Shoulder strap (1)
13
Operating Instructions - Page 15

... burns. • When the CHARGE lamp flashes, this may indicate a battery error or that a battery pack other than the specified type has been installed. Check that the battery pack is the specified...To use your camera abroad - Power sources You can use your camera and the battery charger and the AC-VQ900AM AC Adaptor/charger (sold separately) in any country or region where the power supply is within...
Operating Instructions - Page 93

... • When you copy rotated images to a computer, "PMB" contained on the CD-ROM
(supplied) can display the rotated images correctly. However, the images may not be rotated depending on the software.
Enlarging images
An image can be enlarged for closer examination. This is convenient to check the focus condition of a recorded image.
1 Display the image you...
Operating Instructions - Page 105

...This format is not achieved by digital processing. Select this format to process images on a computer for professional purposes. • The image size is fixed to the maximum size. The image
size is not displayed on the LCD monitor.
RAW... "Image Data Converter SR" software included on the CD-ROM (supplied) in order to open a RAW image recorded on this camera. With this software, a RAW image can be...
Operating Instructions - Page 128

MassStrg.card
When "Memory Stick Duo" media and a CF card are both inserted in the camera during mass storage connections, you can select the displayed method on a PC.
Both cards Selected card
Displays both the "Memory Stick Duo" media and CF card/ Microdrive. This is supported by a PC running Windows 2000 SP3, or a later version of OS.
Displays only the card selected with [Memory card].
128
Operating Instructions - Page 135

... how to copy images in a memory card to a computer connected using a USB cable.
Recommended computer environment
The following environment is recommended for a computer connected to the camera to import images.
x Windows OS (pre-installed): Microsoft Windows 2000 Professional SP4/ Windows XP*1 SP3/Windows Vista*2 SP1 • Operation is not assured in an environment based on an upgrade of the...
Operating Instructions - Page 137

... appear, click [Computer] (For Windows XP: [My Computer]) t [Removable Disk].
2 Double-click [DCIM].
• In that case, you can also import images using "PMB."
3 Double-click the folder where the
image files you want to copy are stored. Then, right-click an image file to display the menu and click [Copy].
• On the storage destination of the...
Operating Instructions - Page 138

...on the "Documents" window to display the menu and click [Paste].
The image files are copied to the "Documents" folder. • When an image with the same file
name exists in the copy destination folder, the ...camera (page 141).
For Macintosh
1 Double-click the newly recognized icon t [DCIM] t the
folder where the images you want to copy are stored.
2 Drag and drop the image files to the hard disk...
Operating Instructions - Page 139

... the desktop.
2 Double-click the desired image file.
The image is displayed.
For Macintosh Double-click the hard disk icon t the desired image file to open the image file. Deleting the USB connection
Perform the procedures listed below beforehand when: • Disconnecting the USB cable. • Removing the memory card. • Turning off the camera.
139
Viewing images on a computer
Operating Instructions - Page 140

x For Windows Double-click on the tasktray, then click (USB Mass Storage Device) t [Stop]. Confirm the device on the confirmation window, then click [OK]. The device is disconnected. x For Macintosh
Drag and drop the drive icon or the icon of the memory card to the "Trash" icon.
The camera is disconnected from the computer.
140
Operating Instructions - Page 141

Image file storage destinations and file names
The image files recorded with your camera are grouped as folders on the memory card.
Example: viewing folders on Windows Vista
AFolders containing image data recorded using this camera. (The first three digits show the folder number.)
BYou can create a folder by date form (page 126).
• You cannot record/play back any images...
Operating Instructions - Page 142

... number. • An extension may be displayed
depending on the computer settings. The extension for images is JPG. Do not change the extension.
2 Copy the image file to the
memory card folder in the following order.
1 Right-click the image file, then click [Copy].
2 Double-click [Removable Disk] in [Computer] (For Windows XP: [My Computer]).
3 Right-click the [sssMSDCF] folder in...
Operating Instructions - Page 143

...using "Image Data Converter SR Ver.3"/ "Image Data Lightbox SR"/"Remote Camera Control" OS (pre-installed): Microsoft Windows XP*1 SP3/Windows Vista*2 SP1 *1 64-bit editions and Starter (Edition) are not supported. *2 Starter (Edition) is not supported. CPU/Memory: Pentium 4 or faster is recommended, RAM 1 GB or more is recommended. Display: 1024 × 768 dots or more
Recommended environment for...
Operating Instructions - Page 144

... Lightbox SR"/"Remote Camera Control" OS (pre-installed): Mac OS X (v10.4/v10.5) CPU: Power PC G4/G5 series (1.0 GHz or faster is recommended)/Intel Core Solo/Core Duo/Core 2 Duo or faster Memory: 1 GB or more is recommended. Display: 1024 × 768 dots or more
Installing the software
x Windows • Log on as Administrator.
1 Turn on your computer, and insert
the CD-ROM (supplied...
Operating Instructions - Page 145

...; Sony Picture Utility "PMB" "PMB Guide"
x Macintosh • Log on as Administrator.
1 Turn on your Macintosh computer, and insert the CD-ROM
(supplied) into the CD-ROM drive.
2 Double-click the CD-ROM icon. 3 Copy the [IDS_INST.pkg] file in the [MAC] folder to the hard
disk icon.
4 Double-click the [IDS_INST.pkg] file in the copy-to folder.
Follow the instructions...
Operating Instructions - Page 146

... [Sony Image Data Suite] folder from the [Application] folder. To exit, click [Quit Image Data Converter SR] from the [IDC SR] menu.
Using "Image Data Lightbox SR"
With "Image Data Lightbox SR" you can: • Display and compare RAW/JPEG images recorded with this camera. • Rate the images on a scale of five. • Set...
Operating Instructions - Page 149
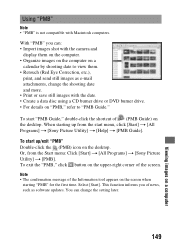
...; Create a data disc using a CD burner drive or DVD burner drive. • For details on "PMB," refer to "PMB Guide."
To start "PMB Guide," double-click the shortcut of (PMB Guide) on the desktop. When starting up from the start menu, click [Start] t [All Programs] t [Sony Picture Utility] t [Help] t [PMB Guide].
To start up/exit "PMB" Double-click...