Sony STR DA5500ES - AV Network Receiver driver and firmware
Drivers and firmware downloads for this Sony item

Related Sony STR DA5500ES Manual Pages
Download the free PDF manual for Sony STR DA5500ES and other Sony manuals at ManualOwl.com
Operating Instructions - Page 2
...apparatus.
Do not install the appliance in...set out in the EMC Directive using a connection cable...Record these numbers in the space
provided below. Refer to them whenever you call
upon your Sony dealer regarding this product.
Model No.
Serial No.
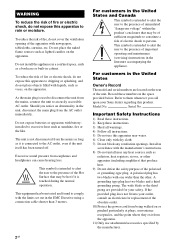
Important Safety Instructions
1) Read these instructions. 2) Keep these instructions. 3) Heed all warnings. 4) Follow all instructions... the power cord ...
Operating Instructions - Page 3

... in the U.S.A. Other versions may not comply with FCC technical regulations.
NOTE:
This equipment has been tested and found to comply with the limits for a Class B digital device, pursuant to Part 15 of the FCC Rules. These limits are designed to provide reasonable protection against harmful interference in a residential installation. This equipment generates, uses...
Operating Instructions - Page 4
... of this product or battery, please contact your local Civic Office, your household waste disposal service or the shop where you purchased the product.
4GB
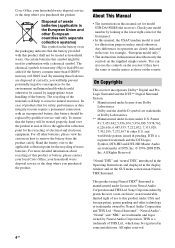
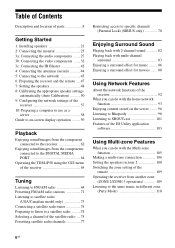
About This Manual
• The instructions in this manual are for model STR-DA5500ES (the receiver). Check your model number by looking at the lower right corner of the front panel.
•...
Operating Instructions - Page 5
... and trade names are those of their respective owners.
"BRAVIA" Sync is a trademark of Sony Corporation.
DLNA and DLNA CERTIFIED are trademarks and/ or service marks of the Digital Living Network Alliance.
VAIO is a trademark of Sony Corporation.
Microsoft, Windows, Windows Vista, and Windows Media are trademarks or registered trademarks of Microsoft Corporation in the United States and...
Operating Instructions - Page 6
... the appropriate speaker settings
automatically (Auto Calibration 50 9: Configuring the network settings of the
receiver 57 10: Preparing a computer to use as a
server 58 Guide to on-screen display operation .........59
Playback
Enjoying sound/images from the component connected to the receiver 62
Enjoying sound/images from the components connected to the DIGITAL MEDIA PORT 64
Operating the...
Operating Instructions - Page 9
...Canadian model
TUNING
only).
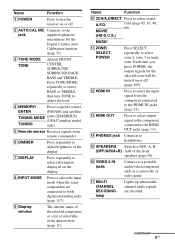
E Remote sensor Receives signals from remote commander.
F DIMMER
Press repeatedly to adjust brightness of the display.
G DISPLAY
Press repeatedly to select information displayed on the display.
H INPUT MODE
Press to select the input mode when the same components are connected to both digital and analog jacks (page 117).
I Display window
The current status of...
Operating Instructions - Page 21
Getting Started
Getting Started
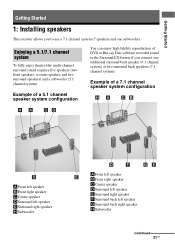
1: Installing speakers
This receiver allows you to use a 7.1 channel system (7 speakers and one subwoofer)....
Example of a 5.1 channel speaker system configuration
You can enjoy high fidelity reproduction of DVD or Blu-ray Disc software recorded sound in the Surround EX format if you connect one additional surround back speaker (6.1 channel system) or two surround...
Operating Instructions - Page 45
....
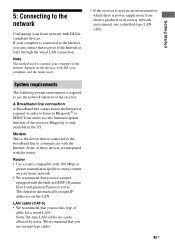
Note
The method used to connect your computer to the Internet depends on the devices, your ISP, your computer, and the router used.
• If the receiver is used in an environment in which there is power supply noise from electric products or in a noisy network environment, use a shielded-type LAN cable.
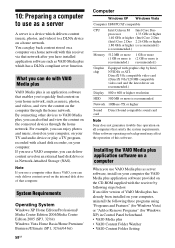
System requirements
The following system environment is required...
Operating Instructions - Page 58
... your TV and audio device or play a TV program, recorded with a hard disk recorder, on your computer. If you use a VAIO computer, you can deliver content saved on an external hard disk drive or in Network-Attached Storage (NAS).
Note
If you use a computer other than a VAIO, you can only deliver content saved on the internal disk drive of that computer.
System Requirements
Operating System
Windows...
Operating Instructions - Page 59
....
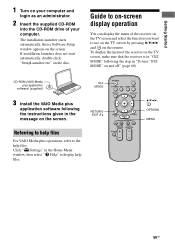
2 Insert the supplied CD-ROM
into the CD-ROM drive of your computer.
The installation launcher starts automatically, then a Software Setup window appears on the screen. If installation launcher does not start automatically, double-click "SetupLauncher.exe" on the disc.
Guide to on-screen display operation
You can display the menu of the receiver on the TV screen and select the function you...
Operating Instructions - Page 73

...enjoying the service. Easy to follow installation and setup instructions are provided with the satellite tuners. Whichever service you choose...receive the SIRIUS or XM satellite radio service. All programming and fees subject to change. It is prohibited to copy, decompile, disassemble, reverse engineer, hack, manipulate or otherwise make available any technology or software incorporated in receivers...
Operating Instructions - Page 80
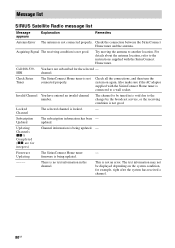
... - updated.
Updating Channels xx% Completed (xx are for integers)
Channel information is being updated. -
Firmware
The SiriusConnect Home tuner
-
Updating
firmware is being updated.
-----
There is no text information in the channel.
This is not an error. The text information may not be displayed depending on the system condition, for example, right after the system has received a channel...
Operating Instructions - Page 92
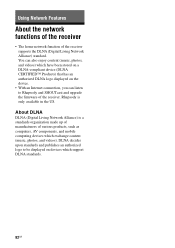
... DLNA logo displayed on the device.
• With an Internet connection, you can listen to Rhapsody and SHOUTcast and upgrade the firmware of the receiver. Rhapsody is only available in the US.
About DLNA
DLNA (Digital Living Network Alliance) is a standards organization made up of manufacturers of various products, such as computers, AV components, and mobile computing devices which exchange...
Operating Instructions - Page 94
Other features
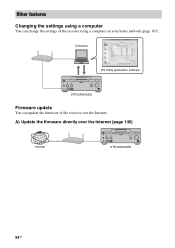
Changing the settings using a computer
You can change the settings of the receiver using a computer on your home network (page 103).
Computer
ES Utility application software
STR-DA5500ES
Firmware update
You can update the firmware of the receiver over the Internet. A) Update the firmware directly over the Internet (page 146)
Internet
STR-DA5500ES
94GB
Operating Instructions - Page 95
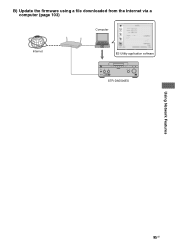
B) Update the firmware using a file downloaded from the Internet via a computer (page 103)
Computer
Internet
ES Utility application software
STR-DA5500ES
Using Network Features
95GB
Operating Instructions - Page 103
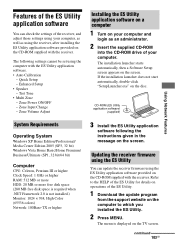
... can update the receiver firmware using the ES Utility application software provided on the CD-ROM supplied with the receiver. Refer to the HELP of the ES Utility for details on operations of the ES Utility.
1 Download the update program
from the support website on the computer to which you installed the ES Utility.
2 Press MENU.
The menu is displayed on the TV...
Operating Instructions - Page 104

...from the PC is displayed on the TV screen.
8 Click "System" in the ES Utility
window on the computer screen, then click "Browse..." and specify the path of the update program, and click "Start Update." Receiver updating starts. When updating complete, the receiver will restart automatically.
Notes
• Do not turn the receiver off or disconnect the network cable during firmware updating. It may...
Operating Instructions - Page 146
....
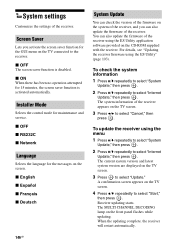
Installer Mode
Selects the control mode for maintenance and service.
x OFF x RS232C x Network
Language
Selects the language for the messages on the screen.
x English x Español x Français x Deutsch
System Update
You can check the version of the firmware on the system of the receiver, and you can also update the firmware of the receiver. You can also update the firmware...
Operating Instructions - Page 147
... the network cable during firmware updating. It may cause a malfunction.
• It may take 30 minutes for the firmware updating to complete.
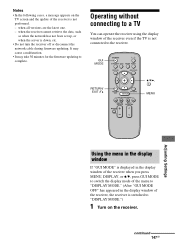
Operating without connecting to a TV
You can operate the receiver using the display window of the receiver even if the TV is not connected to the receiver.
GUI MODE
RETURN/ EXIT O
V/v/b, MENU
Adjusting Settings
Using the menu in the display window
If...
Operating Instructions - Page 194
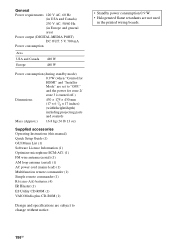
... (when "Control for
HDMI" and "Installer Mode" are set to "OFF,"
and the power for zone 2/
zone 3 is turned off.)
Dimensions
430 × 175 × 430 mm (17 × 6 7/8 × 17 inches) (width/height/depth)
including projecting parts
and controls
Mass (Approx.) 16.8 kg (36 lb 13 oz)
Supplied accessories Operating Instructions (this manual) Quick Setup Guide (1) GUI Menu List (1) Software...