Toshiba Portege Z30 driver and firmware
Related Toshiba Portege Z30 Manual Pages
Download the free PDF manual for Toshiba Portege Z30 and other Toshiba manuals at ManualOwl.com
User Manual - Page 13
...) ARISING IN ANY WAY OUT OF THE USE OF THIS SOFTWARE, EVEN IF ADVISED OF THE POSSIBILITY OF SUCH DAMAGE.
The licence and distribution terms for any publically available version or derivative of this code cannot be changed. i.e. this code cannot simply be copied and put under another distribution licence [including the GNU...
User Manual - Page 23
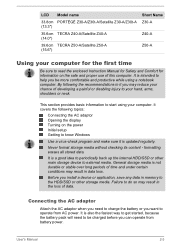
...computer. It covers the following topics:
Connecting the AC adaptor Opening the display Turning on the power Initial setup Getting to know Windows
Use a virus-check program and make sure it is updated regularly.
Never format storage... may result in data loss.
Before you install a device or application, save any data in memory to the HDD/SSD or other storage media. Failure to do so may result in...
User Manual - Page 28
...
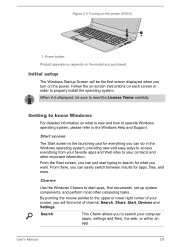
Product appearance depends on the model you purchased.
Initial setup
The Windows Startup Screen will be the first screen displayed when you turn on the power. Follow the on-screen instructions on each screen in order to properly install the operating system. When it is displayed, be sure to read the License Terms carefully.
Getting to know...
User Manual - Page 29
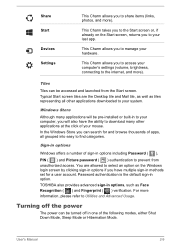
... access your computer's settings (volume, brightness, connecting to the internet, and more).
Tiles
Tiles can be accessed and launched from the Start screen. Typical Start screen tiles are the Desktop tile and Mail tile, as well as tiles representing all other applications downloaded to your system.
Windows Store
Although many applications will be pre-installed or built...
User Manual - Page 30
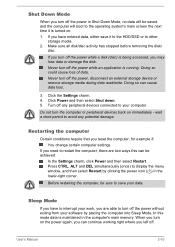
... of data. Never turn off the power, disconnect an external storage device or remove storage media during data read/write. Doing so can cause data loss.
3. Click the Settings charm. 4. Click Power and then select Shut down. 5. Turn off any peripheral devices connected to your computer.
Do not turn the computer or peripheral devices back on immediately - wait a short period...
User Manual - Page 64
... Settings".
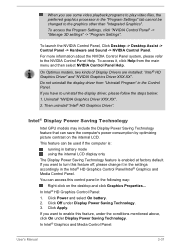
To launch the NVIDIA Control Panel, Click Desktop -> Desktop Assist -> Control Panel -> Hardware and Sound -> NVIDIA Control Panel. For more information about the NVIDIA Control Panel system, please refer to the NVIDIA Control Panel Help. To access it, click Help from the main menu and then select NVIDIA Control Panel Help.
On Optimus models, two kinds of Display Drivers are installed...
User Manual - Page 66
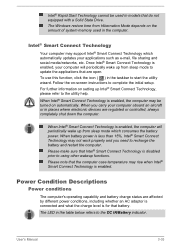
... do not equipped with a Solid State Drive. The Windows restore time from Hibernation Mode depends on the amount of system memory used in the computer.
Intel® Smart Connect Technology
Your computer may support Intel® Smart Connect Technology which automatically updates your applications such as e-mail, file sharing and social media/networks, etc. Once Intel® Smart...
User Manual - Page 70
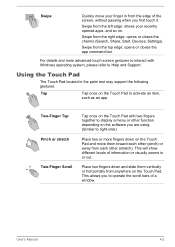
... right edge: opens or closes the charms (Search, Share, Start, Devices, Settings).
Swipe from the top edge: opens or closes the app command bar.
For details and more advanced touch screen gestures to interact with Windows operating system, please refer to Help and Support.
Using the Touch Pad
The Touch Pad located in the...
User Manual - Page 75
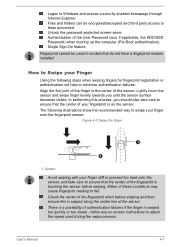
Logon to Windows and access a security enabled homepage through Internet Explorer. Files and folders can be encrypted/decrypted and third party access to them prevented. Unlock the password-protected screen-saver. Authentication of the User Password (and, if applicable, the HDD/SSD Password) when booting up the computer (Pre-Boot authentication). Single Sign-On feature
Fingerprint cannot...
User Manual - Page 77
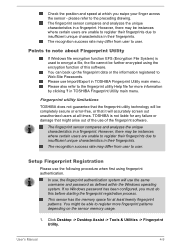
... system. If no Windows password has been configured, you must do this before starting the fingerprint registration process. This sensor has the memory space for at least twenty fingerprint patterns. You might be able to register more fingerprint patterns depending on the sensor memory usage.
1. Click Desktop -> Desktop Assist -> Tools & Utilities -> Fingerprint Utility.
User's Manual
4-9
User Manual - Page 93
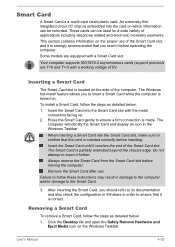
... models are equipped with a Smart Card slot.
Your computer supports ISO7816-3 asynchronous cards (support protocols are T=0 and T=1) with a working voltage of 5V.
Inserting a Smart Card
The Smart Card slot is located on the side of the computer. The Windows hot-install feature allows you to insert a Smart Card while the computer is turned on.
To install a Smart Card, follow the steps as detailed...
User Manual - Page 97
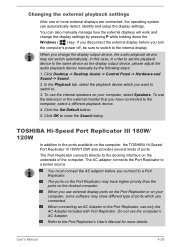
...you turn the computer's power off, be sure to switch to the internal display.
When you change the display output device, the audio playback device may not switch automatically. In this case, in order to set the playback device to the same device as the display output device, please adjust the audio playback device manually by the following steps:
1. Click Desktop -> Desktop Assist -> Control Panel...
User Manual - Page 104
... Utility
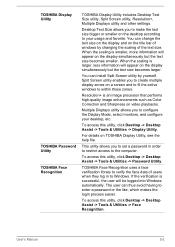
TOSHIBA Password Utility TOSHIBA Face Recognition
TOSHIBA Display Utility includes Desktop Text Size utility, Split Screen utility, Resolution+, Multiple Displays utility and other settings.
Desktop Text Size allows you to make the text size bigger or smaller on the desktop according to your usage and favorite. You can change the text size on the display and on the title bar of windows...
User Manual - Page 106
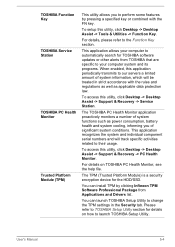
..., click Desktop -> Desktop Assist -> Support & Recovery -> PC Health Monitor.
For details on TOSHIBA PC Health Monitor, see the help file.
The TPM (Trusted Platform Module) is a security encryption device for the HDD/SSD.
You can install TPM by clicking Infineon TPM Software Professional Package from Applications and Drivers list.
You can launch TOSHIBA Setup Utility to change the TPM settings in...
User Manual - Page 107

...the setup files above but can be downloaded from Windows Store.
Special features
The following features are either unique to TOSHIBA computers or are advanced features which make the computer more convenient to use.
Access each function using the following procedures.
*1 To access the Power Options, click Desktop -> Desktop Assist -> Control Panel -> System and Security -> Power Options.
Display...
User Manual - Page 121
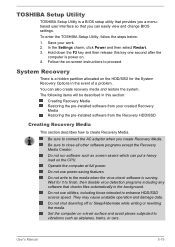
... easily view and change BIOS settings.
To enter the TOSHIBA Setup Utility, follow the steps below:
1. Save your work. 2. In the Settings charm, click Power and then select Restart. 3. Hold down the F2 key and then release this key one second after the
computer is power on. 4. Follow the on-screen instructions to proceed.
System Recovery
There is a hidden partition...
User Manual - Page 122
...blank disc into the optical disc drive tray, or insert the USB Flash Memory into one available USB port.
4. Click Desktop -> Desktop Assist -> Support & Recovery -> Recovery Media Creator.
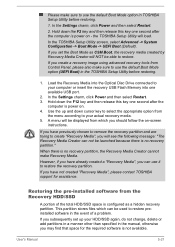
5. After Recovery Media Creator starts, select the type of media and the title you wish to copy, and then click the Create button.
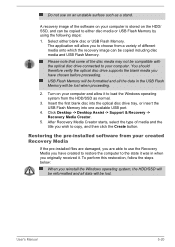
Restoring the pre-installed software from your created Recovery Media
If the pre...
User Manual - Page 123
... you create a recovery image using advanced recovery tools from Control Panel, please also make sure to use the default Boot Mode option (UEFI Boot) in the TOSHIBA Setup Utility before restoring.
1. Load the Recovery Media into the Optical Disc Drive connected to your computer or insert the recovery USB Flash Memory into one available USB port.
2. In the Settings charm, click Power and then select...
User Manual - Page 124
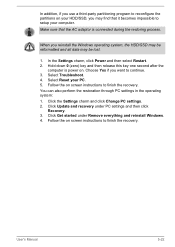
... screen instructions to finish the recovery. You can also perform the restoration through PC settings in the operating system: 1. Click the Settings charm and click Change PC settings. 2. Click Update and recovery under PC settings and then click
Recovery. 3. Click Get started under Remove everything and reinstall Windows. 4. Follow the on screen instructions to finish the recovery.
User's Manual...
User Manual - Page 125
...the computer off, then when you turn the computer back on again it will recognize the new device. Make sure all optional accessories are configured properly in the computer's setup program and that all required driver software has been loaded (please refer to the documentation included with the optional accessories for further information on its installation and configuration).
User's Manual
6-1