Toshiba Satellite L50-A PSKLSC-01100Q driver and firmware
Drivers and firmware downloads for this Toshiba item

Related Toshiba Satellite L50-A PSKLSC-01100Q Manual Pages
Download the free PDF manual for Toshiba Satellite L50-A PSKLSC-01100Q and other Toshiba manuals at ManualOwl.com
Users Manual Canada; English - Page 5
... Semiconductor Corporation.
All other product names and service names in this manual may be trademarks or registered trademarks of their respective companies.
Regulatory Information
FCC information
FCC notice "Declaration of Conformity Information"
This equipment has been tested and found to comply with the limits for a Class B digital device, pursuant to part 15 of the...
Users Manual Canada; English - Page 12
... display the following acknowledgement:
"This product includes cryptographic software written by Eric Young ([email protected])"
The word 'cryptographic' can be left out if the rouines from the library being used are not cryptographic related :-). 4. If you include any Windows... DAMAGES (INCLUDING, BUT NOT LIMITED TO, PROCUREMENT OF SUBSTITUTE GOODS OR SERVICES; LOSS OF
User's Manual
1-9
Users Manual Canada; English - Page 20
... neck.
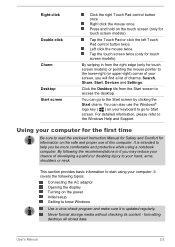
This section provides basic information to start using your computer. It covers the following topics:
Connecting the AC adaptor Opening the display Turning on the power Initial setup Getting to know Windows
Use a virus-check program and make sure it is updated regularly.
Never format storage media without checking its content - formatting destroys all stored data...
Users Manual Canada; English - Page 24

... Setup.
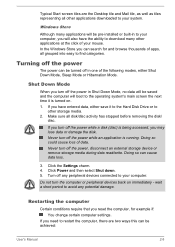
1. Open the display panel. 2. Press the computer's power button.
Figure 2-5 Turning on the power
1
1. Power button Product appearance depends on the model you purchased.
Initial setup
The Windows 8 Startup Screen will be the first screen displayed when you turn on the power. Follow the on-screen instructions on each screen in order to properly install the operating system.
User's Manual...
Users Manual Canada; English - Page 26
... of data. Never turn off the power, disconnect an external storage device or remove storage media during data read/write. Doing so can cause data loss.
3. Click the Settings charm. 4. Click Power and then select Shut down. 5. Turn off any peripheral devices connected to your computer.
Do not turn the computer or peripheral devices back on immediately - wait a short period...
Users Manual Canada; English - Page 27
... as USB devices, memory media or other external memory devices. Data will be lost.
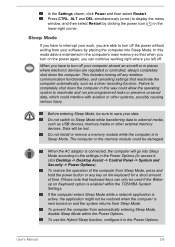
Do not install or remove a memory module while the computer is in Sleep Mode. The computer or the memory module could be damaged.
When the AC adaptor is connected, the computer will go into Sleep Mode according to the settings in the Power Options (to access it, click Desktop -> Desktop Assist -> Control...
Users Manual Canada; English - Page 39
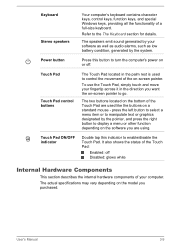
... speakers Power button Touch Pad
Touch Pad control buttons
Touch Pad ON/OFF indicator
Your computer's keyboard contains character keys, control keys, function keys, and special Windows keys, providing all the functionality of a full-size keyboard.
Refer to the The Keyboard section for details.
The speakers emit sound generated by your software as well as audio alarms...
Users Manual Canada; English - Page 41
... to store the image displayed on a bitmap display.
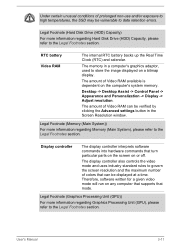
The amount of Video RAM available is dependent on the computer's system memory.
Desktop -> Desktop Assist -> Control Panel -> Appearance and Personalization -> Display -> Adjust resolution.
The amount of Video RAM can be verified by clicking the Advanced settings button in the Screen Resolution window.
Legal Footnote (Memory (Main System))
For...
Users Manual Canada; English - Page 42
... Settings".
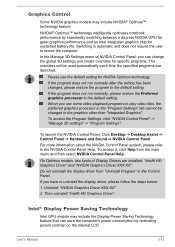
To launch the NVIDIA Control Panel, Click Desktop -> Desktop Assist -> Control Panel -> Hardware and Sound -> NVIDIA Control Panel.
For more information about the NVIDIA Control Panel system, please refer to the NVIDIA Control Panel Help. To access it, click Help from the main menu and then select NVIDIA Control Panel Help.
On Optimus models, two kinds of Display Drivers are installed...
Users Manual Canada; English - Page 58
... or Touch Pad, or closing/opening the display panel.
Start a communication application.
Apply impact or vibration to the computer.
Install, remove or connect external devices, including such items as a memory media card, USB device, external monitor or an optical digital device.
Use the audio/video control button to reproduce music or voice.
Open the optical disc drive.
Do not use shut down, log...
Users Manual Canada; English - Page 59
... applications on the same computer. Playback may not function properly if you use the files other than these types.
Display Devices & Audio
If the video image is not displayed on an external display or television, stop the TOSHIBA VIDEO PLAYER, and change the screen resolution. To change the screen resolution, click Desktop -> Desktop Assist -> Control Panel -> Appearance and Personalization...
Users Manual Canada; English - Page 89

....
To access this utility, click Desktop -> Desktop Assist -> Tools & Utilities -> System Settings.
TOSHIBA HDD Accelerator is a utility that can improve hard drive access performance by using part of the main memory of the computer as a cache. To access this utility, click Desktop -> Desktop Assist -> Tools & Utilities -> System Settings > HDD Accelerator.
This software is provided for playback of...
Users Manual Canada; English - Page 91
... & Entertainment -> TOSHIBA Resolution+ Plug-in for Windows Media Player - Help.
TOSHIBA Audio Enhancement
TOSHIBA Audio Enhancement provides you the function of audio source filtering, earphone audio enhancement, or speaker audio enhancement. To change the settings, click Desktop -> Desktop Assist -> Media & Entertainment -> Audio Enhancement.
You may not have all the software listed above...
Users Manual Canada; English - Page 92
...the setup files above but can be downloaded from Windows Store.
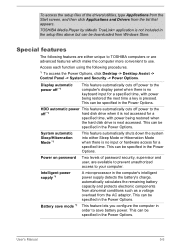
Special features
The following features are either unique to TOSHIBA computers or are advanced features which make the computer more convenient to use.
Access each function using the following procedures.
*1 To access the Power Options, click Desktop -> Desktop Assist -> Control Panel -> System and Security -> Power Options.
Display...
Users Manual Canada; English - Page 104
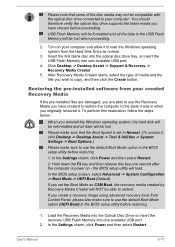
... you create a recovery image using advanced recovery tools from Control Panel, please also make sure to use the default Boot Mode option (UEFI Boot) in the BIOS setup utility before restoring.
1. Load the Recovery Media into the Optical Disc Drive or insert the recovery USB Flash Memory into one available USB port.
2. In the Settings charm, click Power and then select Restart.
User's Manual
5-17
Users Manual Canada; English - Page 105
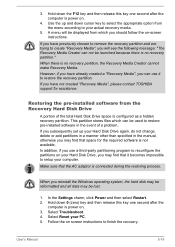
... use it to restore the recovery partition. If you have not created "Recovery Media", please contact TOSHIBA support for assistance.
Restoring the pre-installed software from the Recovery Hard Disk Drive
A portion of the total Hard Disk Drive space is configured as a hidden recovery partition. This partition stores files which can be used to restore pre-installed software in the event of a problem...
Users Manual Canada; English - Page 107
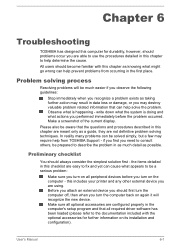
...the computer off, then when you turn the computer back on again it will recognize the new device. Make sure all optional accessories are configured properly in the computer's setup program and that all required driver software has been loaded (please refer to the documentation included with the optional accessories for further information on its installation and configuration).
User's Manual
6-1
Users Manual Canada; English - Page 116
..., contact TOSHIBA Support.
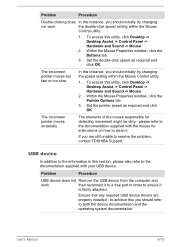
USB device
In addition to the information in this section, please also refer to the documentation supplied with your USB device.
Problem
Procedure
USB device does not Remove the USB device from the computer and
work
then reconnect it to a free port in order to ensure it
is firmly attached.
Ensure that any required USB device drivers are properly installed - to...
Detailed Specs for Satellite L50-A PSKLSC-01100Q English - Page 1
Toshiba recommends Windows 8
L50-A-011
Model: i Satellite L50-A-011 4th Generation Intel® Core™ i5-4200U processor, Windows 8, 15.6" HD Flat LCD, 8GB DDR3L, 750GB HDD S-ATA, DVD Super-Multi Double Layer, 1Gbps LAN, Realtek 802.11 bgn, Integrated HD Web Camera, HDMI, USB 3.0
Processor
4th Generation Intel® Core™ i5-4200U processor (1.6GHz, 3MB Intel® Smart ...
Detailed Specs for Satellite L50-A PSKLSC-01100Q English - Page 2
...recommended conditions. Read additional restrictions under "Environmental Conditions" in your product Resource Guide. Contact Toshiba Technical Support for more information. Hard Disk Drive Disclaimer: 1 Gigabyte (GB) means 1,000,000,000 bytes using powers of 10. The computer operating system, however, reports storage capacity using powers of 2 for the definition of 1 GB = 1,073,741,824 bytes, and...