Toshiba Tecra A8-S8415 driver and firmware
Drivers and firmware downloads for this Toshiba item

Related Toshiba Tecra A8-S8415 Manual Pages
Download the free PDF manual for Toshiba Tecra A8-S8415 and other Toshiba manuals at ManualOwl.com
Resource Guide for Tecra A8 - Page 3
...; A8 Series
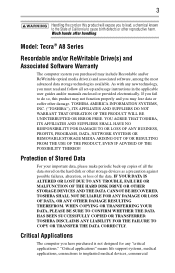
Recordable and/or ReWritable Drive(s) and Associated Software Warranty
The computer system you purchased may include Recordable and/or ReWritable optical media drive(s) and associated software, among the most advanced data storage technologies available. As with any new technology, you must read and follow all set-up and usage instructions in the applicable user guides and/or manuals...
Resource Guide for Tecra A8 - Page 6
...; 5.17 GHz to 5.23 GHz for indoor use only.
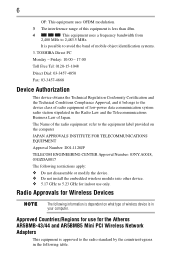
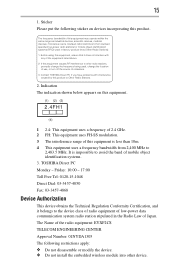
Radio Approvals for Wireless Devices
The following information is dependent on what type of wireless device is in your computer.
Approved Countries/Regions for use for the Atheros AR5BMB-43/44 and AR5BMB5 Mini PCI Wireless Network Adapters
This equipment is approved to the radio standard by the countries/regions...
Resource Guide for Tecra A8 - Page 8
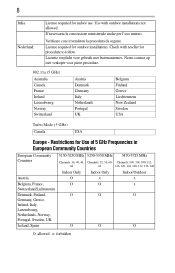
... allowed. E'necessaria la concessione ministeriale anche per l'uso interno.
Verificare con i rivenditori la procedura da seguire. License required for outdoor installations. Check with reseller for procedure to follow. Licentie verplicht voor gebruik met buitenantennes. Neem contact op met verkoper voor juiste procedure.
802.11a (5 GHz)
Australia ...
Resource Guide for Tecra A8 - Page 15
... the band of mobile object identification systems. 3. TOSHIBA Direct PC Monday - Friday: 10:00 - 17:00 Toll Free Tel: 0120-15-1048 Direct Dial: 03-3457-4850 Fax: 03-3457-4868
Device Authorization
This device obtains the Technical Regulation Conformity Certification, and it belongs to the device class of radio equipment of low-power data communication system...
Resource Guide for Tecra A8 - Page 18
...Tecra and Accupoint are registered trademarks of Toshiba America Information Systems, Inc. and/or Toshiba Corporation.
Microsoft and Windows are registered trademarks of Microsoft Corporation in the United States and/or other countries.
DirectX, Active Desktop, DirectShow, and Windows Media are registered trademarks of Microsoft Corporation.
ConfigFree is a trademark of Toshiba....
Computer Disposal...
Resource Guide for Tecra A8 - Page 19
Introduction
19
Introduction
Welcome to the world of powerful and portable multimedia computers!
Some software may differ from its retail version (if available), and may not include user manuals or all program functionality.
This notebook is compatible with European Union Directive 2002/ 95/EC, Restriction of the use of certain Hazardous Substances in electrical ...
Resource Guide for Tecra A8 - Page 24
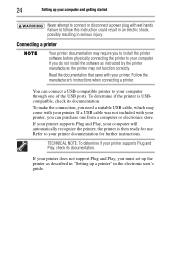
... printer software before physically connecting the printer to your computer. If you do not install the software as instructed by the printer manufacturer, the printer may not function correctly. Read the documentation that came with your printer. Follow the manufacturer's instructions when connecting a printer.
You can connect a USB-compatible printer to your computer through one of the USB ports...
Resource Guide for Tecra A8 - Page 25
...end to one of the computer's USB ports.
2 Plug the printer's power cable into a live electrical outlet.
See your printer documentation for additional configuration steps, or see "Setting up a printer" in the electronic user's guide.
Adding memory (optional)
HINT: To purchase additional memory modules, see the accessories information packaged with your system or visit accessories.toshiba.com.
Your...
Resource Guide for Tecra A8 - Page 27
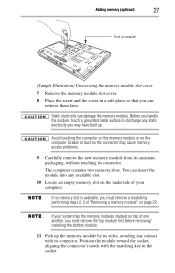
... on the underside of your computer.
If no memory slot is available, you must remove a module by performing steps 2-3 of "Removing a memory module" on page 29.
If your system has the memory modules stacked on top of one another, you must remove the top module first before removing/ installing the bottom module.
11 Pick up...
Resource Guide for Tecra A8 - Page 29
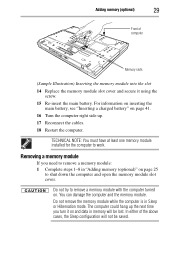
... a charged battery" on page 41.
16 Turn the computer right side up. 17 Reconnect the cables. 18 Restart the computer.
TECHNICAL NOTE: You must have at least one memory module installed for the computer to work.
Removing a memory module
If you need to remove a memory module: 1 Complete steps 1-8 in "Adding memory (optional)" on page 25
to shut down the...
Resource Guide for Tecra A8 - Page 30
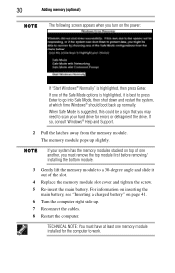
... may need to scan your hard drive for errors or defragment the drive. If so, consult Windows® Help and Support.
2 Pull the latches away from the memory module. The memory module pops up slightly.
If your system has the memory modules stacked on top of one another, you must remove the top module first before removing/ installing the bottom...
Resource Guide for Tecra A8 - Page 32
... software documentation for details.
❖ Back up your files to a removable storage media on a regular basis. Label the backup copies clearly and store them in a safe place.
❖ Scan all new files for viruses. ❖ Do not turn off the computer if a drive indicator light indicates
a drive is active.
The Windows® operating system records information, such as your desktop setup...
Resource Guide for Tecra A8 - Page 34
... Toshiba Dual Pointing Device
❖ To move it to the left side, slide your finger from right to left.
Because the TouchPad is much smaller than the display... setting, press Fn + F9, or: 1 Click Start, Control Panel, Printers and Other Hardware,
and then click Mouse Properties.
The Mouse Properties window appears.
2 Click the Dual Pointing Device tab.
The Dual Pointing Device tab view window ...
Resource Guide for Tecra A8 - Page 35

Using the optical drive
35
6 Close the Printers and Other Hardware window.
7 Close the Control Panel window.
8 Click the TouchPAD ON/OFF tab.
The TouchPAD ON/OFF tab view window appears.
Using the optical drive
Optical storage has become the preferred medium for software, music, and video. Digital versatile discs (DVDs) provide a significant increase in data storage and support features that are...
Resource Guide for Tecra A8 - Page 38
... and hazards mobile computers face every day.
❖ EasyGuard Secure - to defend your data and your notebook against loss, theft or viral attack.
❖ EasyGuard Connect - to help users establish a reliable wired or wireless connection effortlessly and quickly.
❖ EasyGuard Optimize - to enable users to customize system settings to be more productive
* Toshiba EasyGuard™...
Resource Guide for Tecra A8 - Page 39
... flashes amber, it indicates that the system is suspended (using the Windows® operating system Sleep command).
TECHNICAL NOTE: When your computer is using all of the power provided by the AC adaptor to run applications, features, and devices, the recharging of the battery cannot occur. Your computer's Power Saver utility can be used to select a power level setting...
Resource Guide for Tecra A8 - Page 40
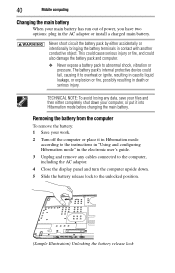
... battery: 1 Save your work.
2 Turn off the computer or place it in Hibernation mode according to the instructions in "Using and configuring Hibernation mode" in the electronic user's guide.
3 Unplug and remove any cables connected to the computer, including the AC adaptor.
4 Close the display panel and turn the computer upside down.
5 Slide the battery release lock...
Resource Guide for Tecra A8 - Page 41
Mobile computing
41
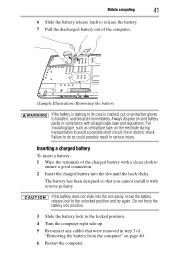
6 Slide the battery release latch to release the battery. 7 Pull the discharged battery out of the computer.
... until the latch clicks.
The battery has been designed so that you cannot install it with reverse polarity.
If the battery does not slide into the slot... Turn the computer right side up.
5 Reconnect any cables that were removed in step 3 of "Removing the battery from ...
Resource Guide for Tecra A8 - Page 45
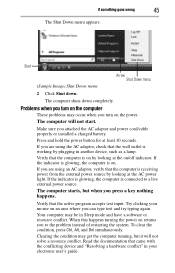
... you attached the AC adaptor and power cord/cable properly or installed a charged battery. Press and hold the power button for at least 10 seconds. If you are using the AC adaptor, check that the wall outlet is working by plugging in another device, such as a lamp. Verify that the computer is on by looking at...
Resource Guide for Tecra A8 - Page 48
....toshiba.com.
Toshiba voice contact
Before calling Toshiba, make sure you have: ❖ Your computer's serial number ❖ The computer and any optional devices related to the problem ❖ Backup copies of your Windows® operating system and all
other preloaded software on your choice of media ❖ Name and version of the program involved in the problem
along with its installation...